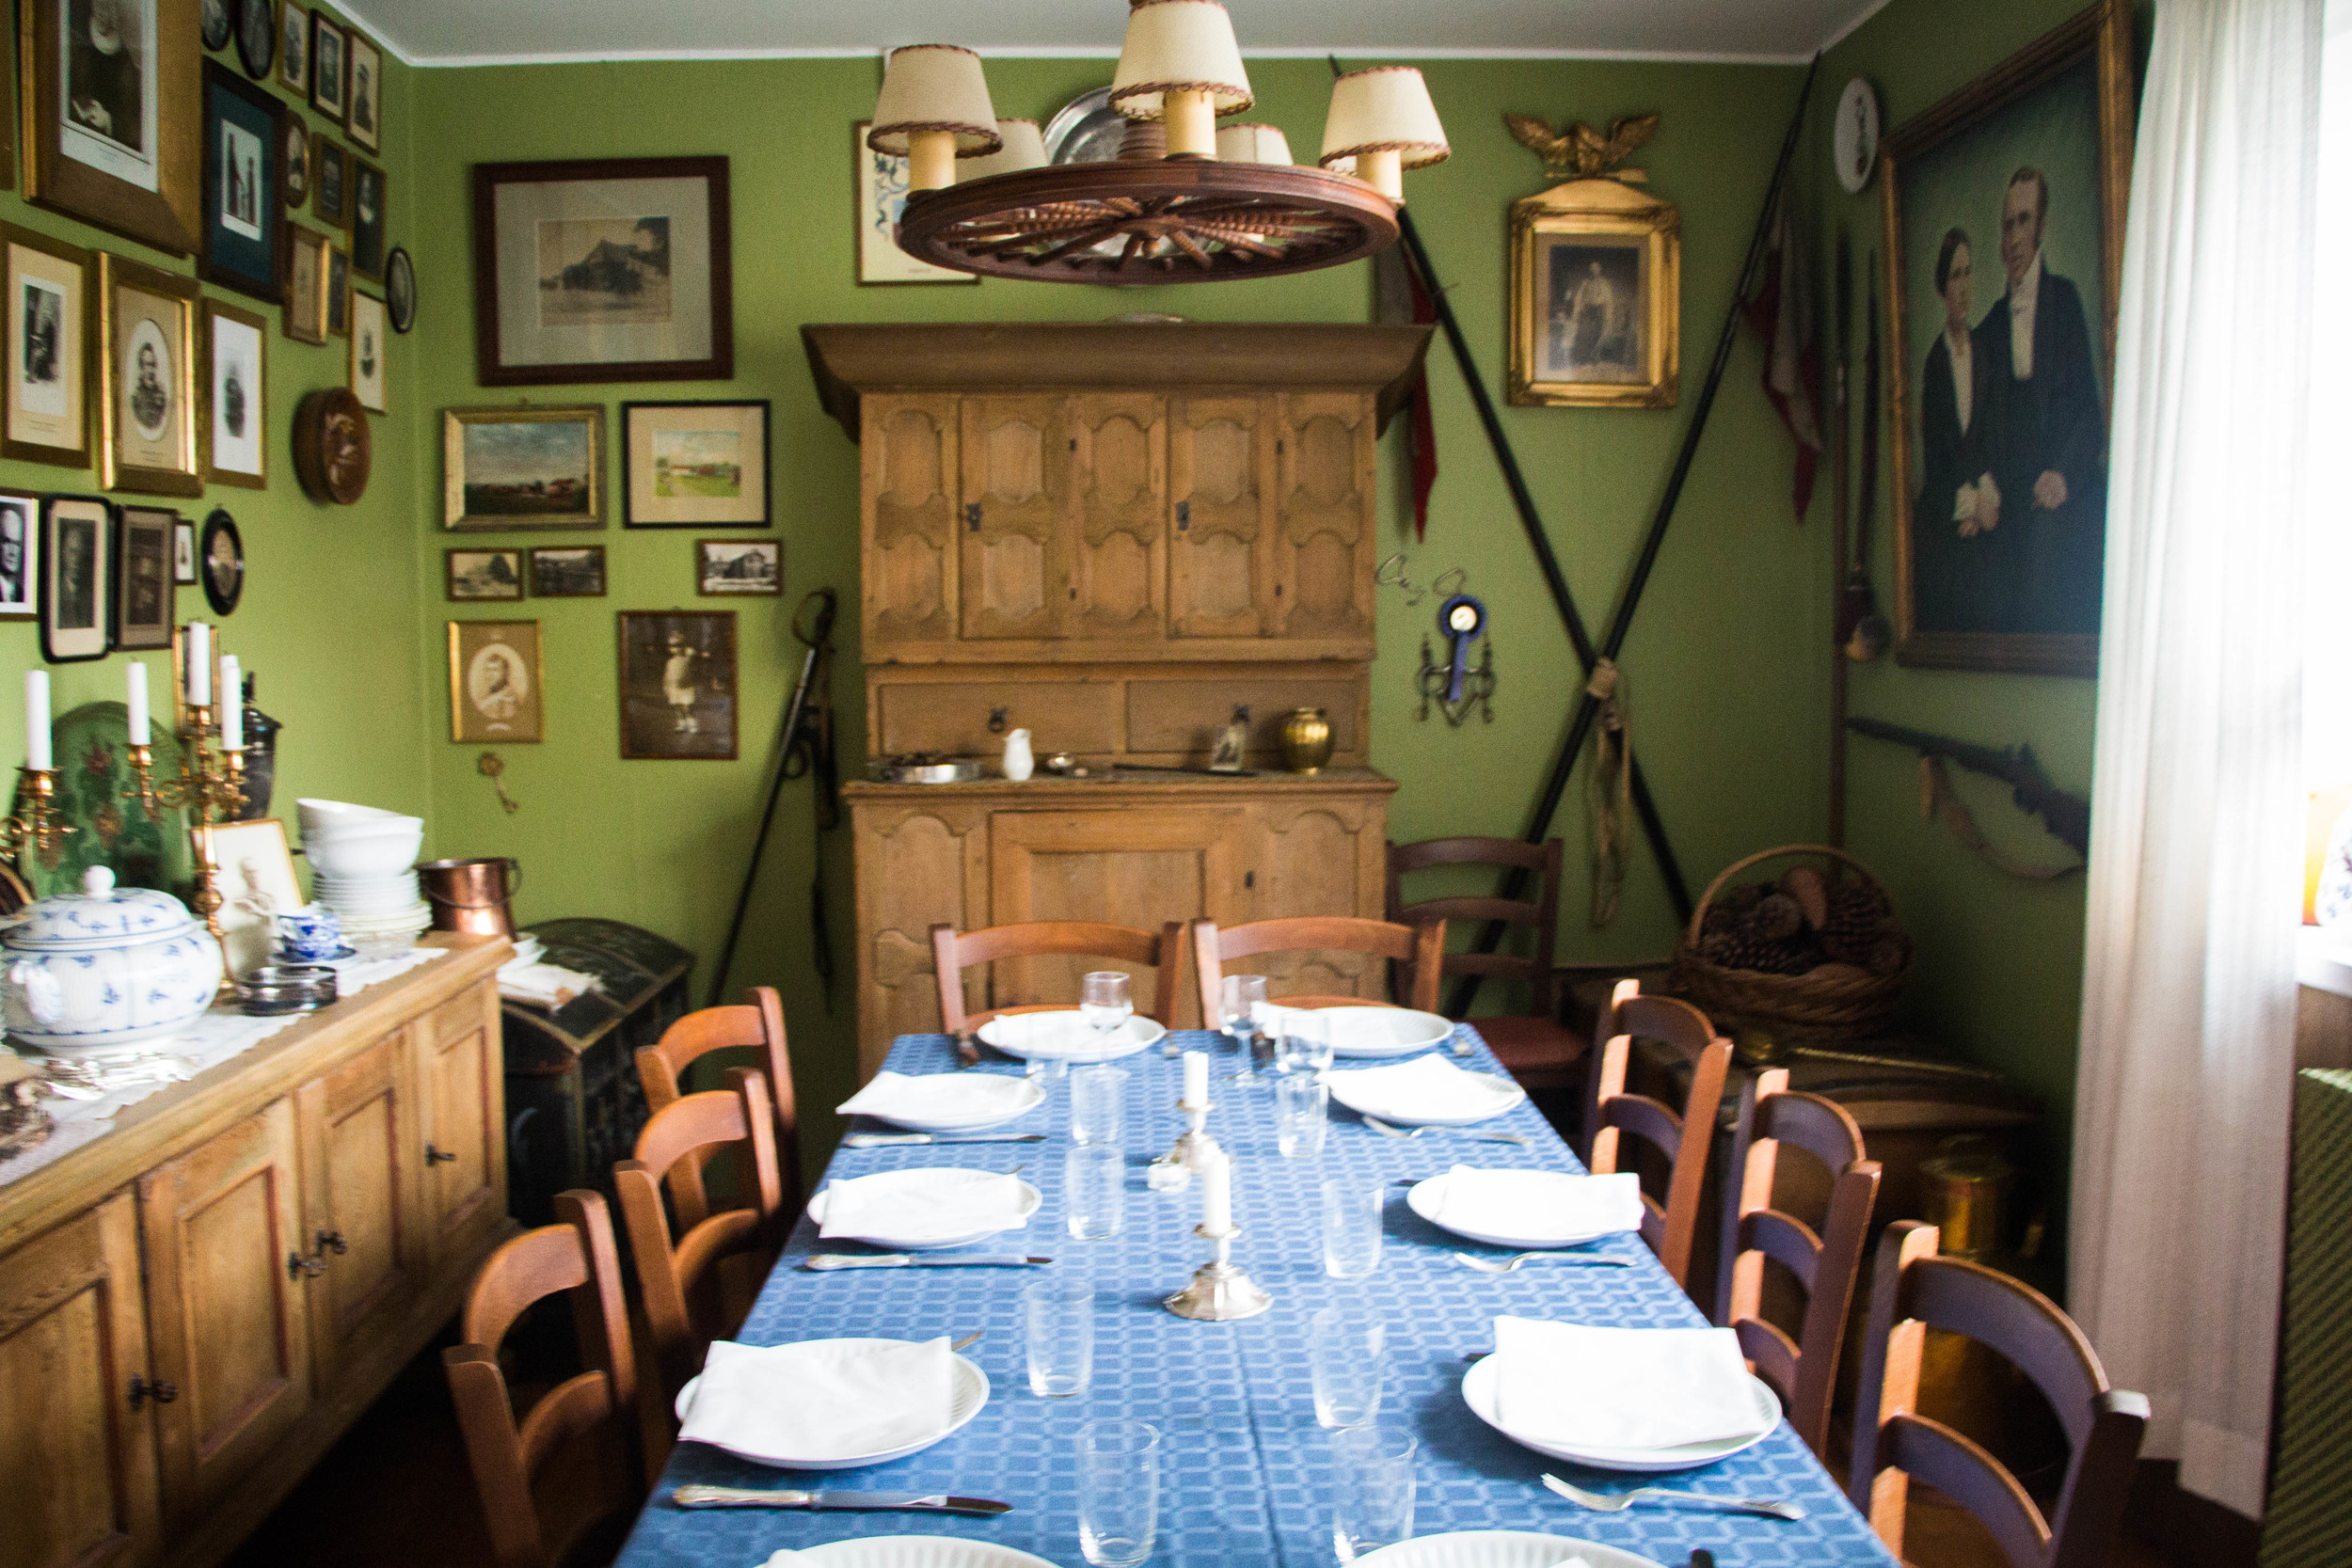
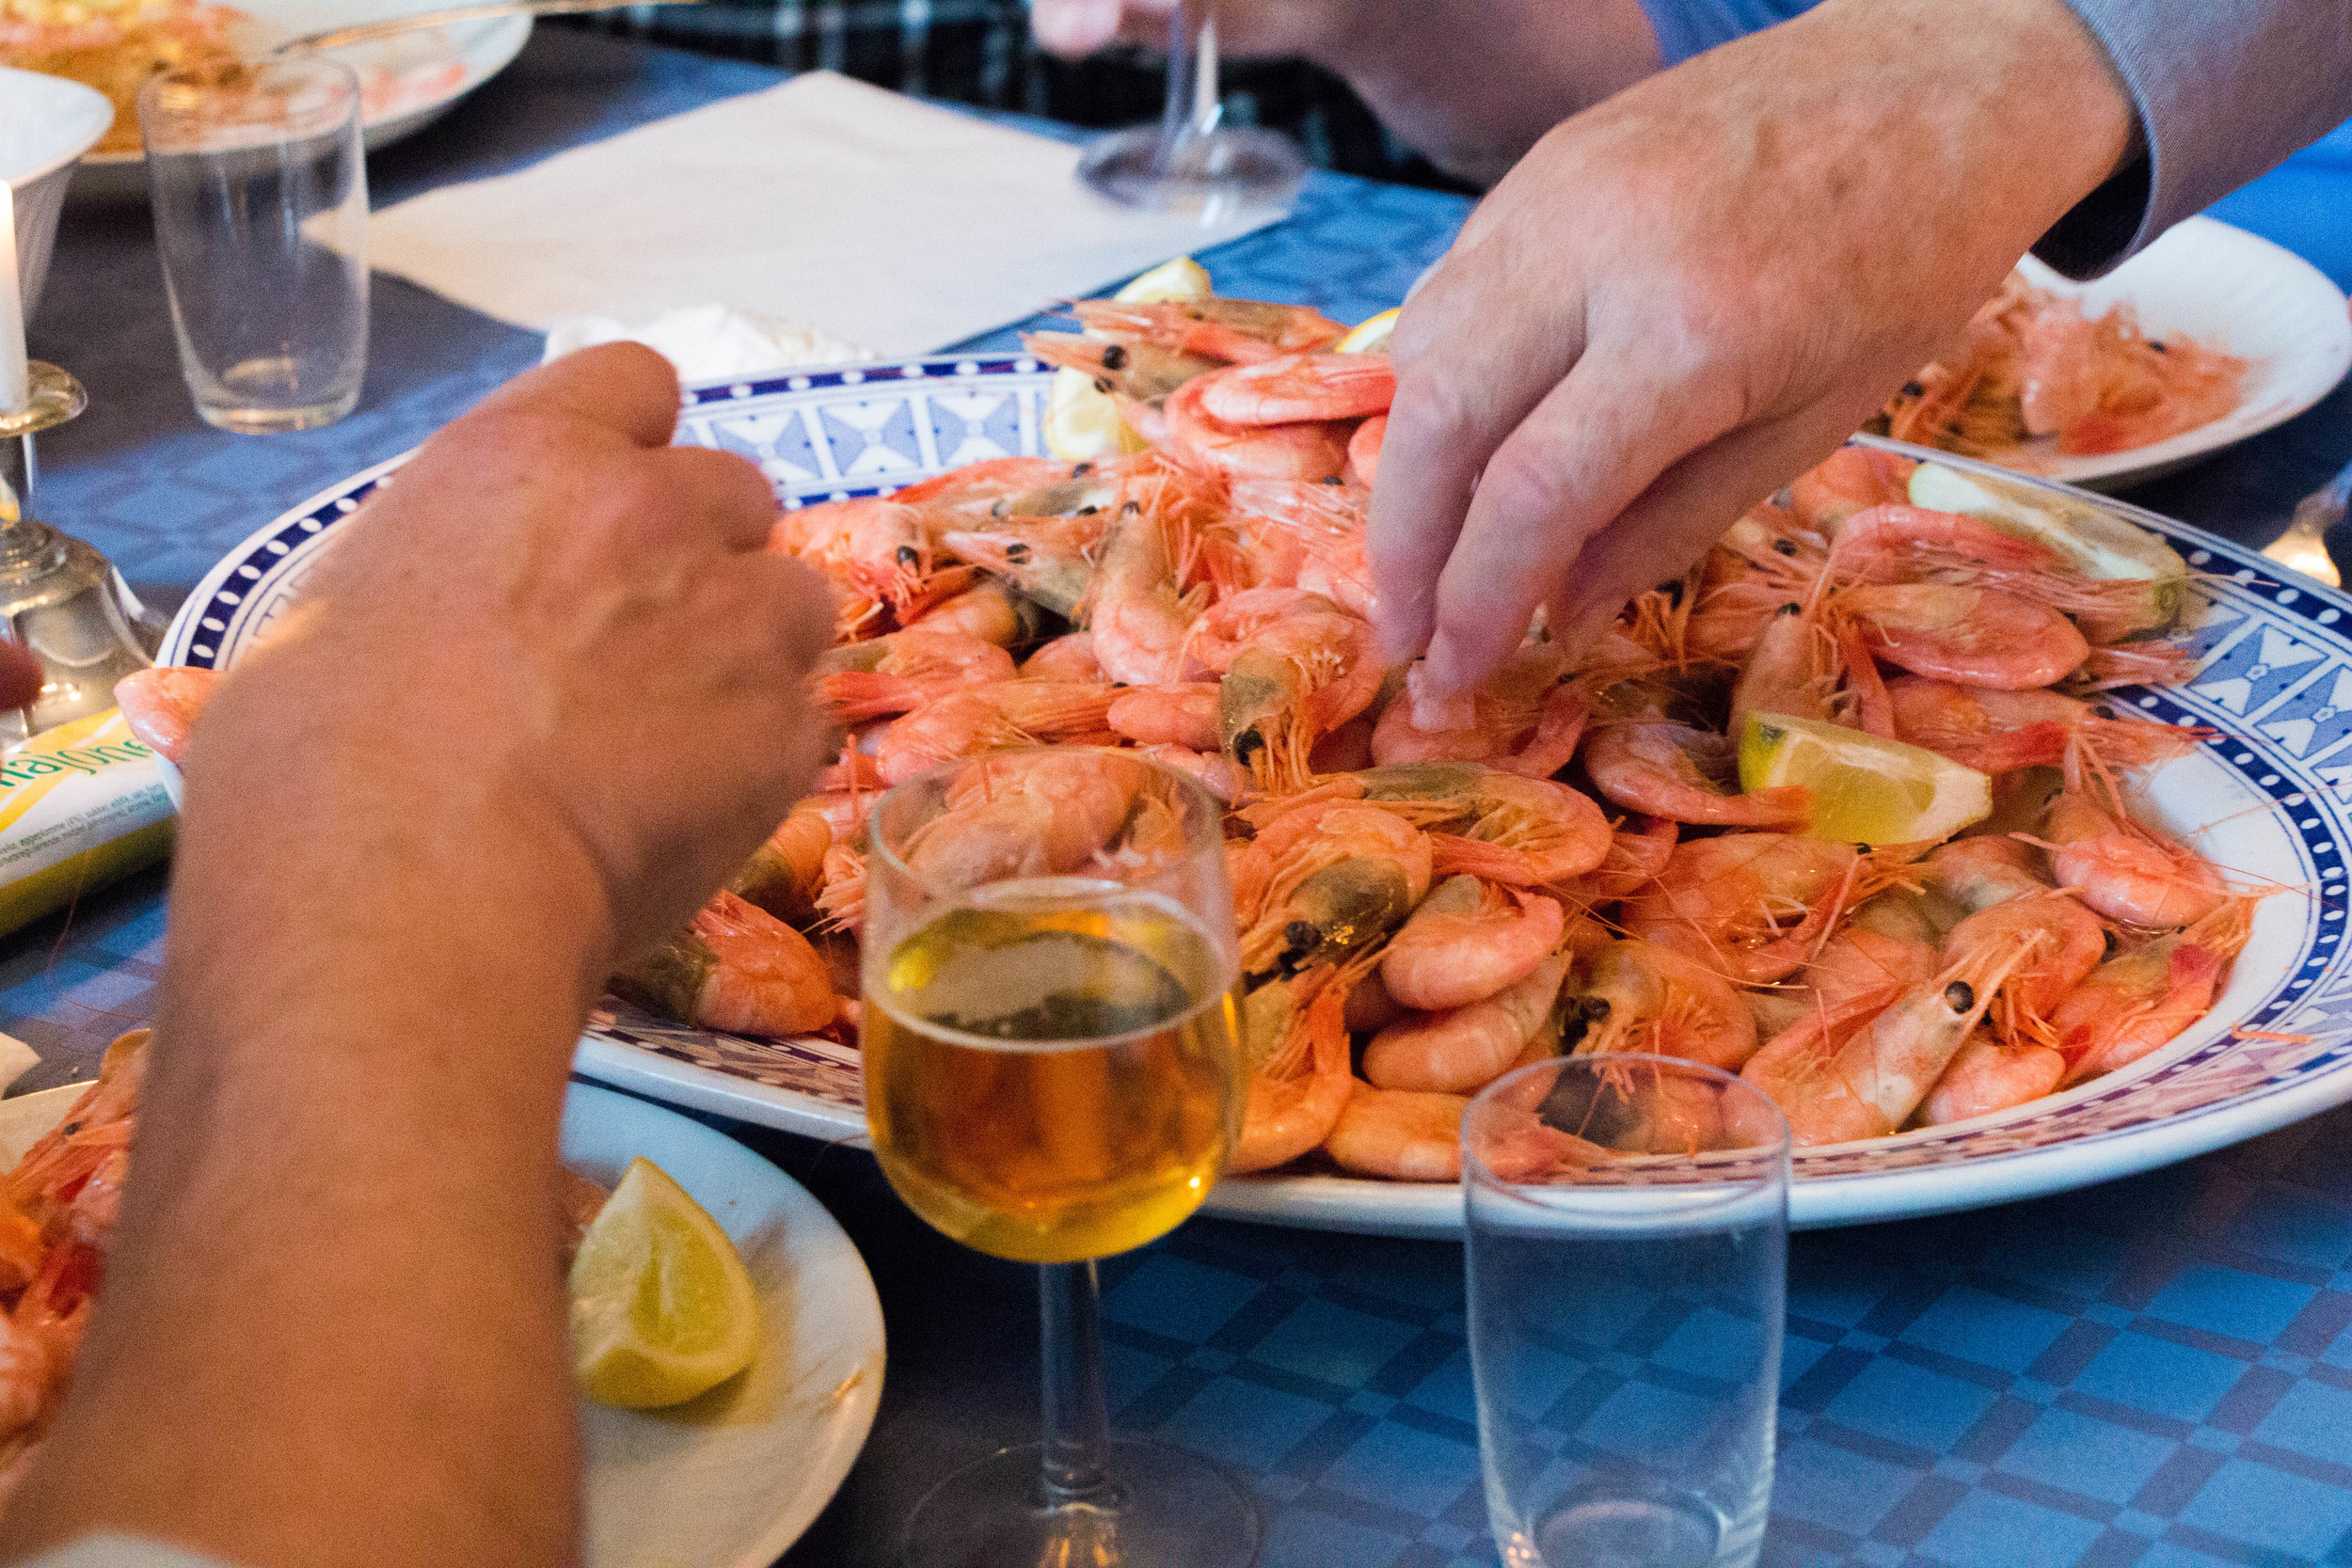
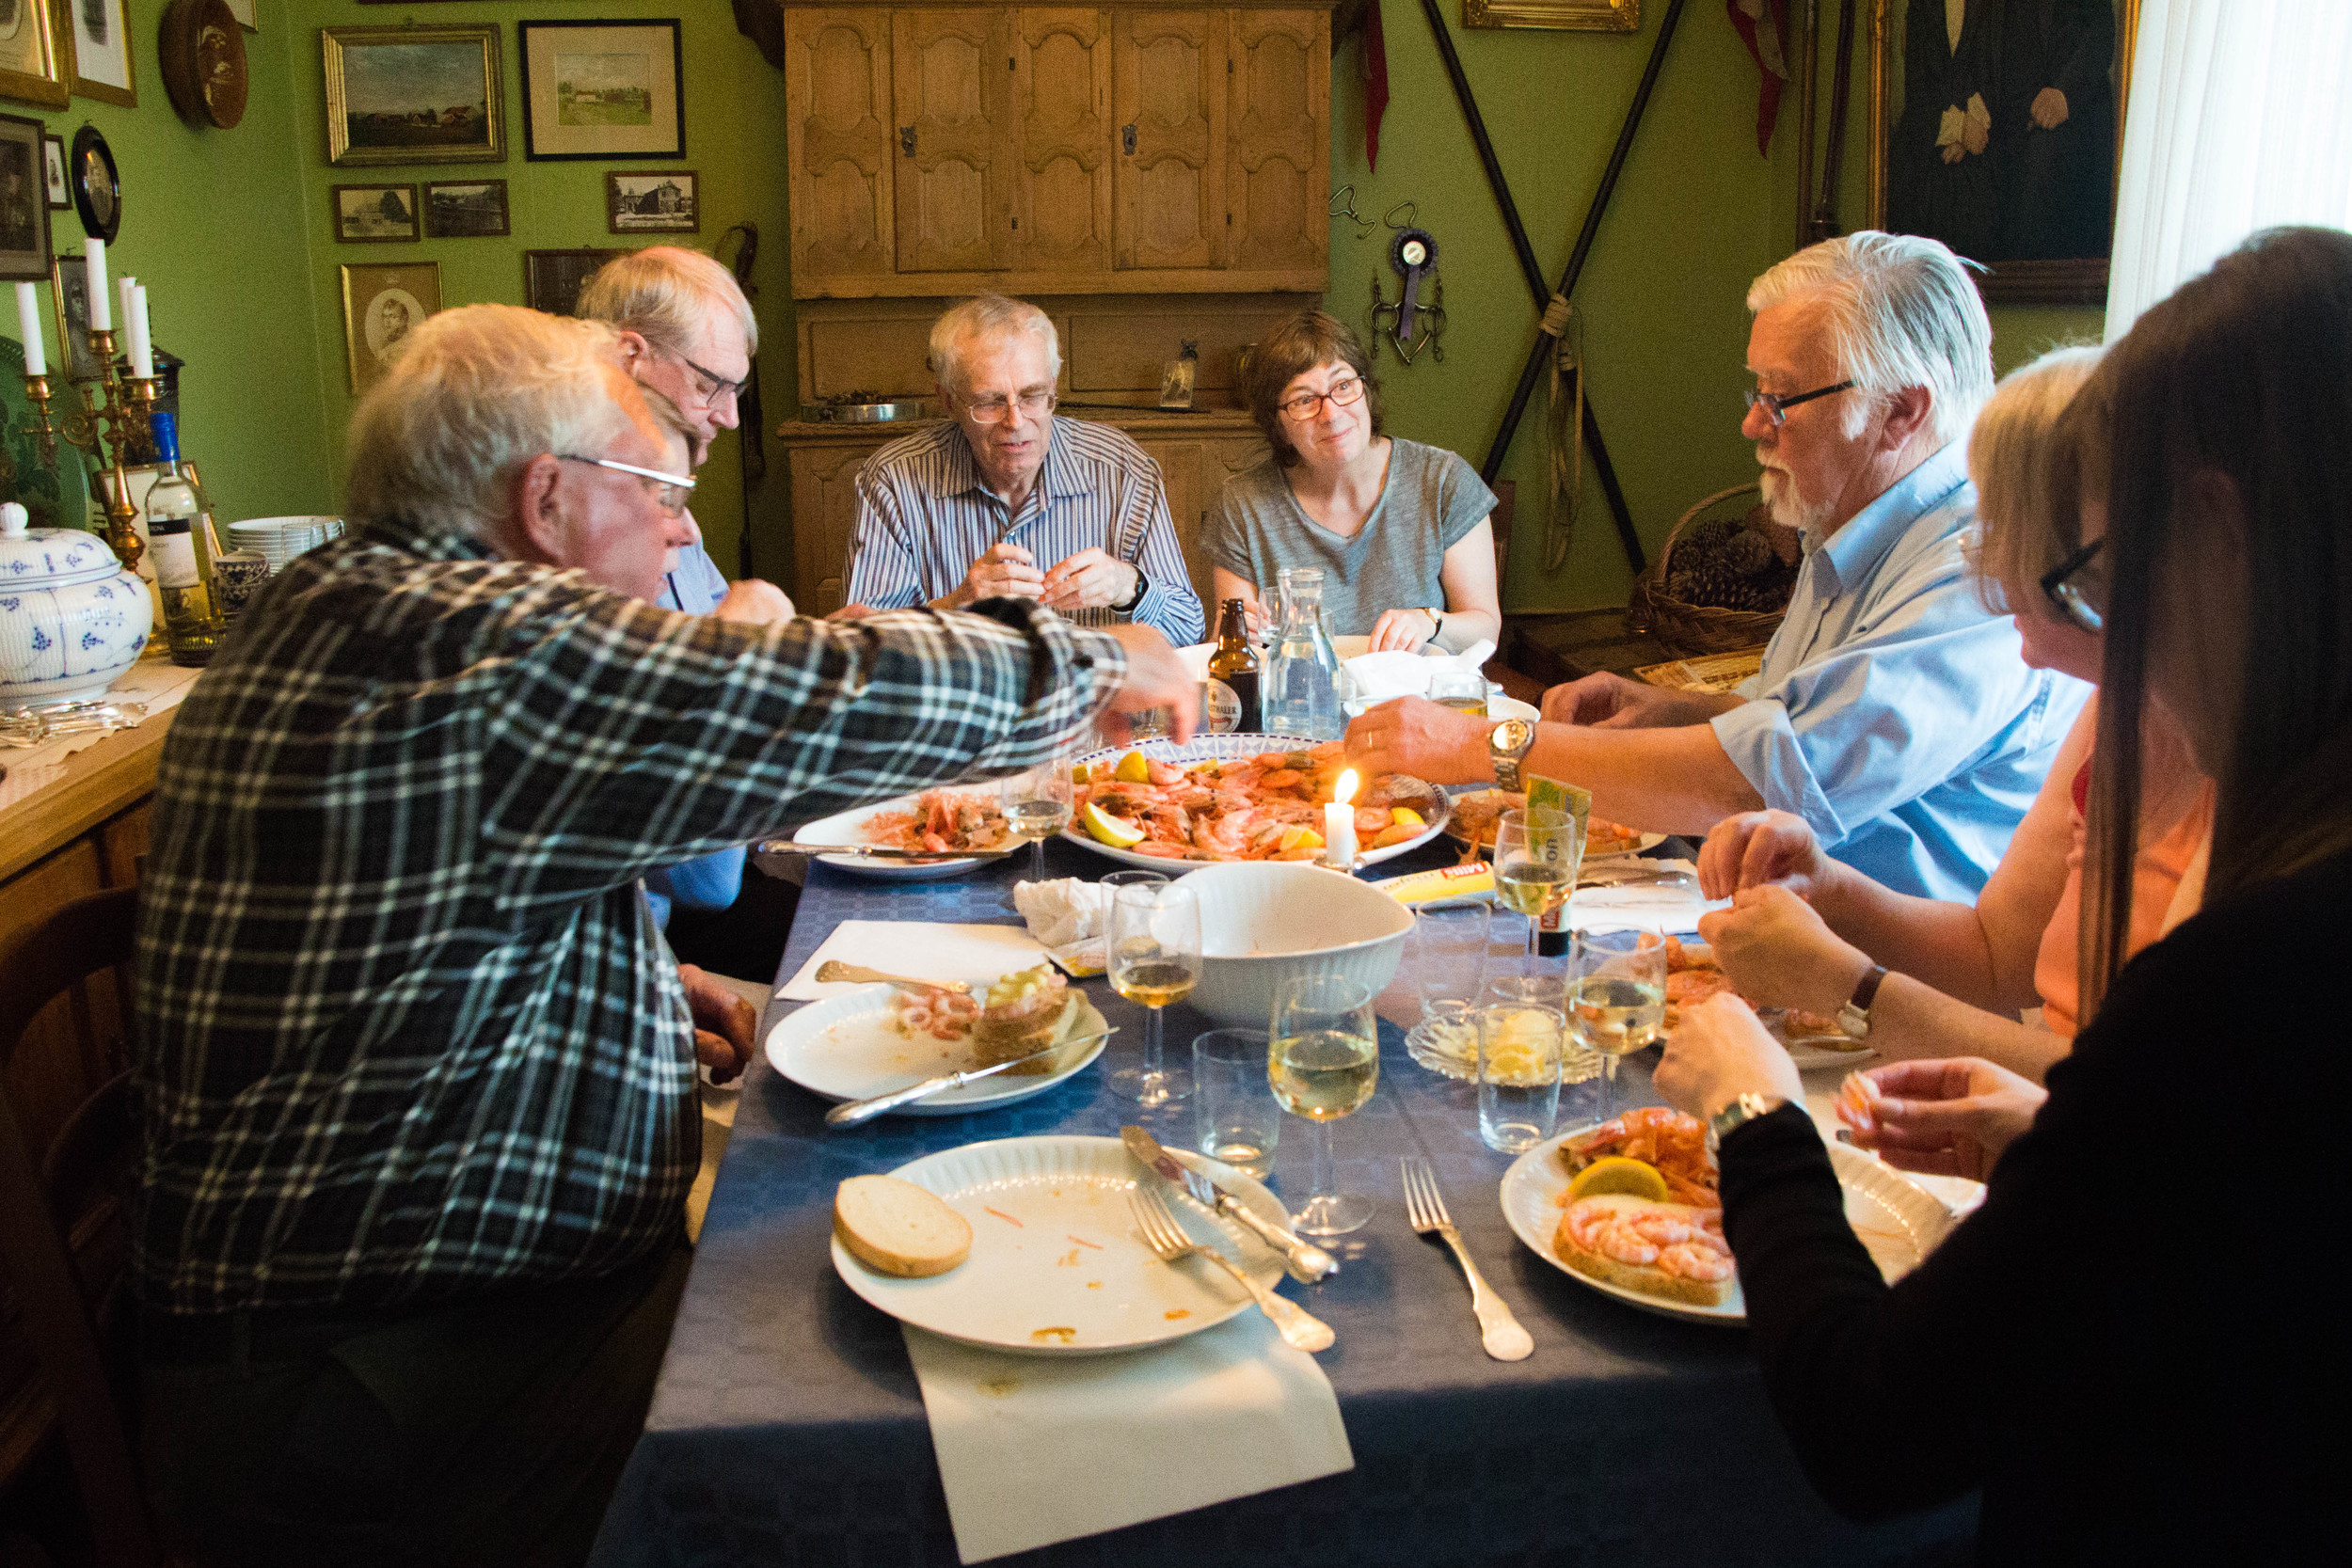
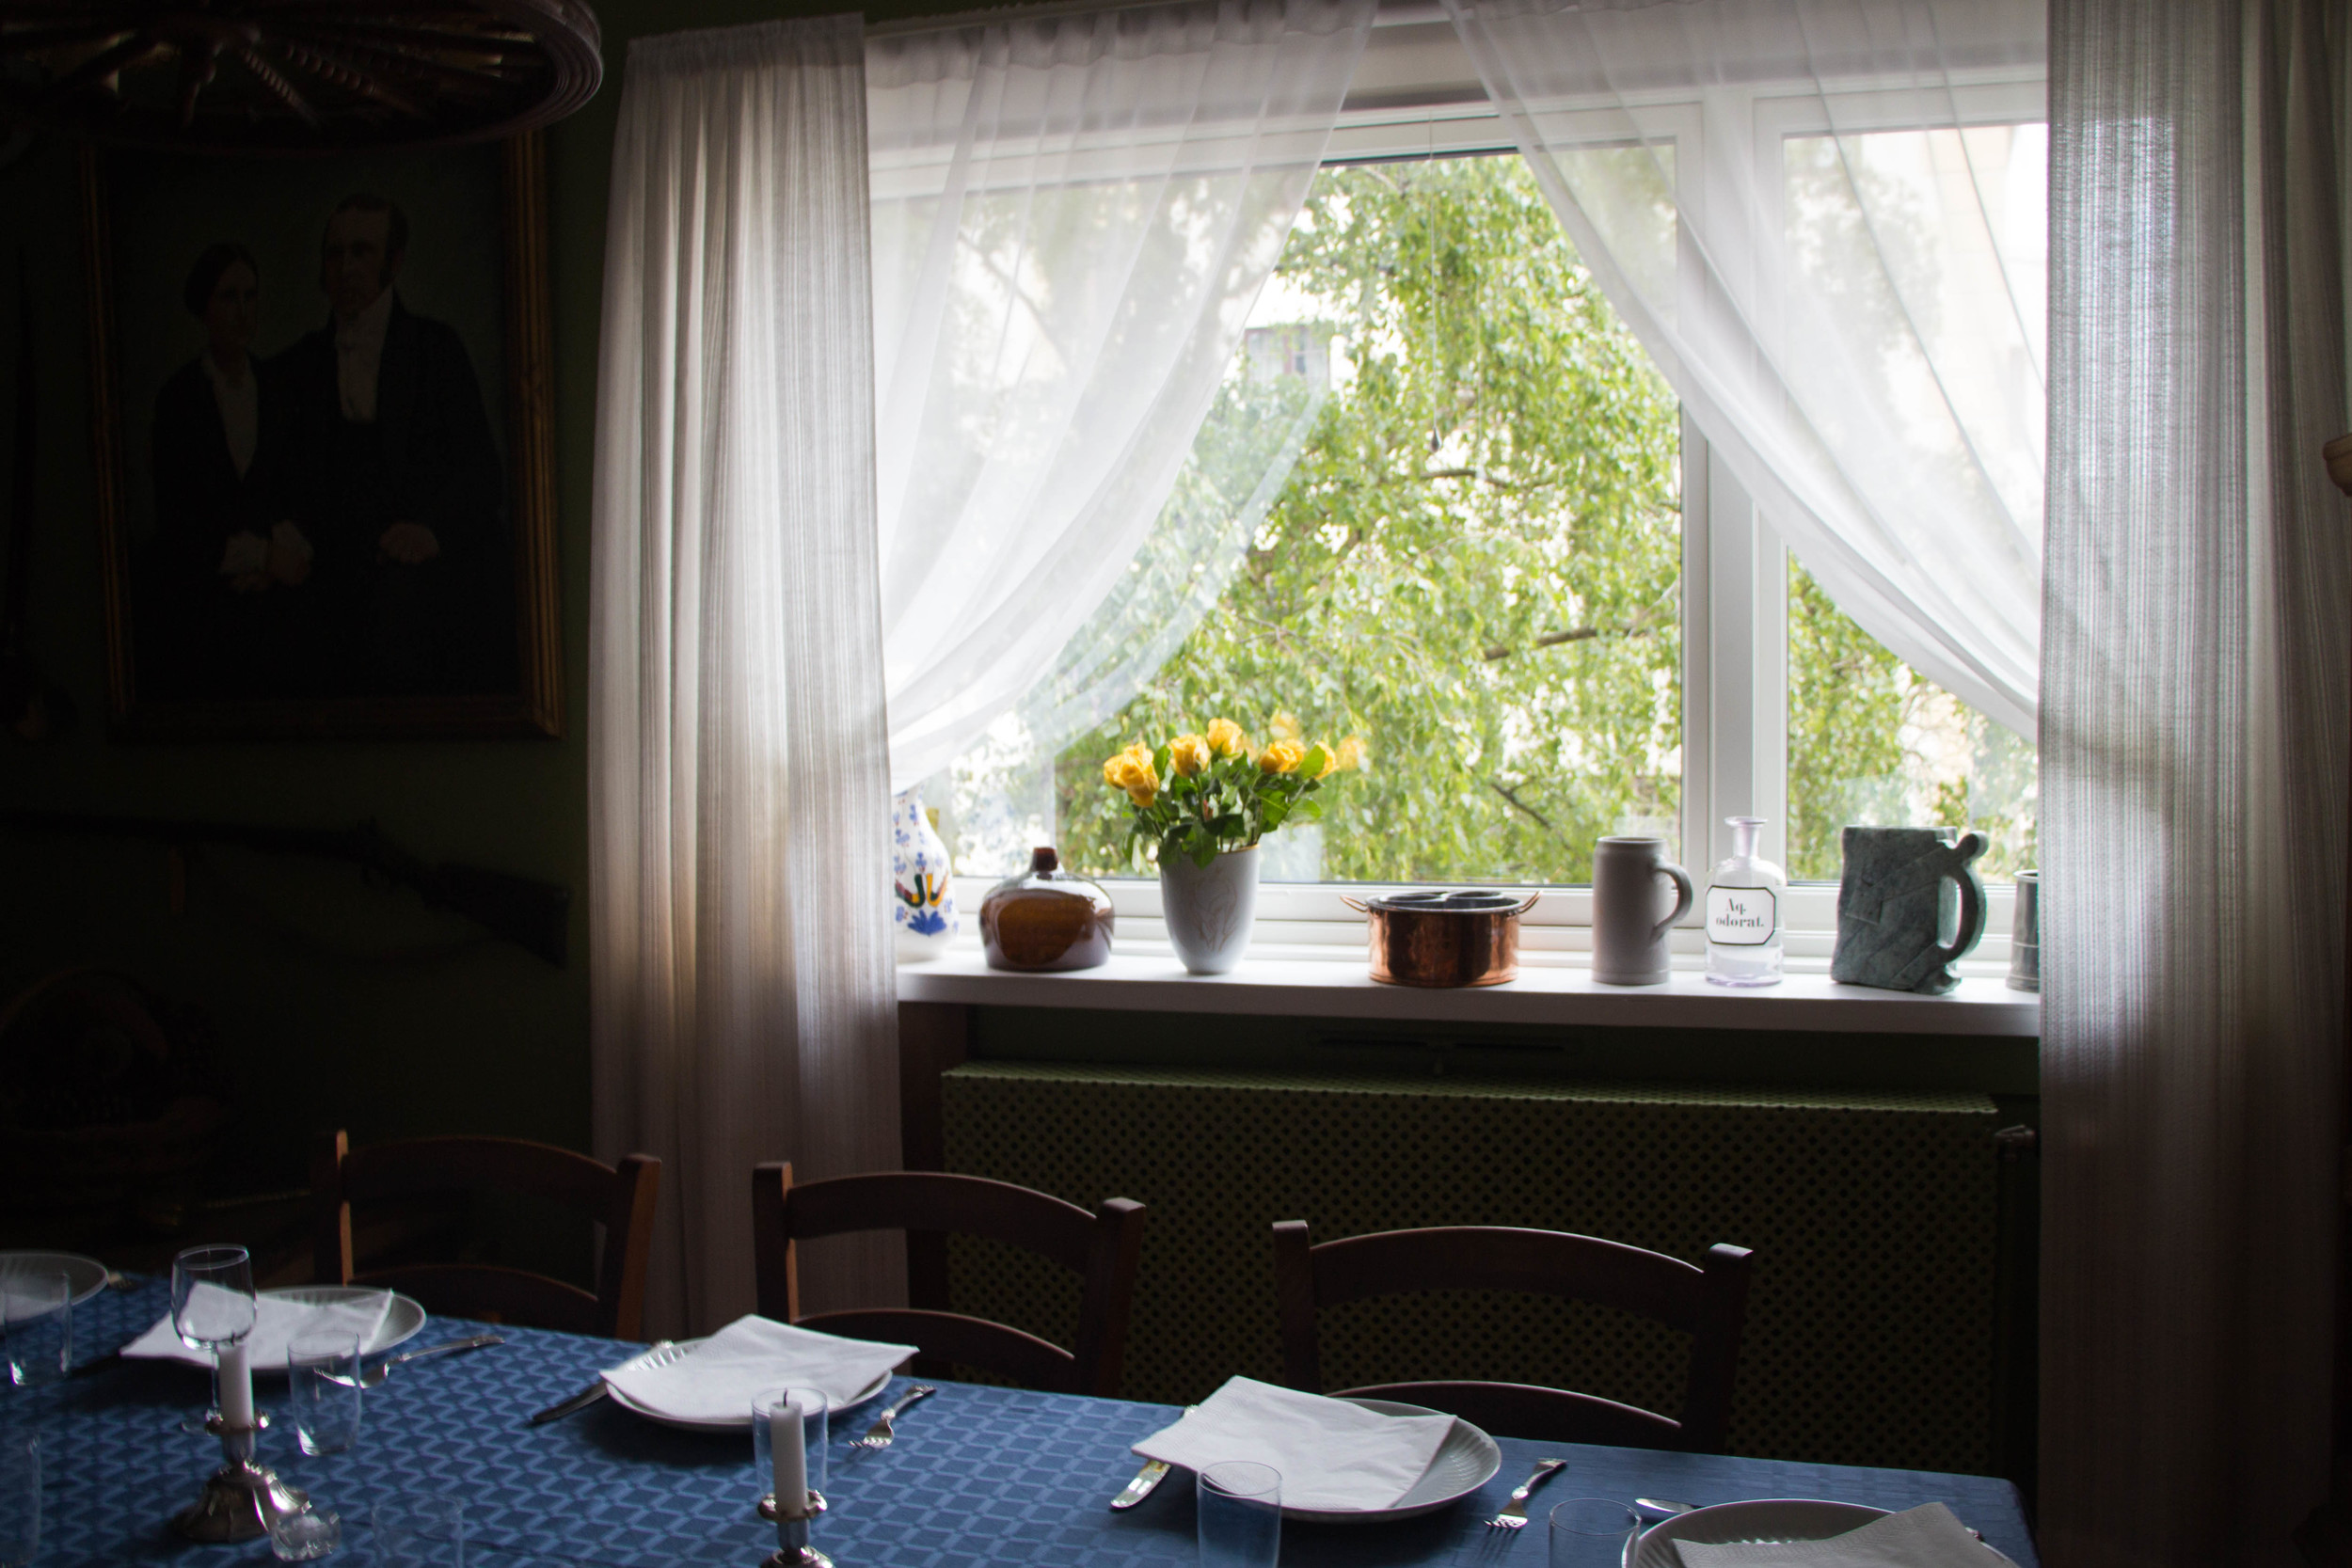
Just got back from vacation and WOW, Norway is incredible. The air is chilly and the fjords are breathtaking. I ate reindeer, cod tongues, whale, shrimp, salmon, and SO MUCH BROWN CHEESE.
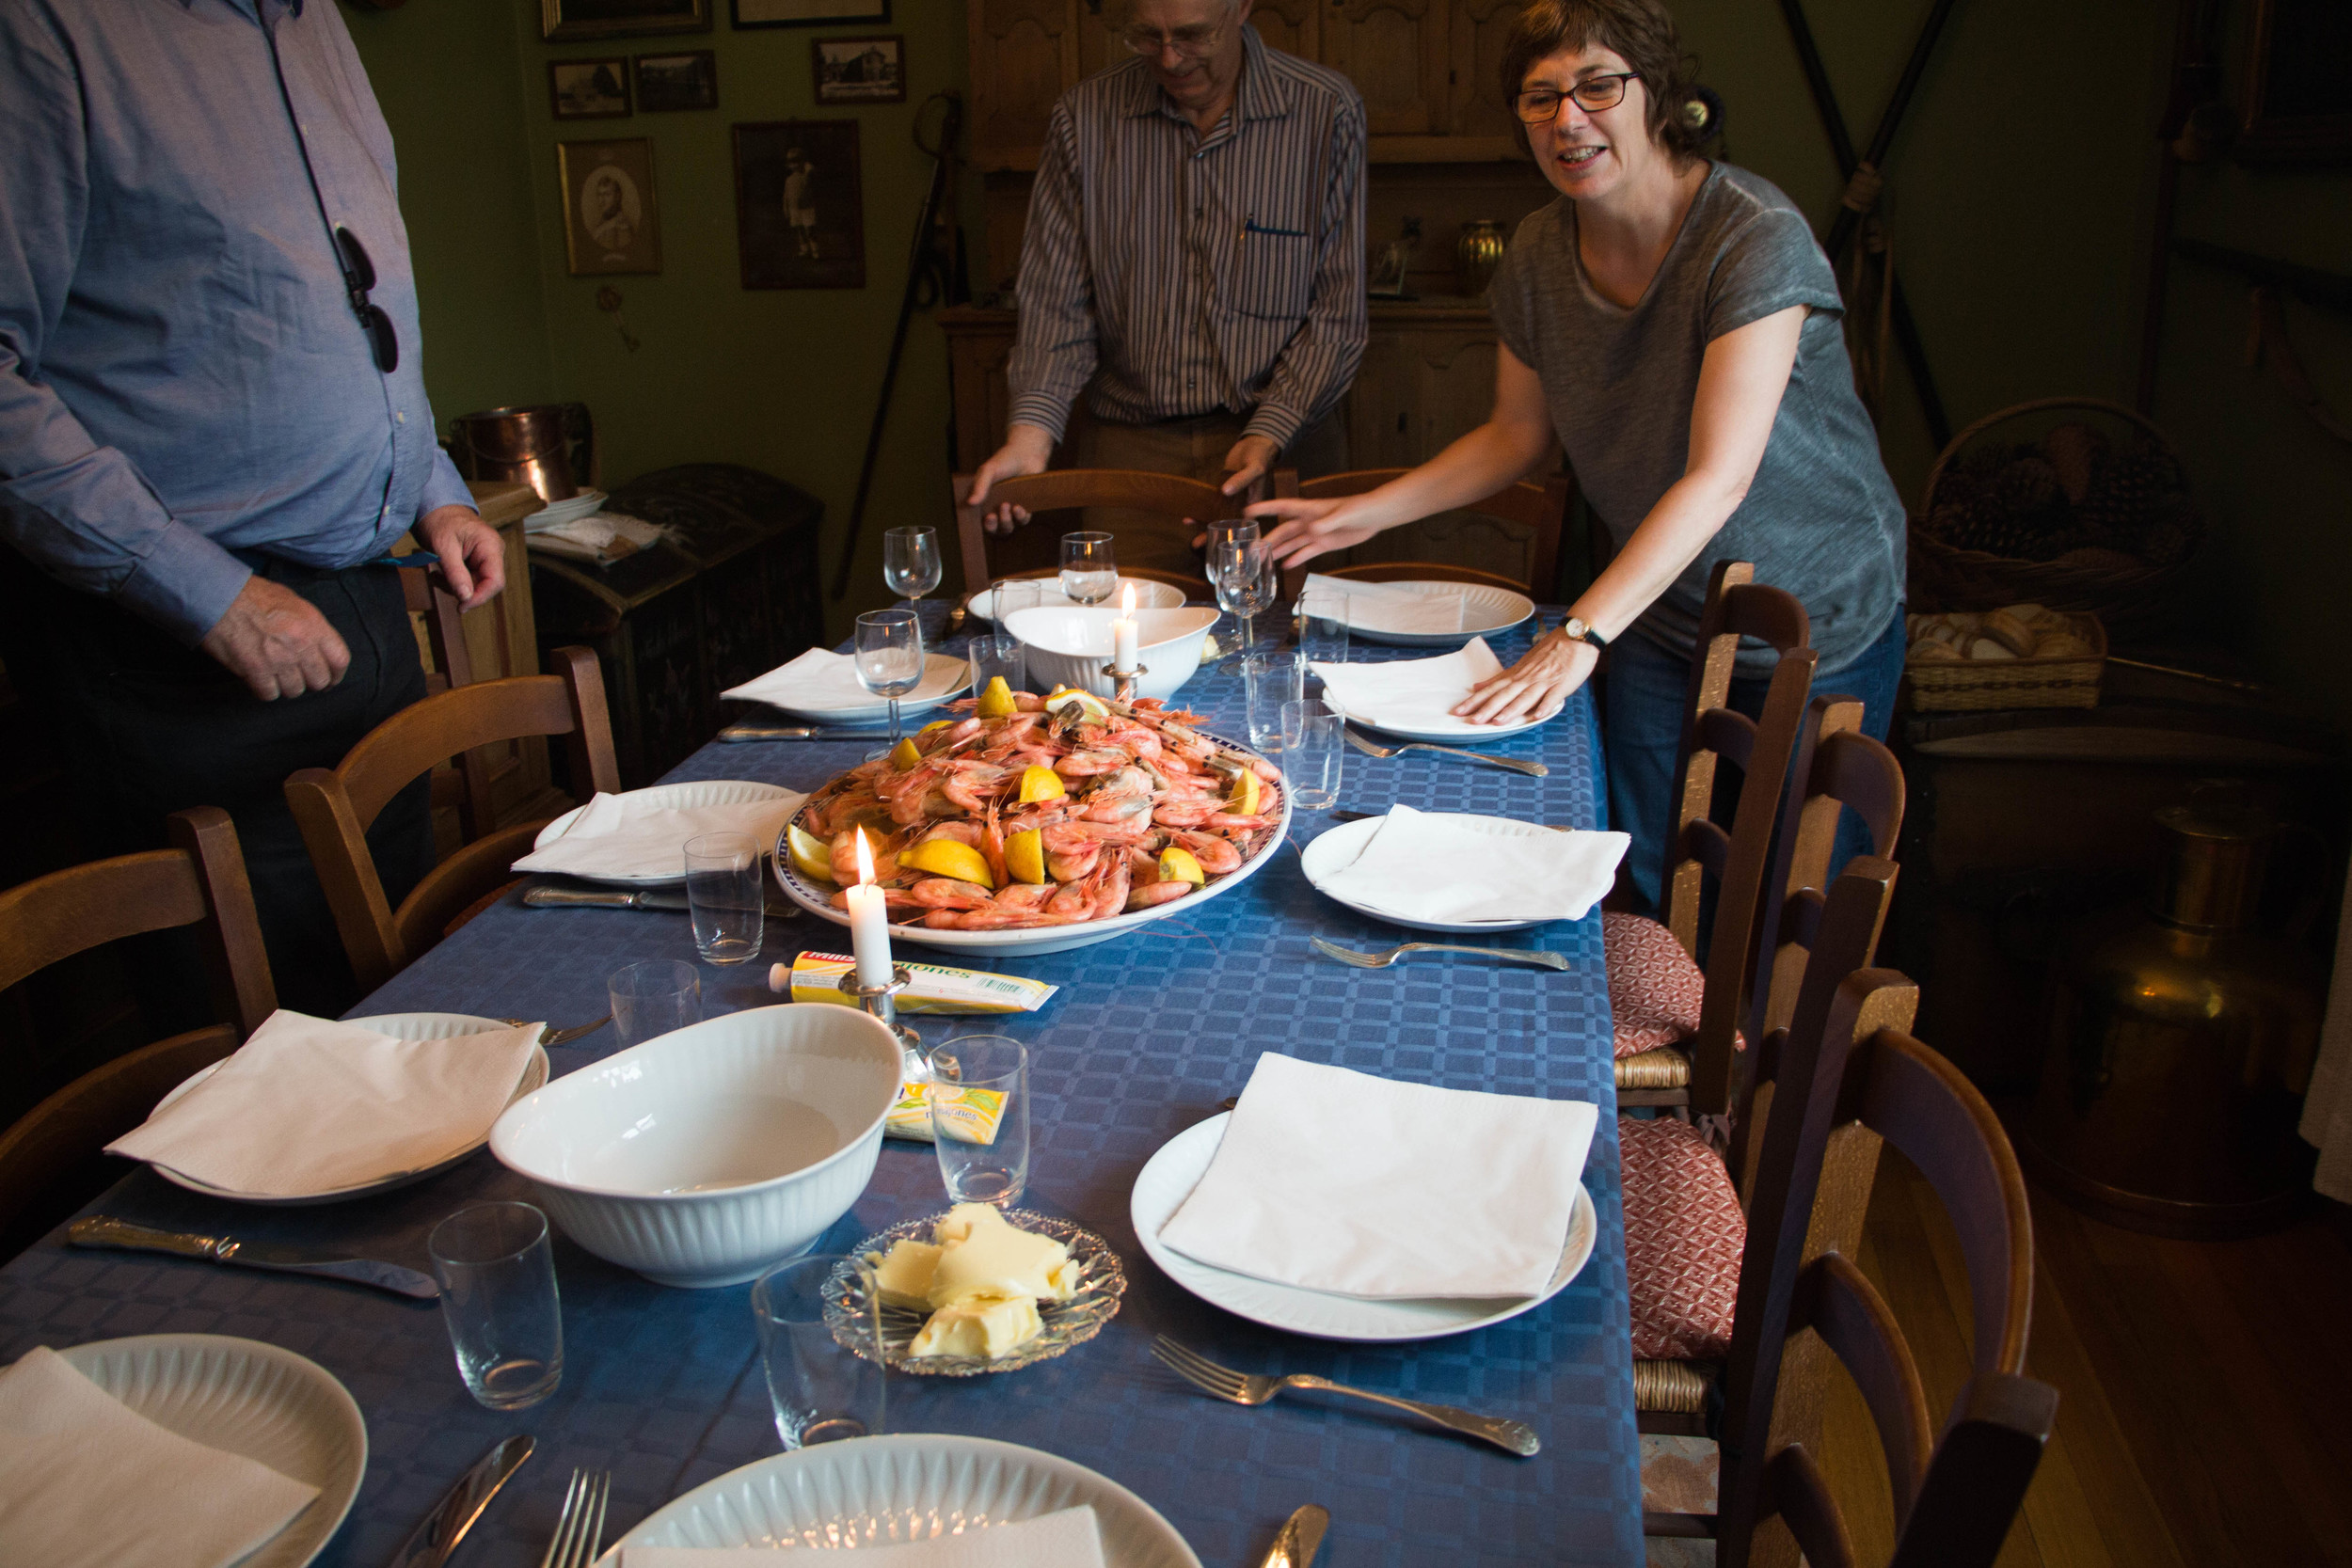
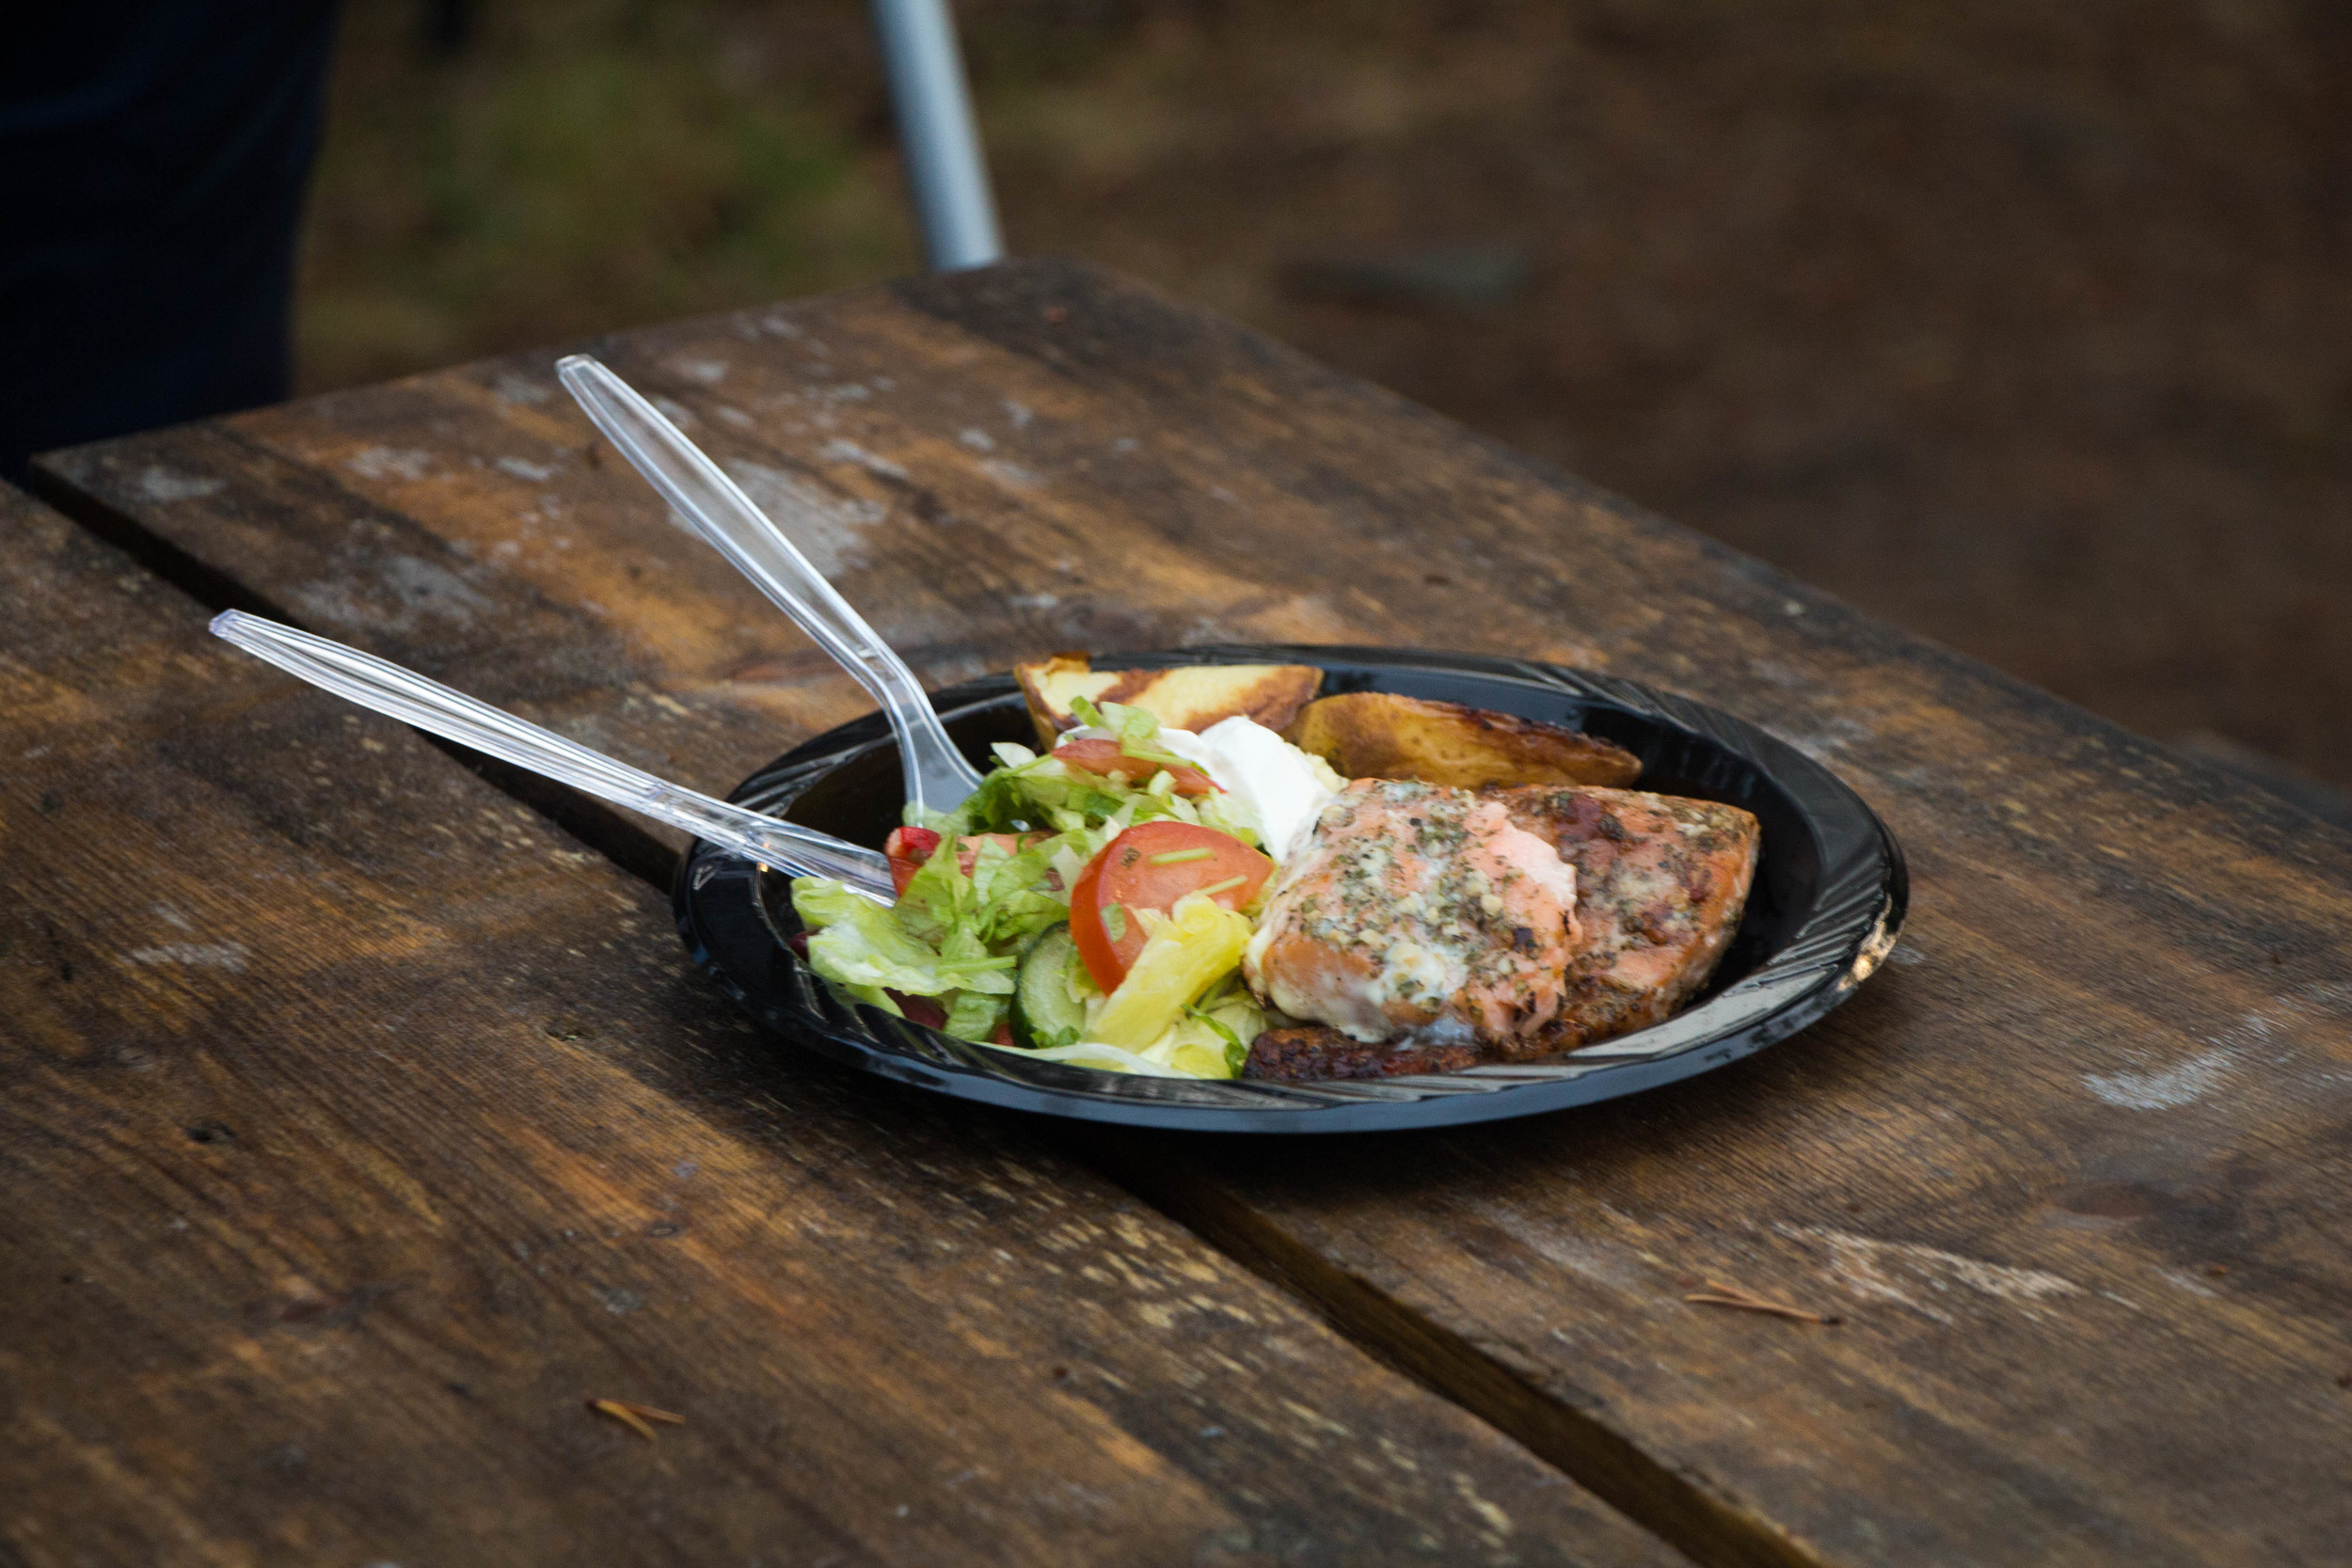
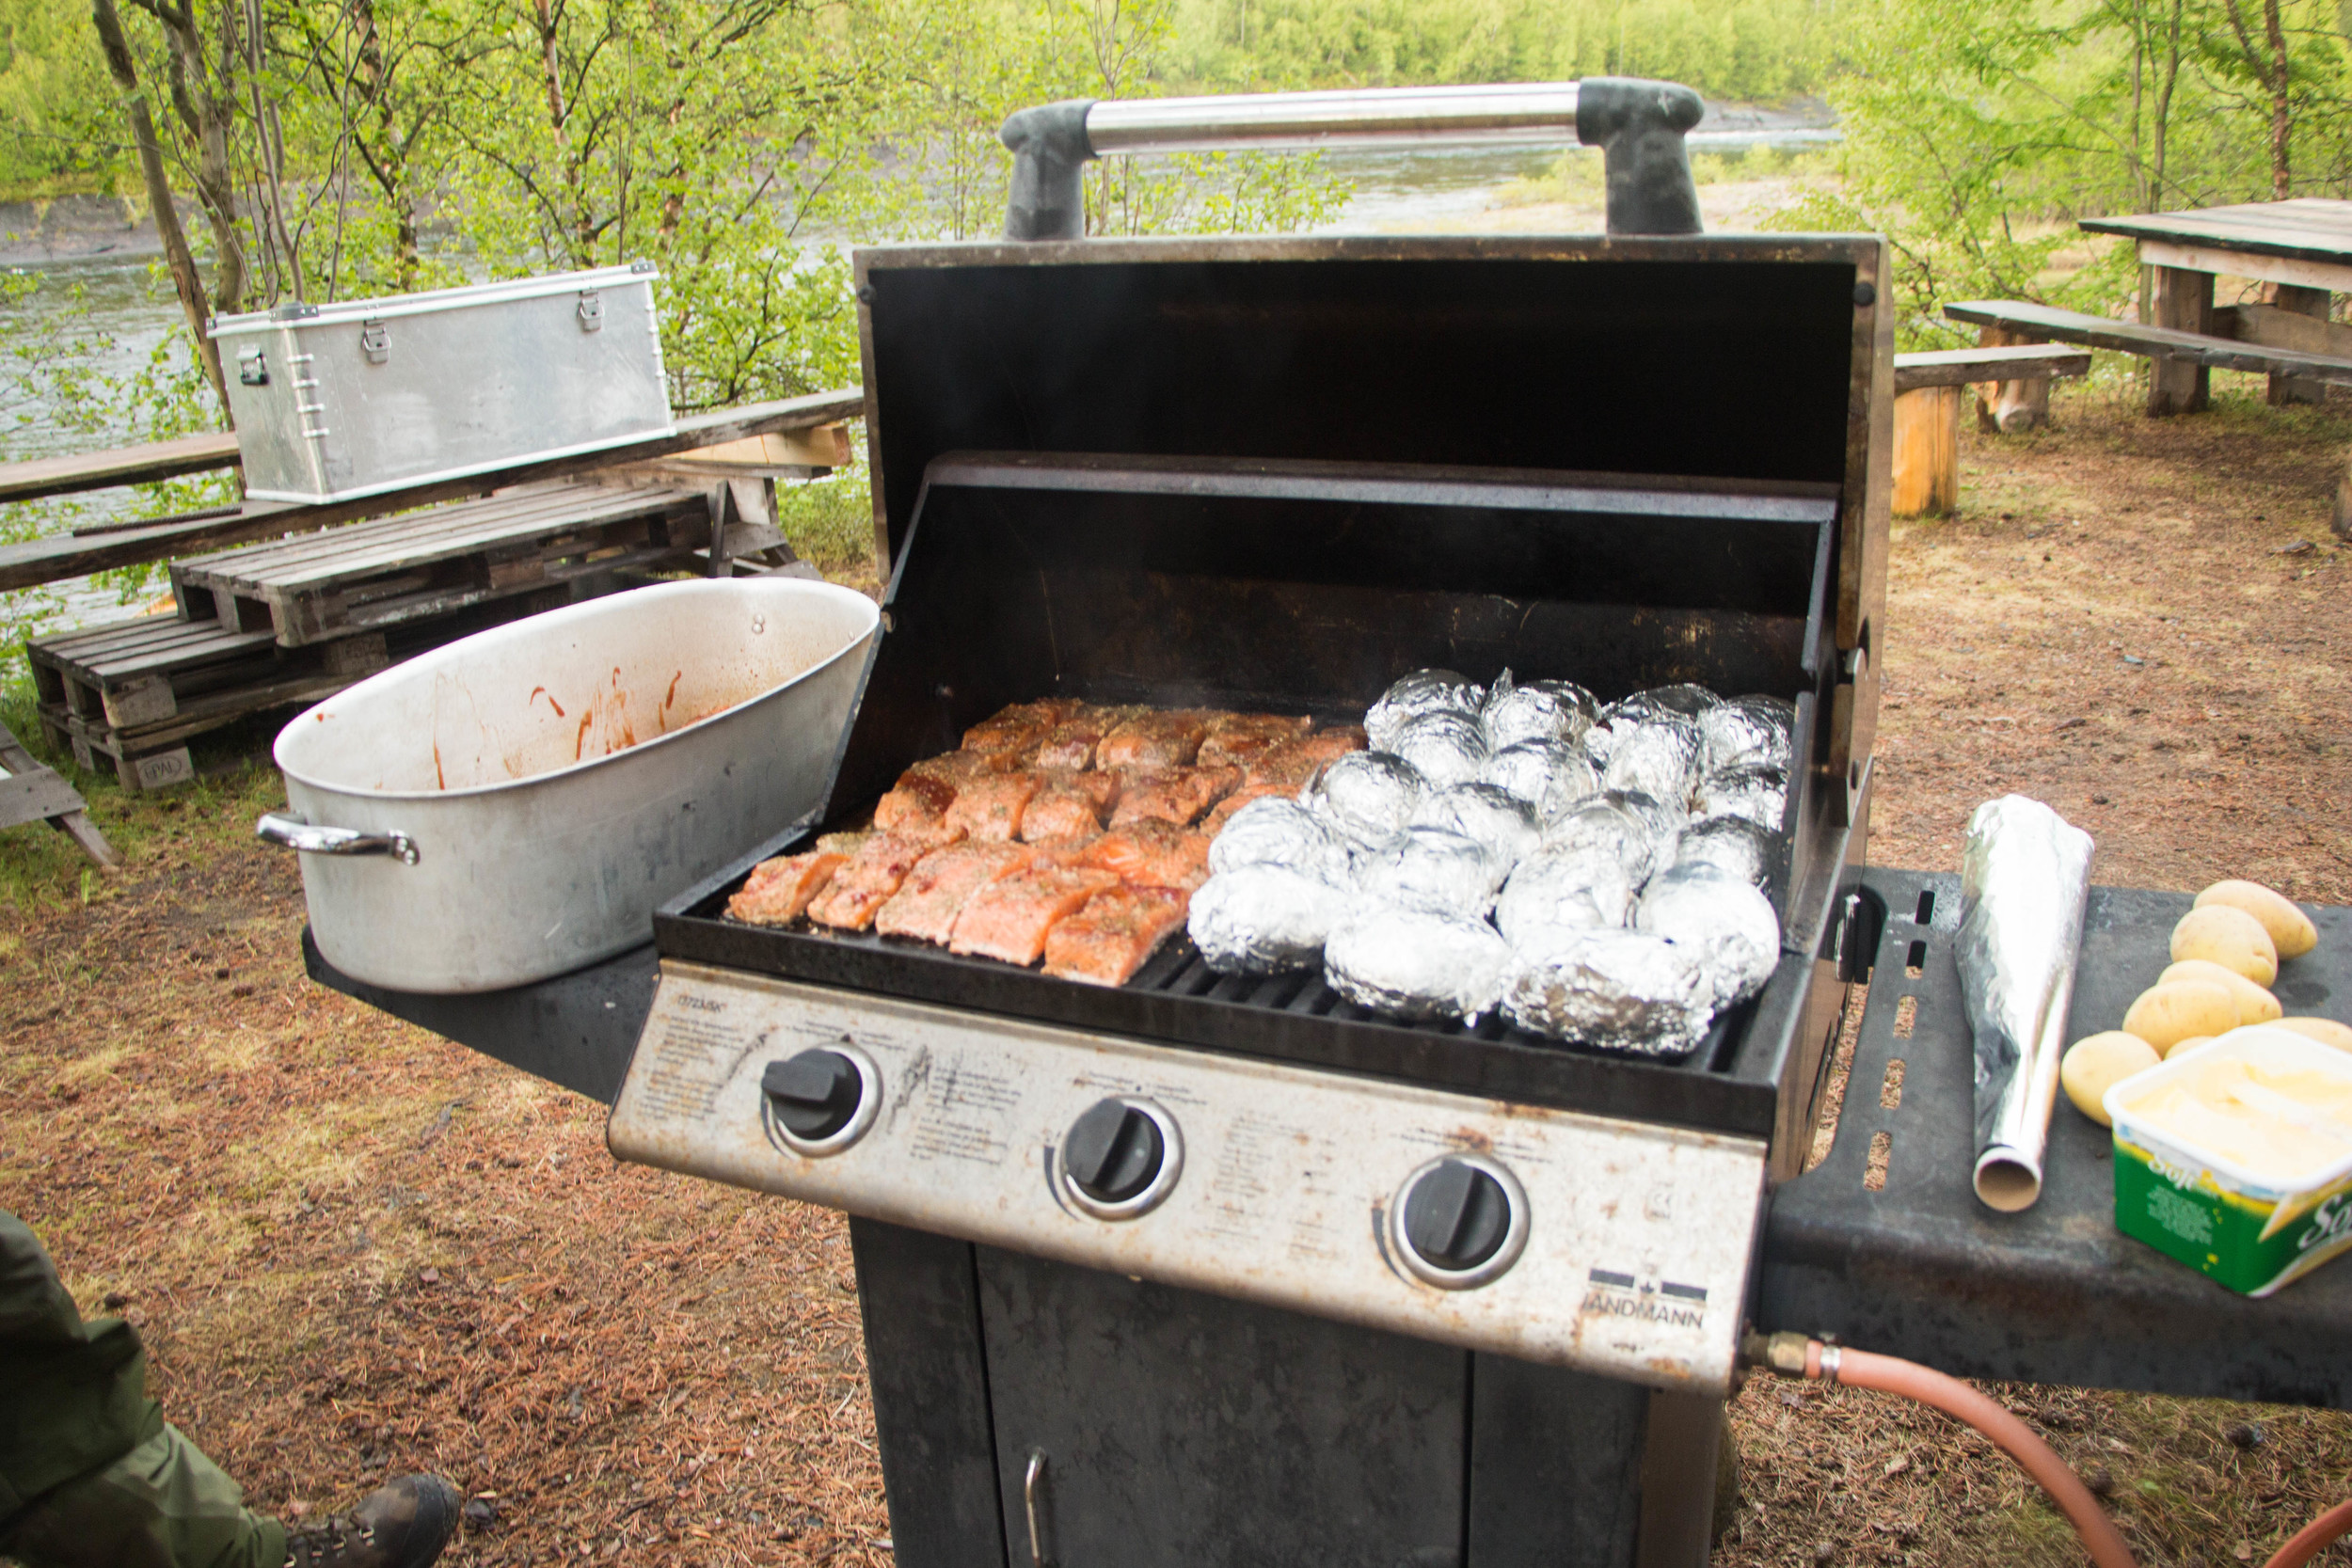
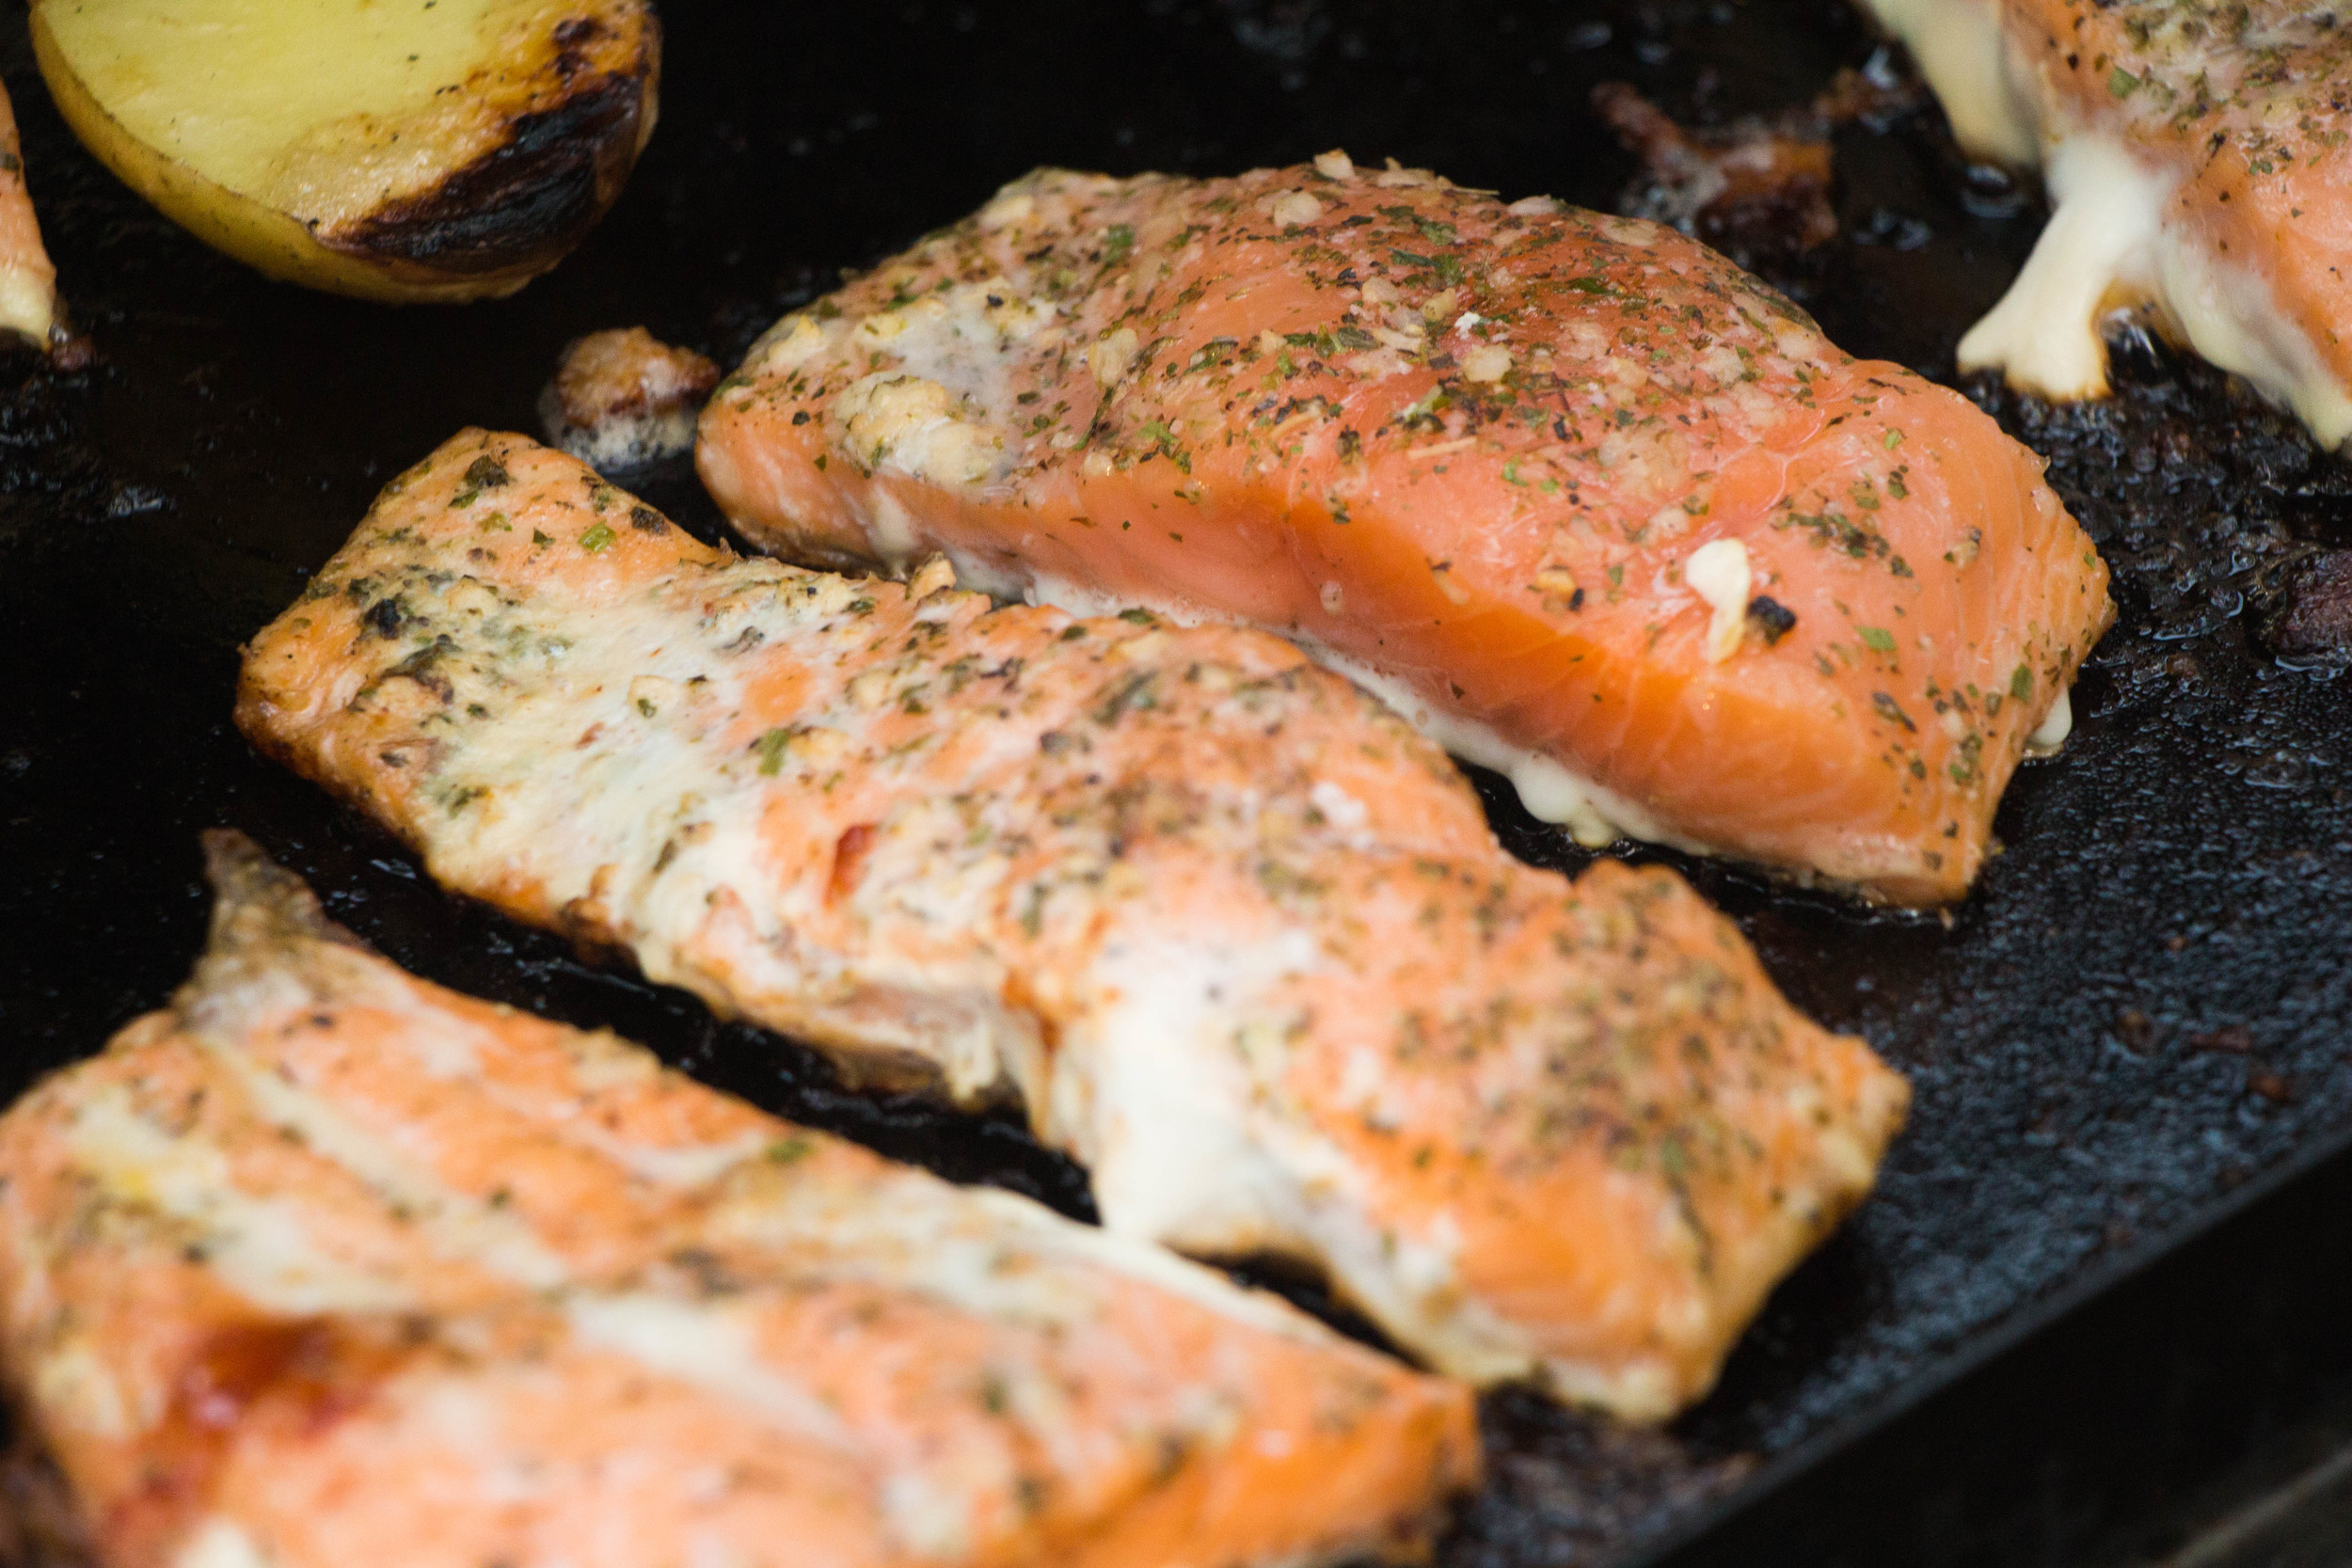
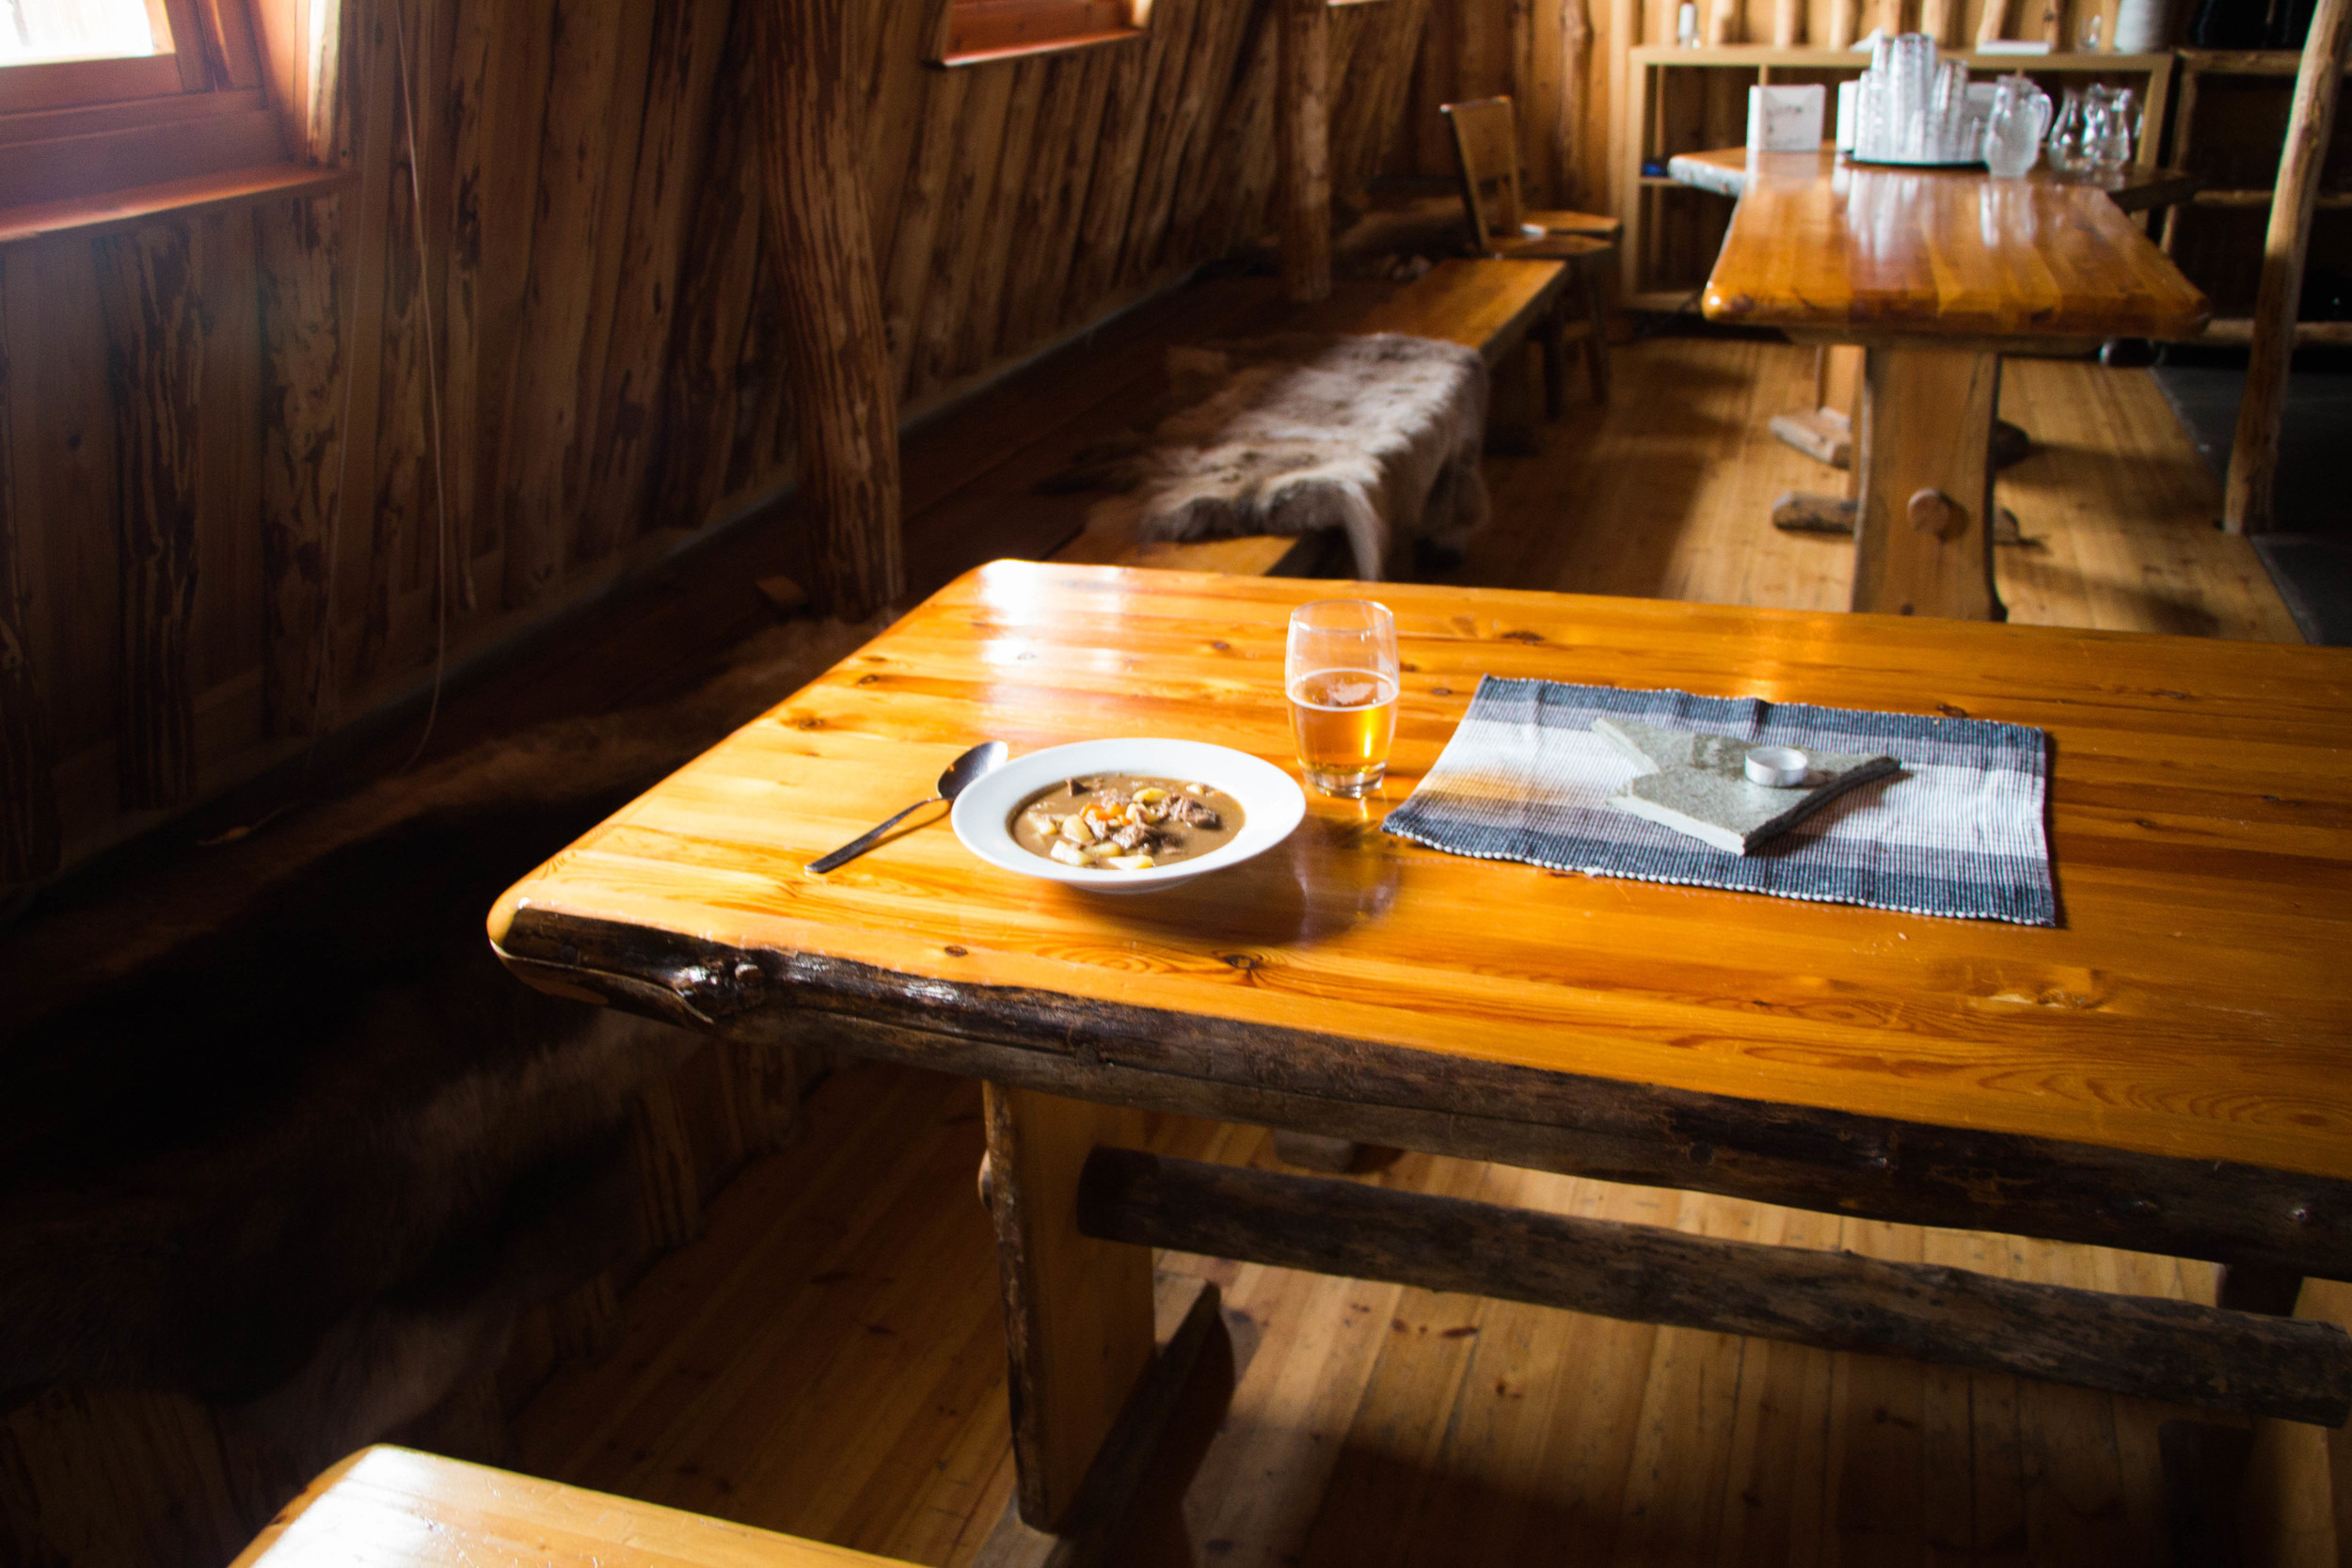
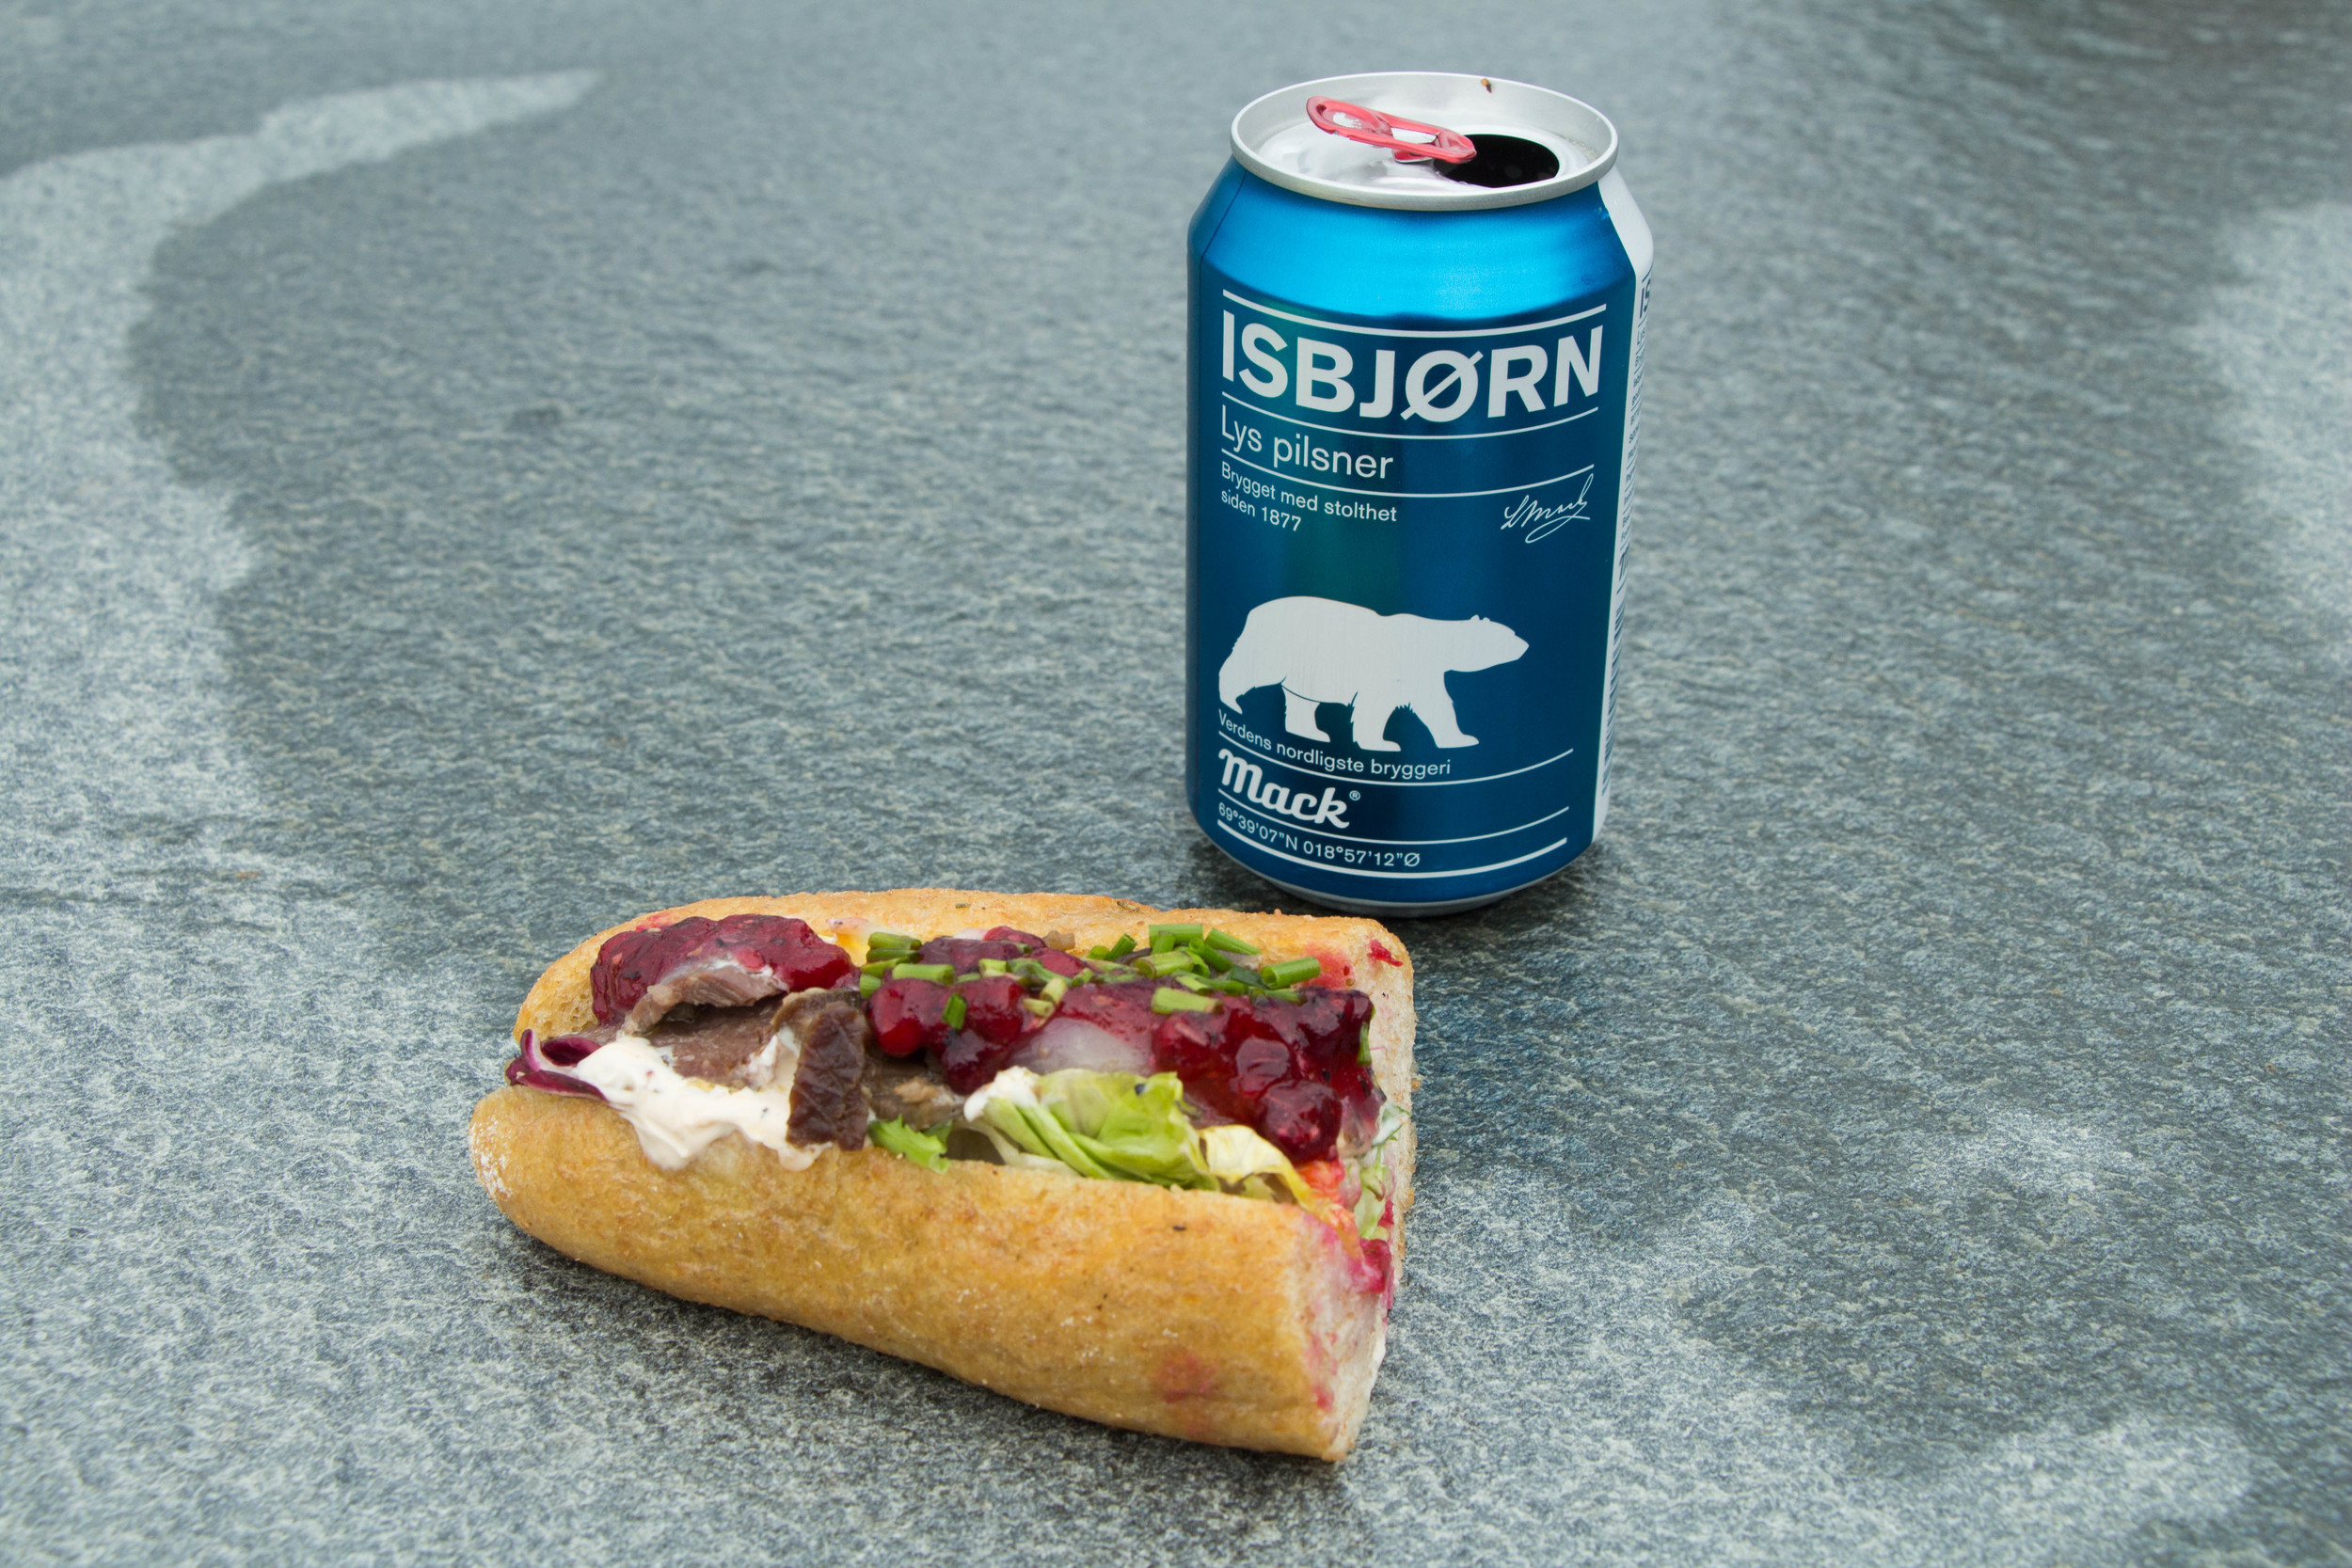
After my mum and I flew to Oslo, we went to Alta (way up north) and spent two weeks traveling around the Arctic Circle (including Tromsø, Hammerfest, Honningsvåg, and Kirkenes). We took boats down the Altaelva and grilled salmon on the riverbank. We ate bidos (a traditional Sami soup made with reindeer meat) in a turf covered restaurant. We saw 7000 year old rock carvings. We drank a lot of Mack beer. There were stockfish racks everywhere and it never got dark. Not once. Not even for a second.
I wish I could go back to the snow topped hills and escape the muggy DC heat. But alas, it's back to work now. Fortunately I smuggled back some brown cheese.
So much for 60 fucking degrees. This DC June heatwave has been killing me. Fortunately I am about to go on vacation to Norway where the highs will be in the mid 60s and I can cool off and eat an insane amount of fish, potatoes, and brown cheese. Expect some Scandinavian inspired recipes when I return.
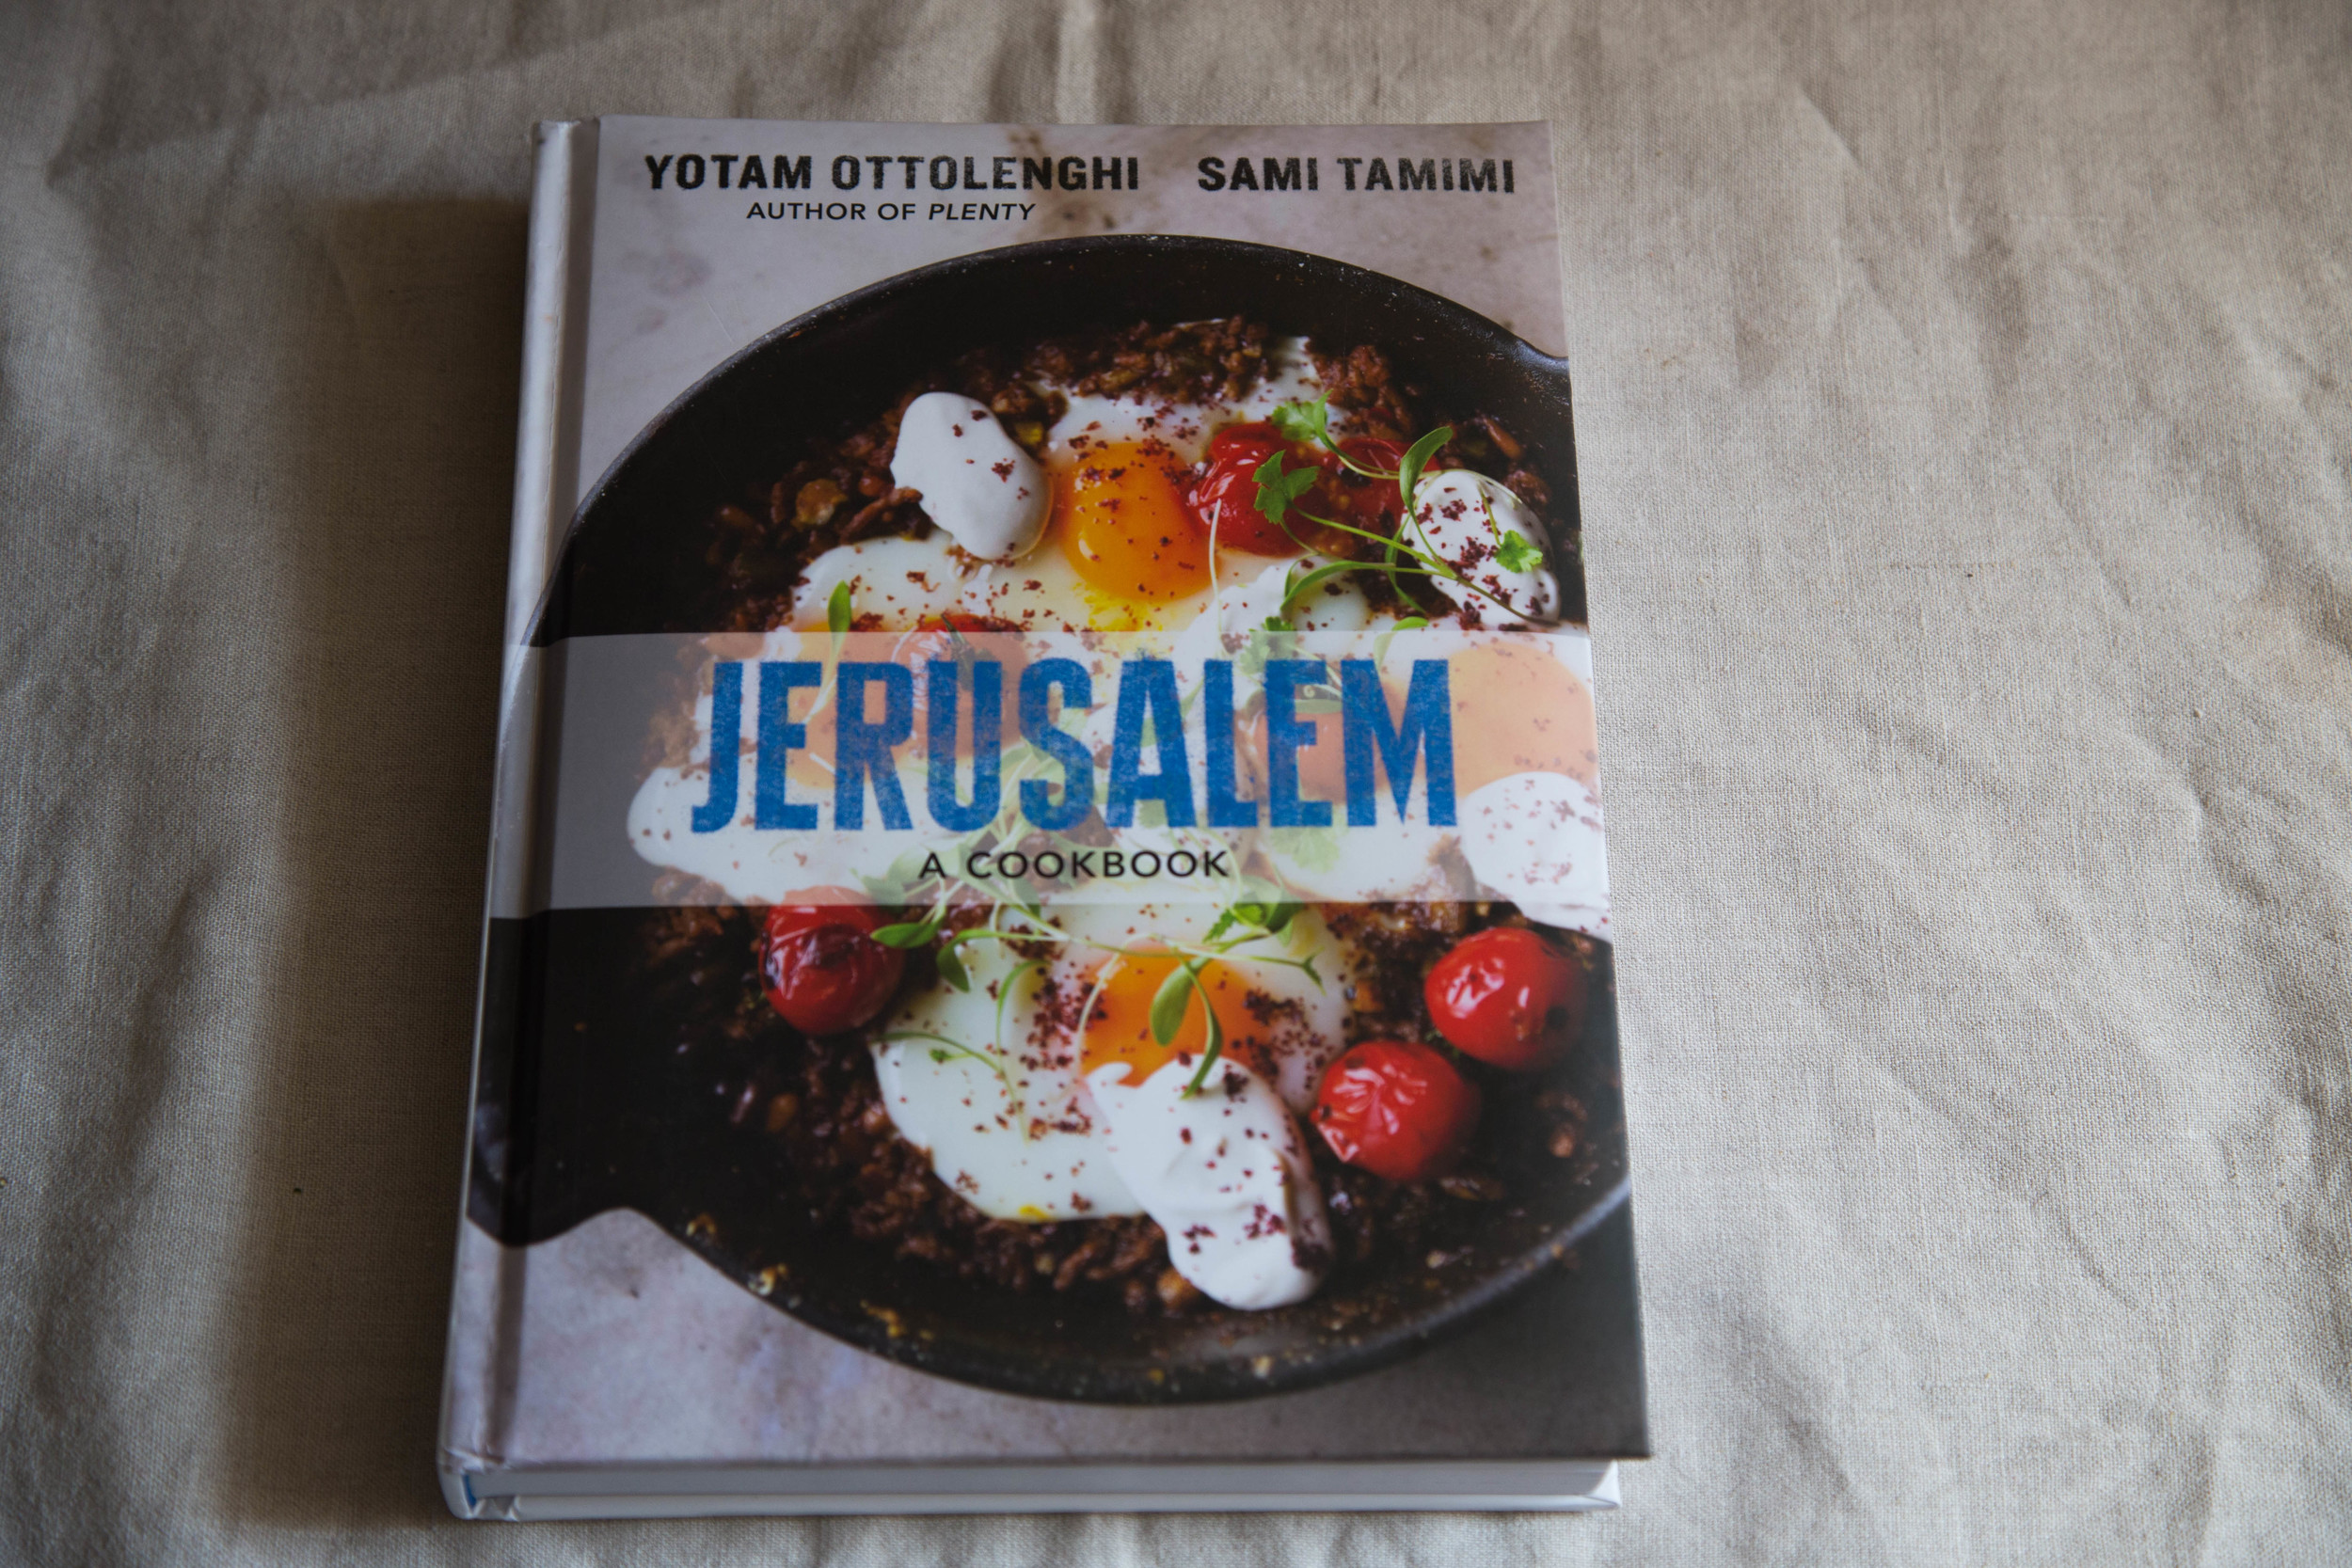
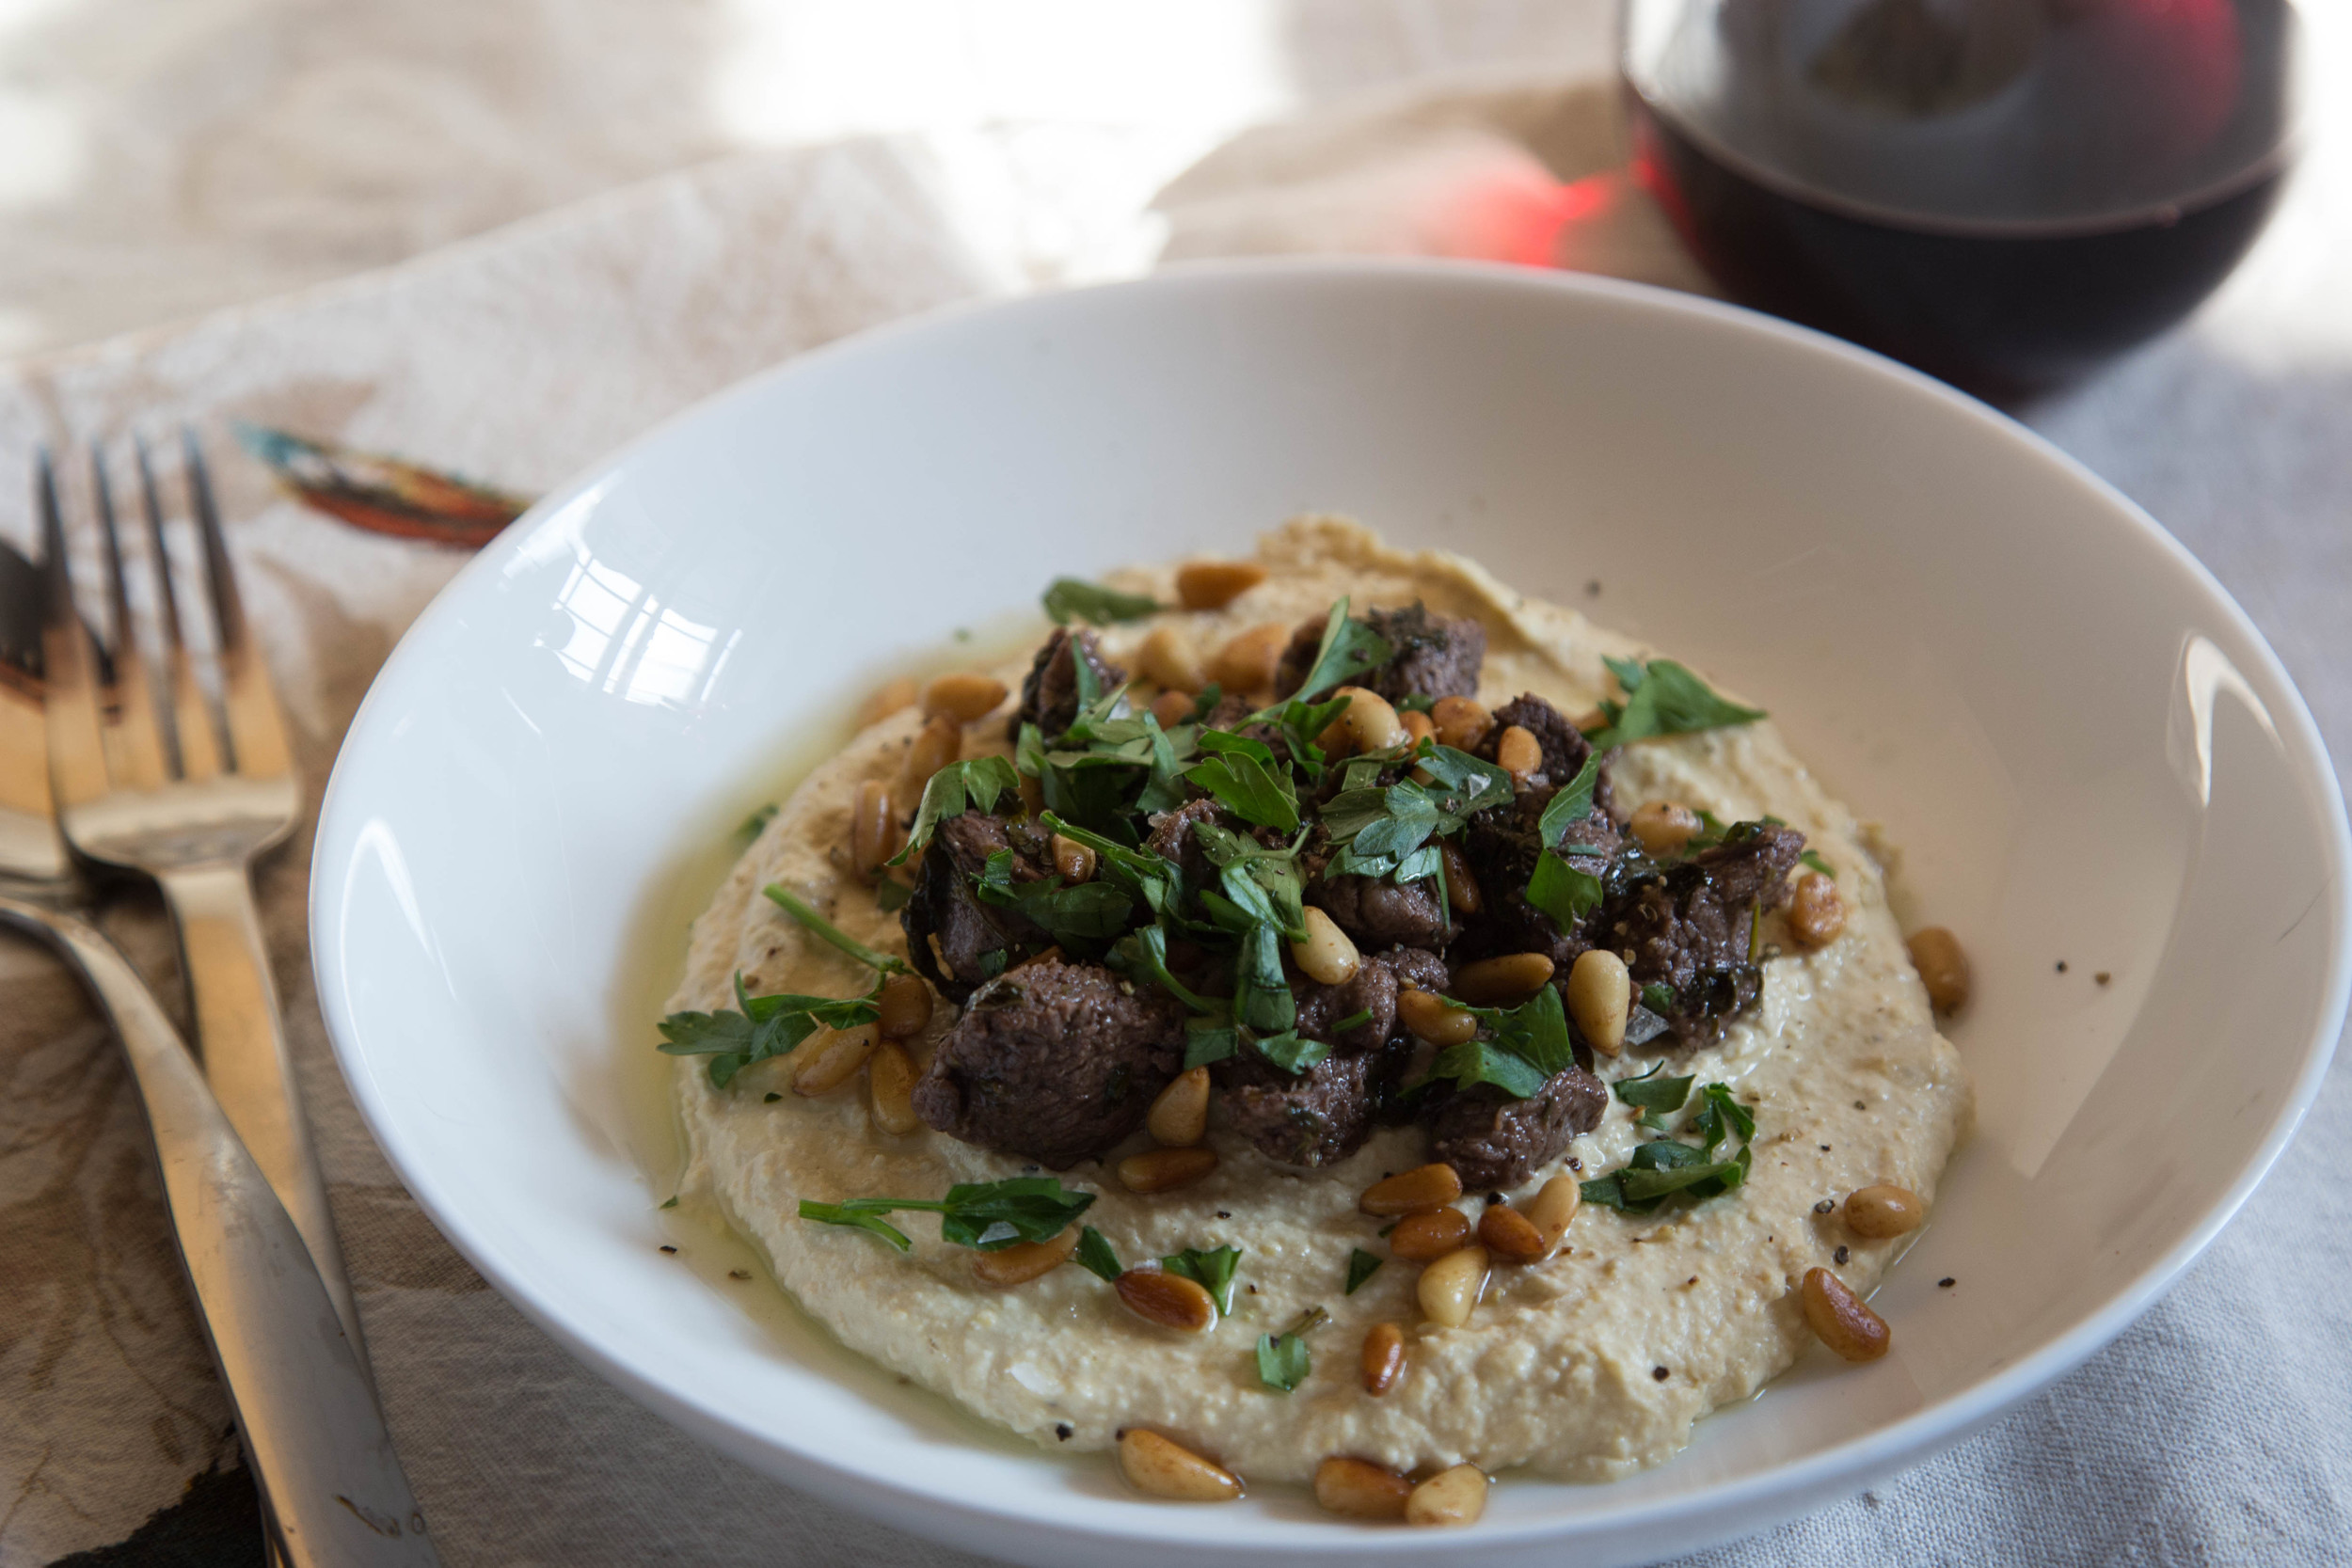
In the meantime, here is Ottolenghi and Tamimi's hummus kawarma aka hummus with lamb. This dish is not only one of my favorite things to eat, it's also one of my favorite things to make. The recipe flows so well. You put the chickpeas on to cook, then prepare the marinade for the meat, as the meat marinades, you make the hummus, once the hummus is done, you put the meat on to cook, as the meat cooks, you prepare the lemon sauce, and then you put the plate together. It sounds like a lot, but each step is short and simple. You're busy in the kitchen but never rushed or forced to multi-task.
Jerusalem is one of my favorite cookbooks. I have cooked my way through almost every recipe and aside from some burnt couscous and a bit of bitter eggplant (my own errors), everything I've made has blown me away. Tahini and pomegranate molasses are now stables in my kitchen and many of the recipes are on my regular rota.
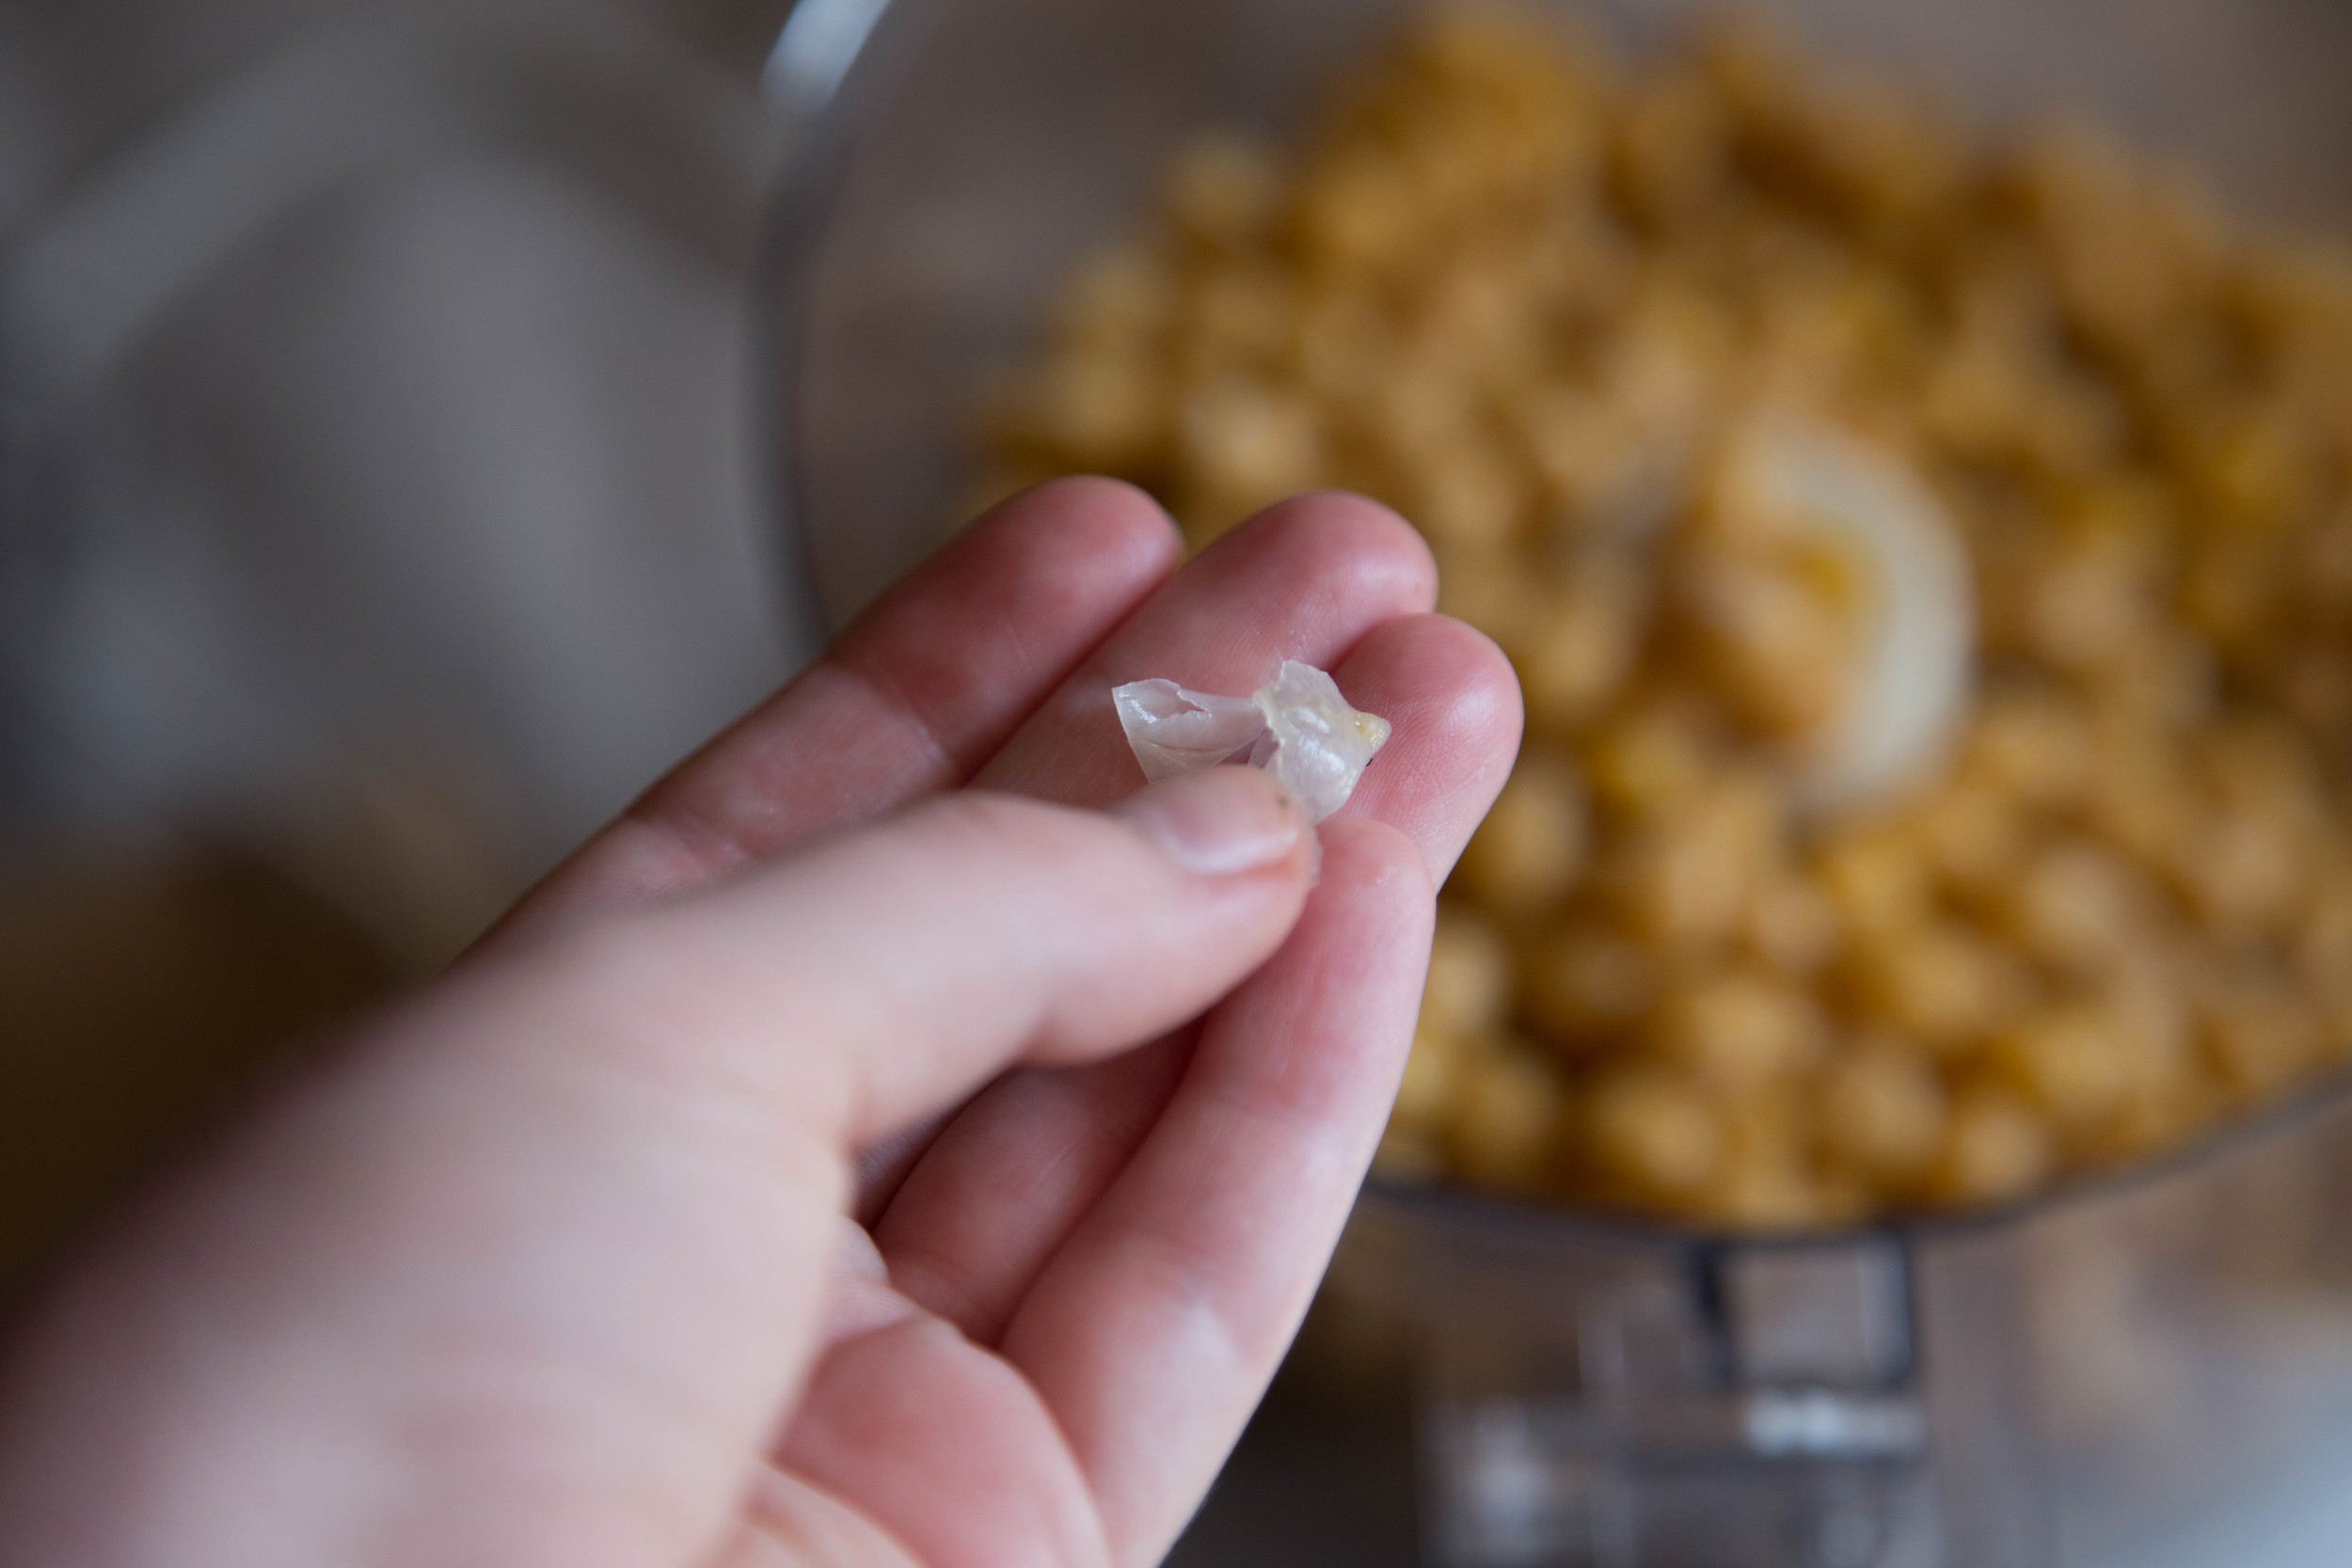
As you may know, I'm fussy about my hummus. I've been making it for years now and I've picked up certain tips along the way; cook the chickpeas with baking soda (it speeds up the process and helps remove the starch), remove the loose skins from the chickpeas (it makes the hummus smoother), use the water you cook the chickpeas in to make the hummus (it adds more flavor). But the specific recipe itself is something you just have to feel out. Everyone has certain preference (less garlic, more lemon etc.), once you start making it you'll learn how much of everything you like. It's also helpful to think of hummus a bit like gazpacho, the flavors combine and mellow overnight, so don't worry too much... I've made plenty of batches I thought we're too much 'something' but tasted great after 24 hours in the fridge!
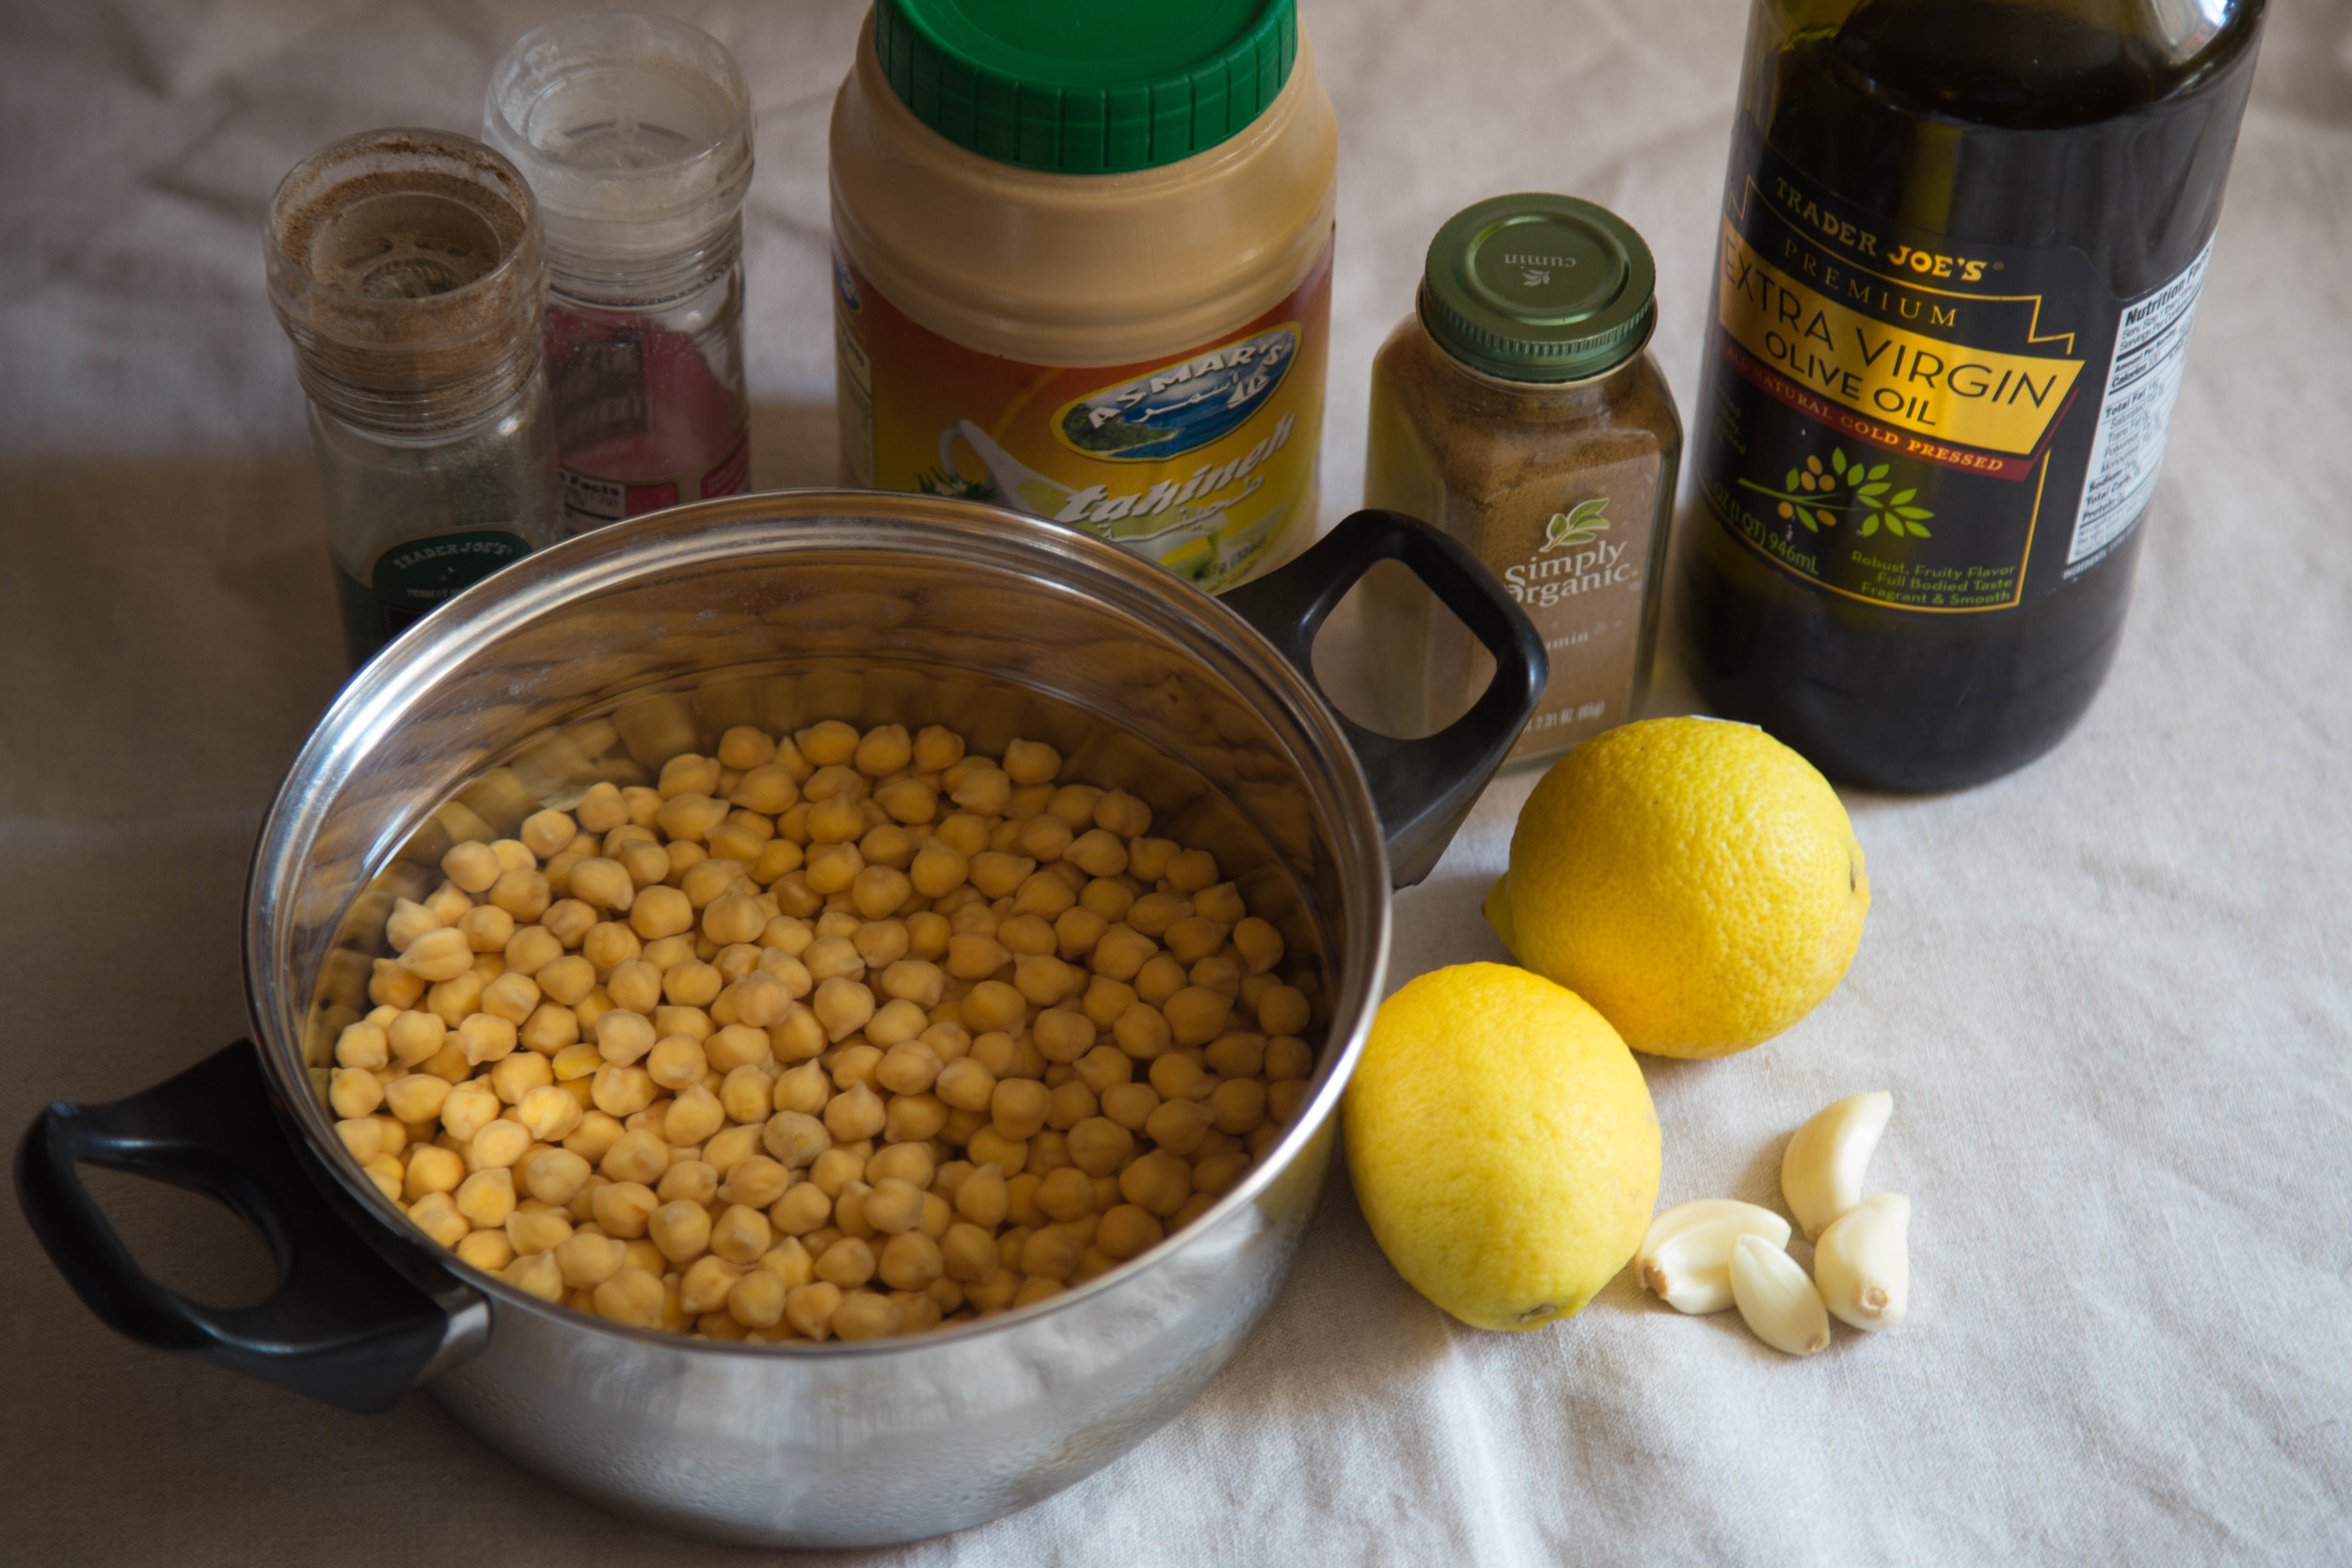
Stuff for Hummus
1 cup dried chickpeas
pinch baking soda
1/2 cup tanhini
juice from 2 lemons
2 big garlic cloves
pinch cumin
1/4 olive oil
salt & pepper
Steps for Hummus
Soak the chickpeas over night (they drink a lot, so make sure they have plenty of water). Put chickpeas on to boil and add a pinch of salt and baking soda. Boil for about 40 mins or until they're done and their skins begin to loosen.
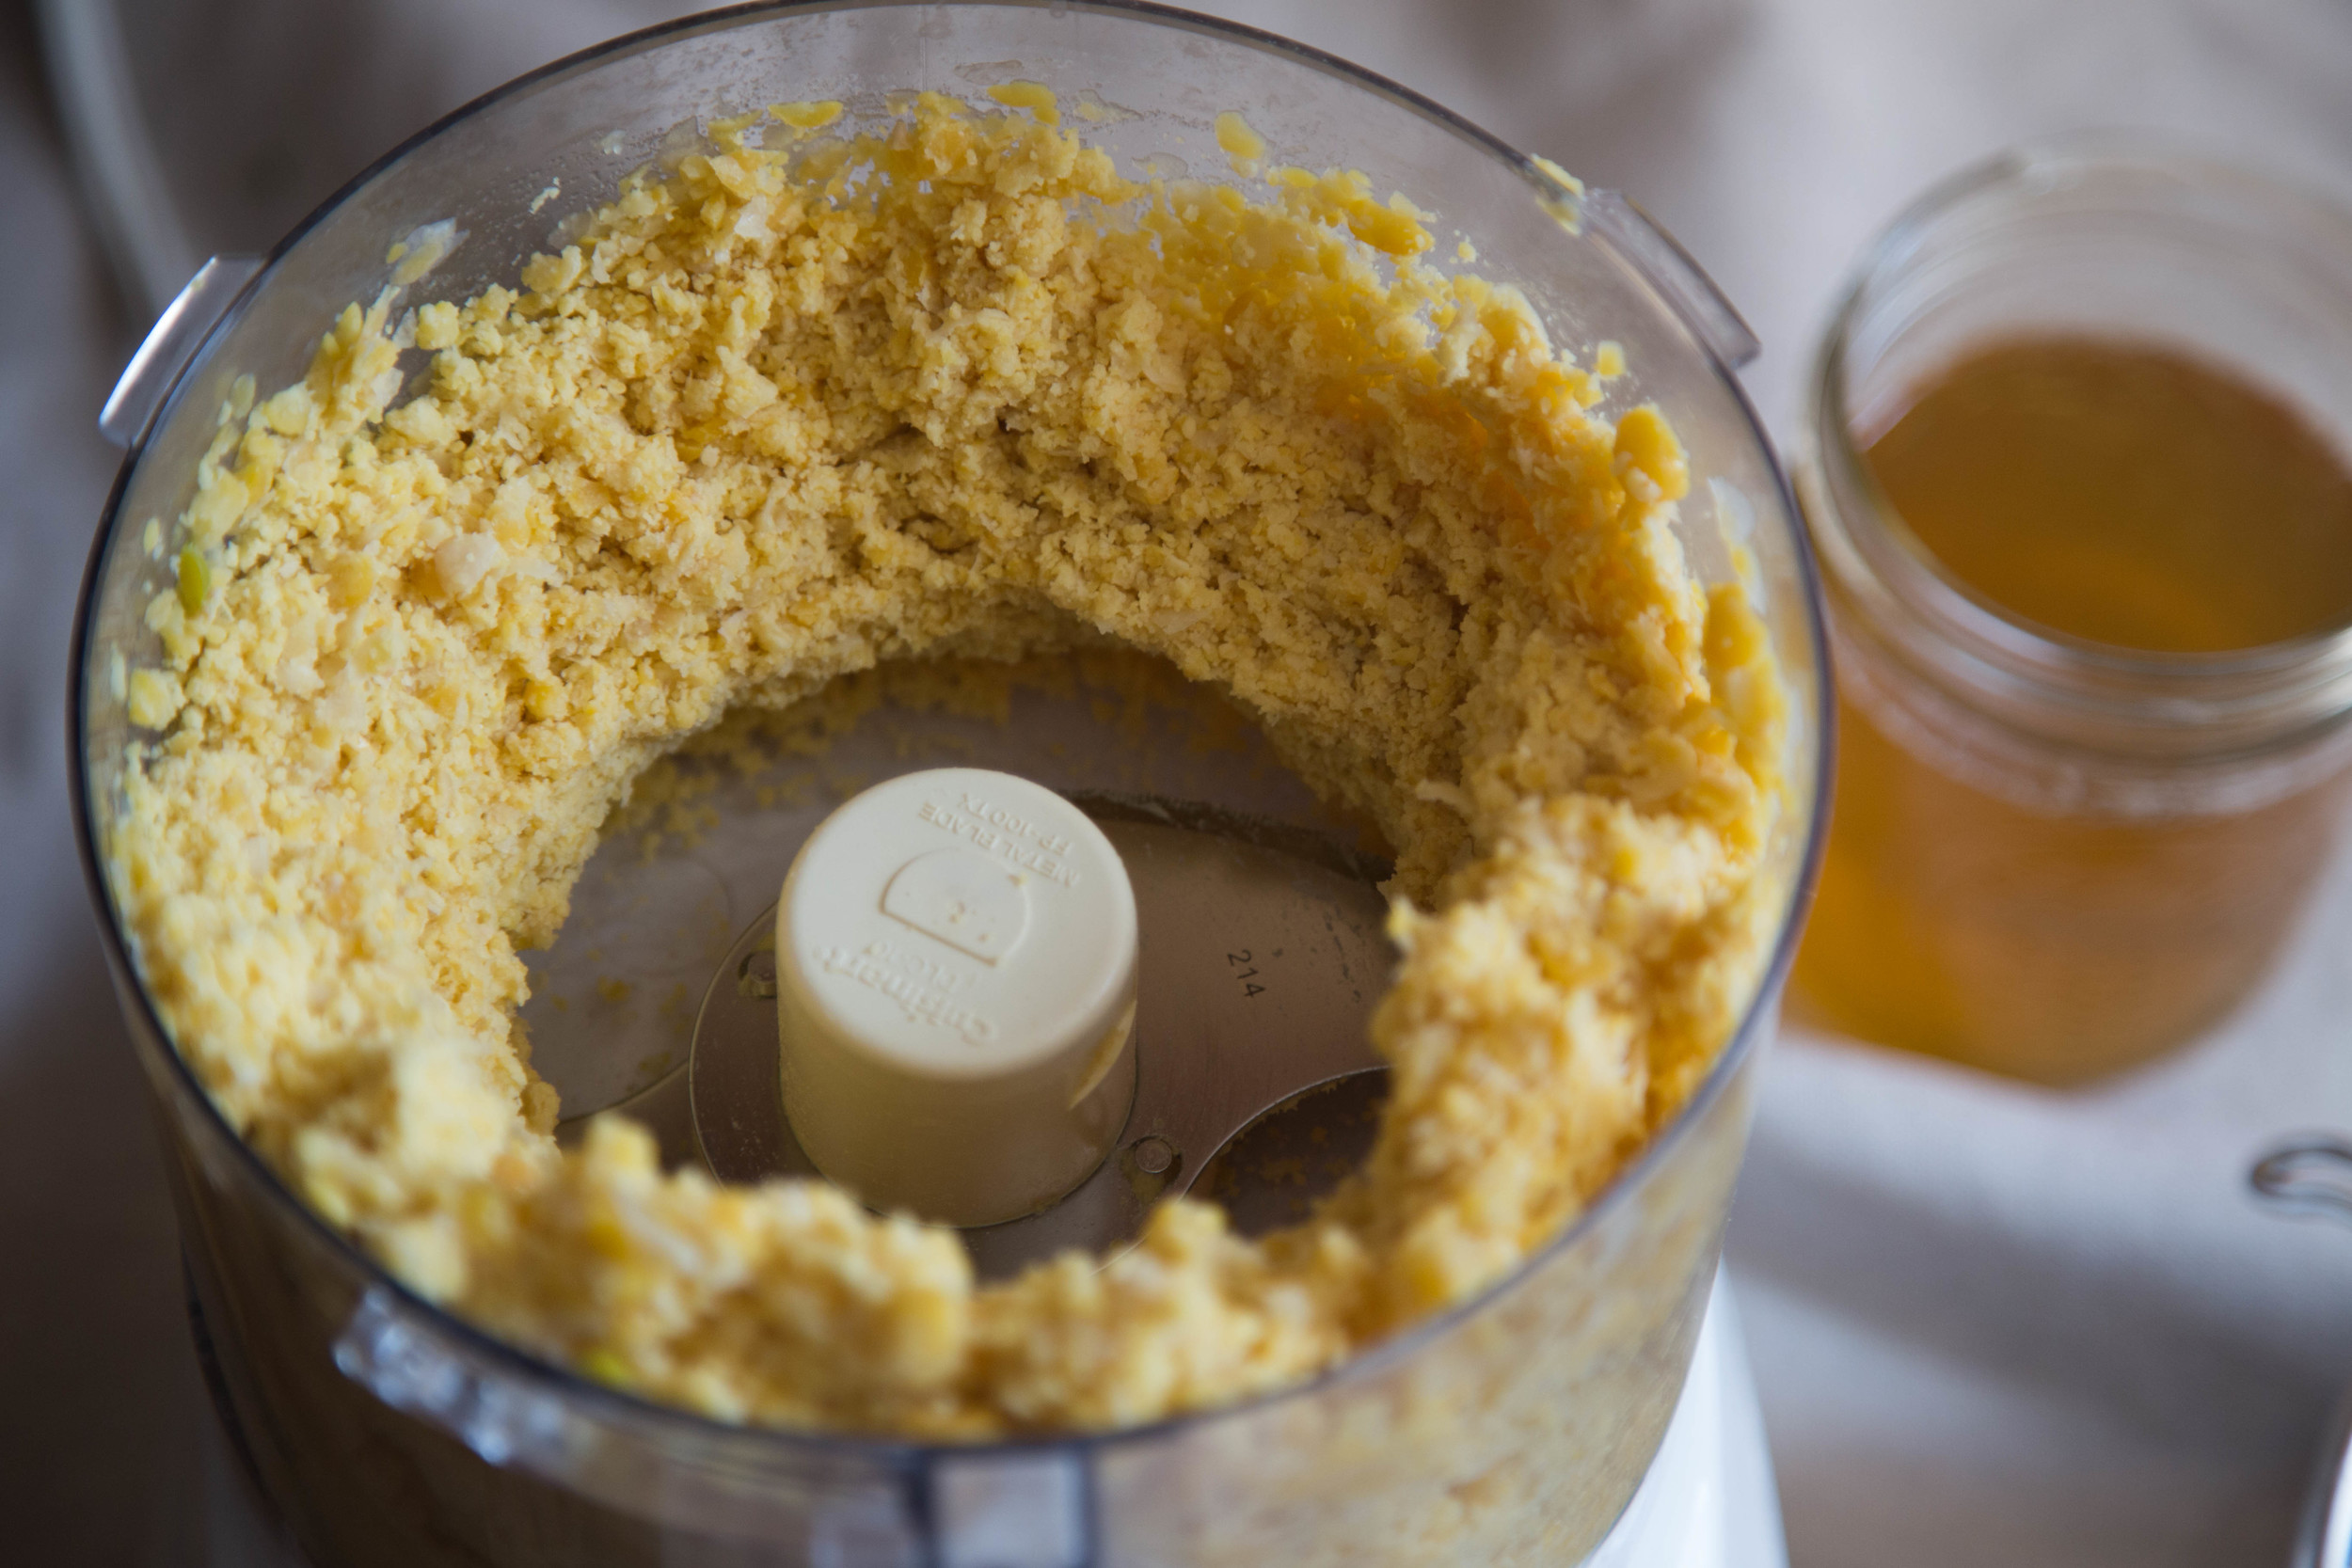
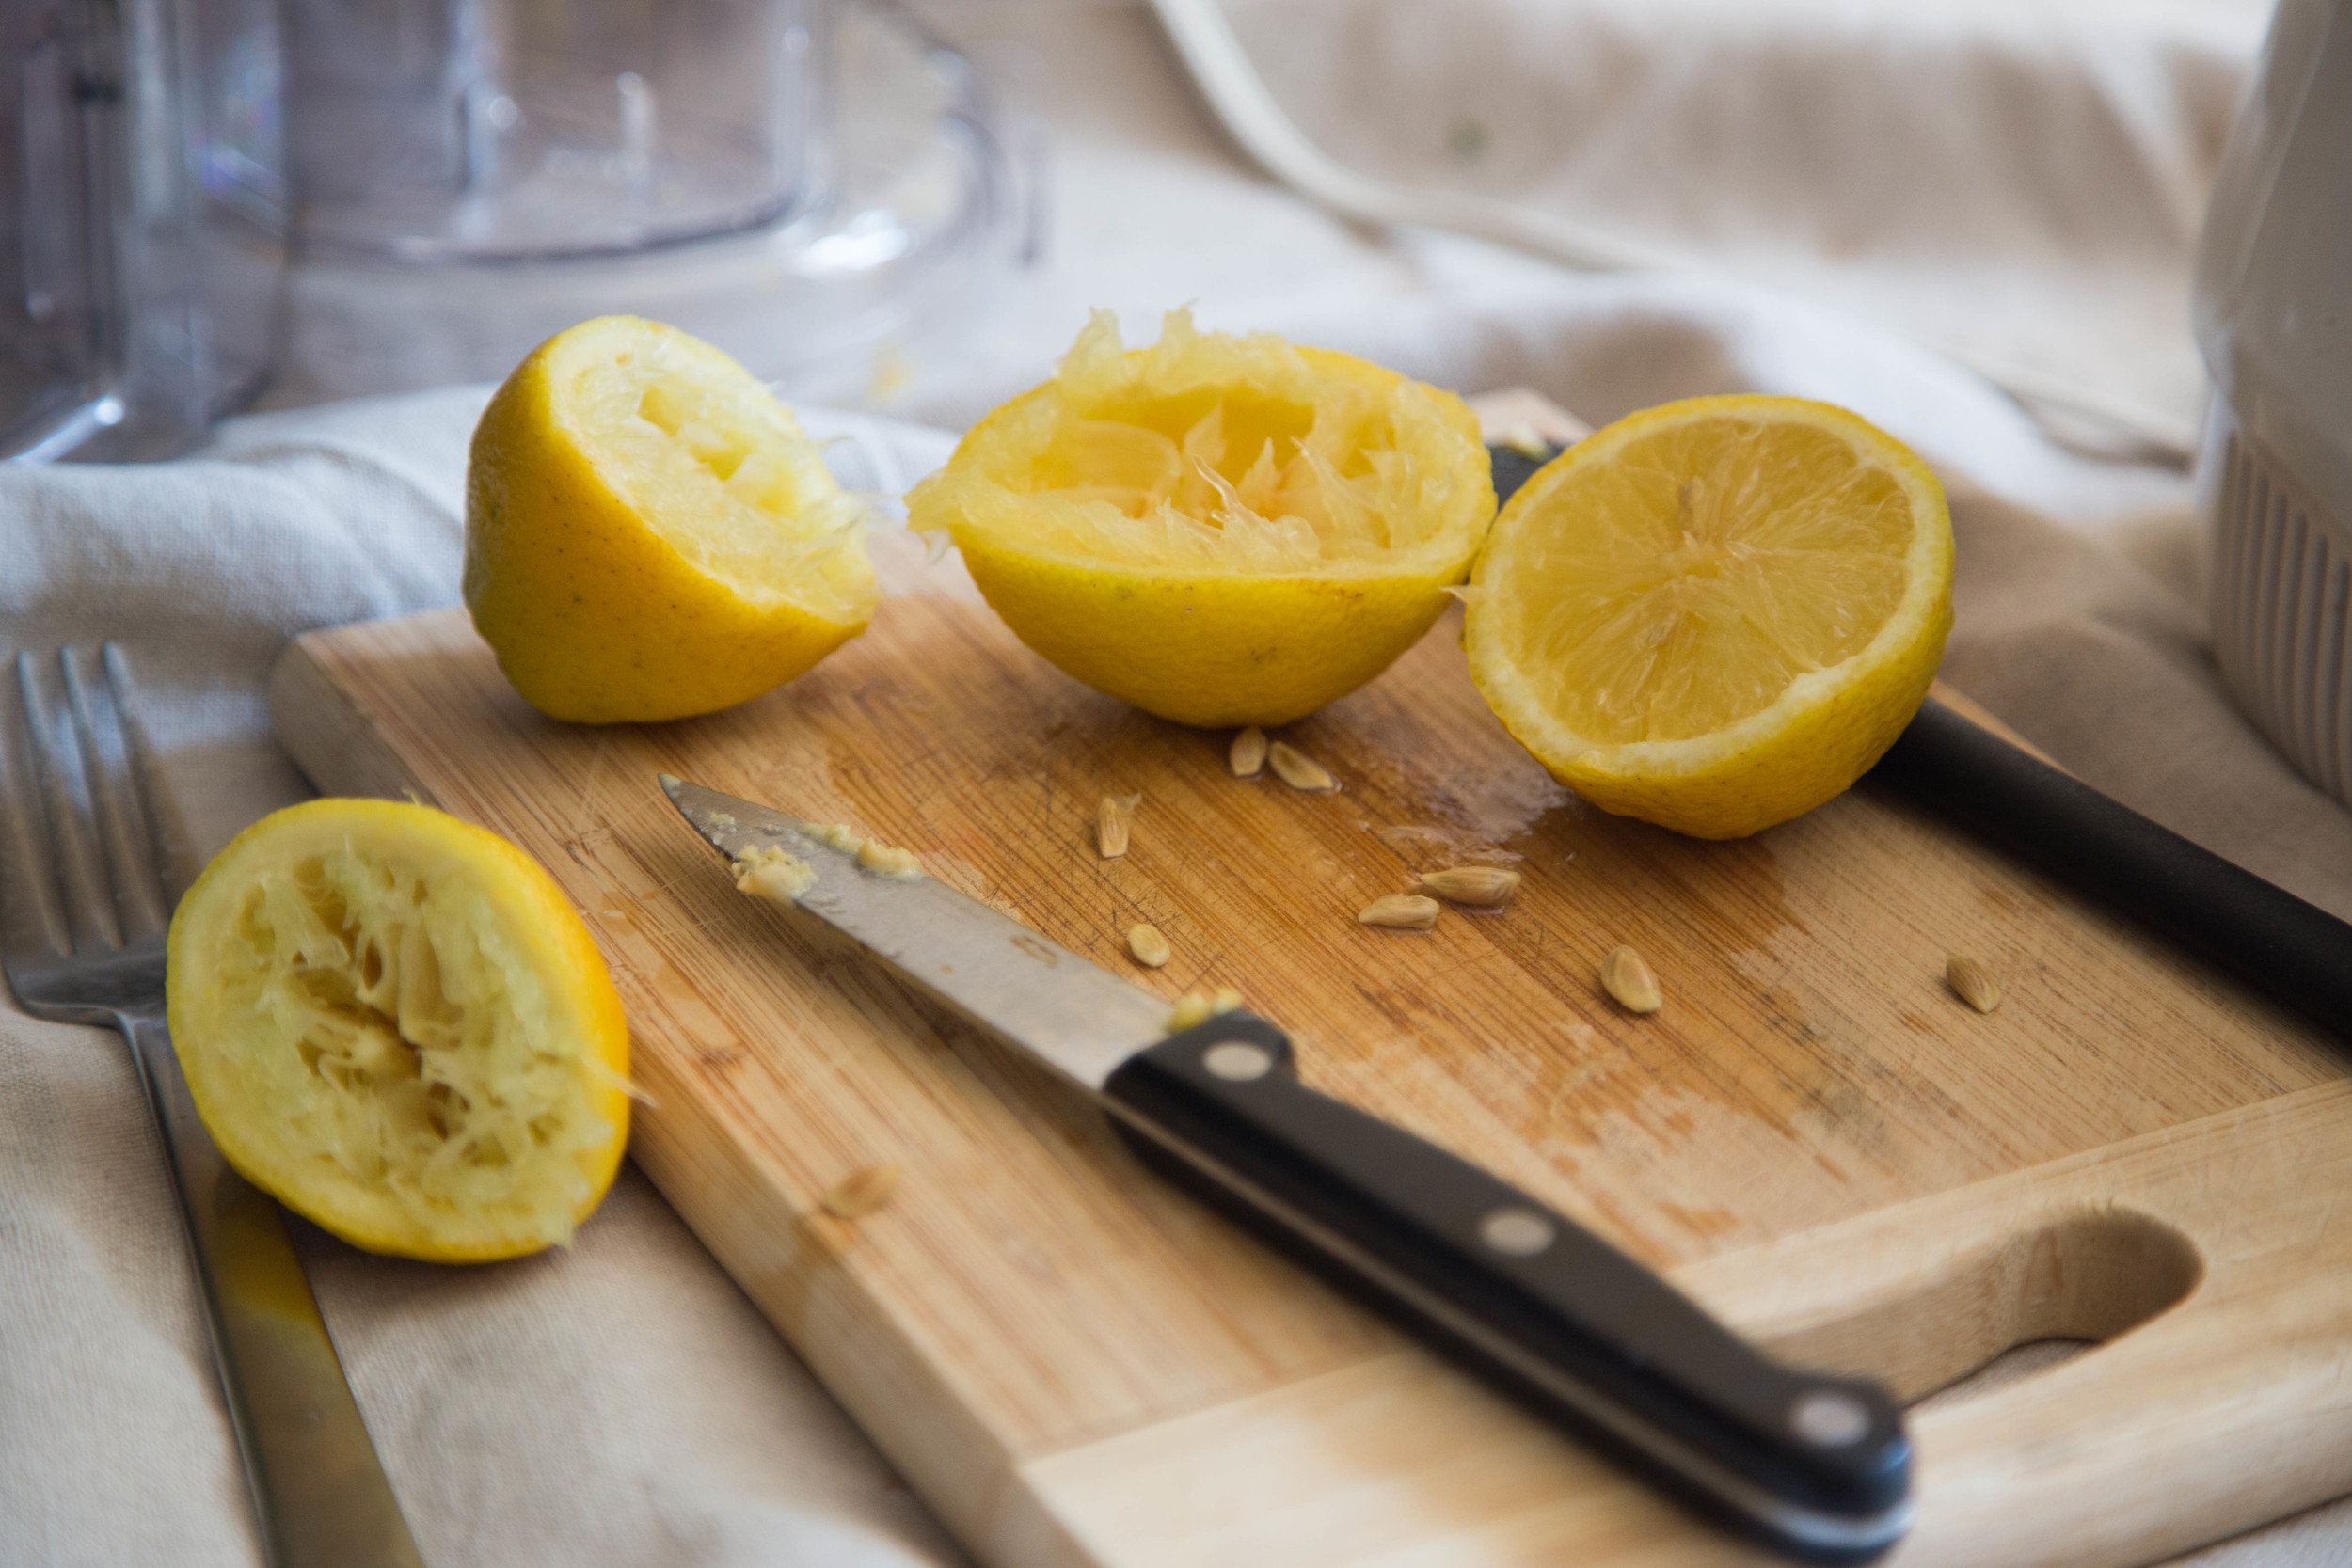
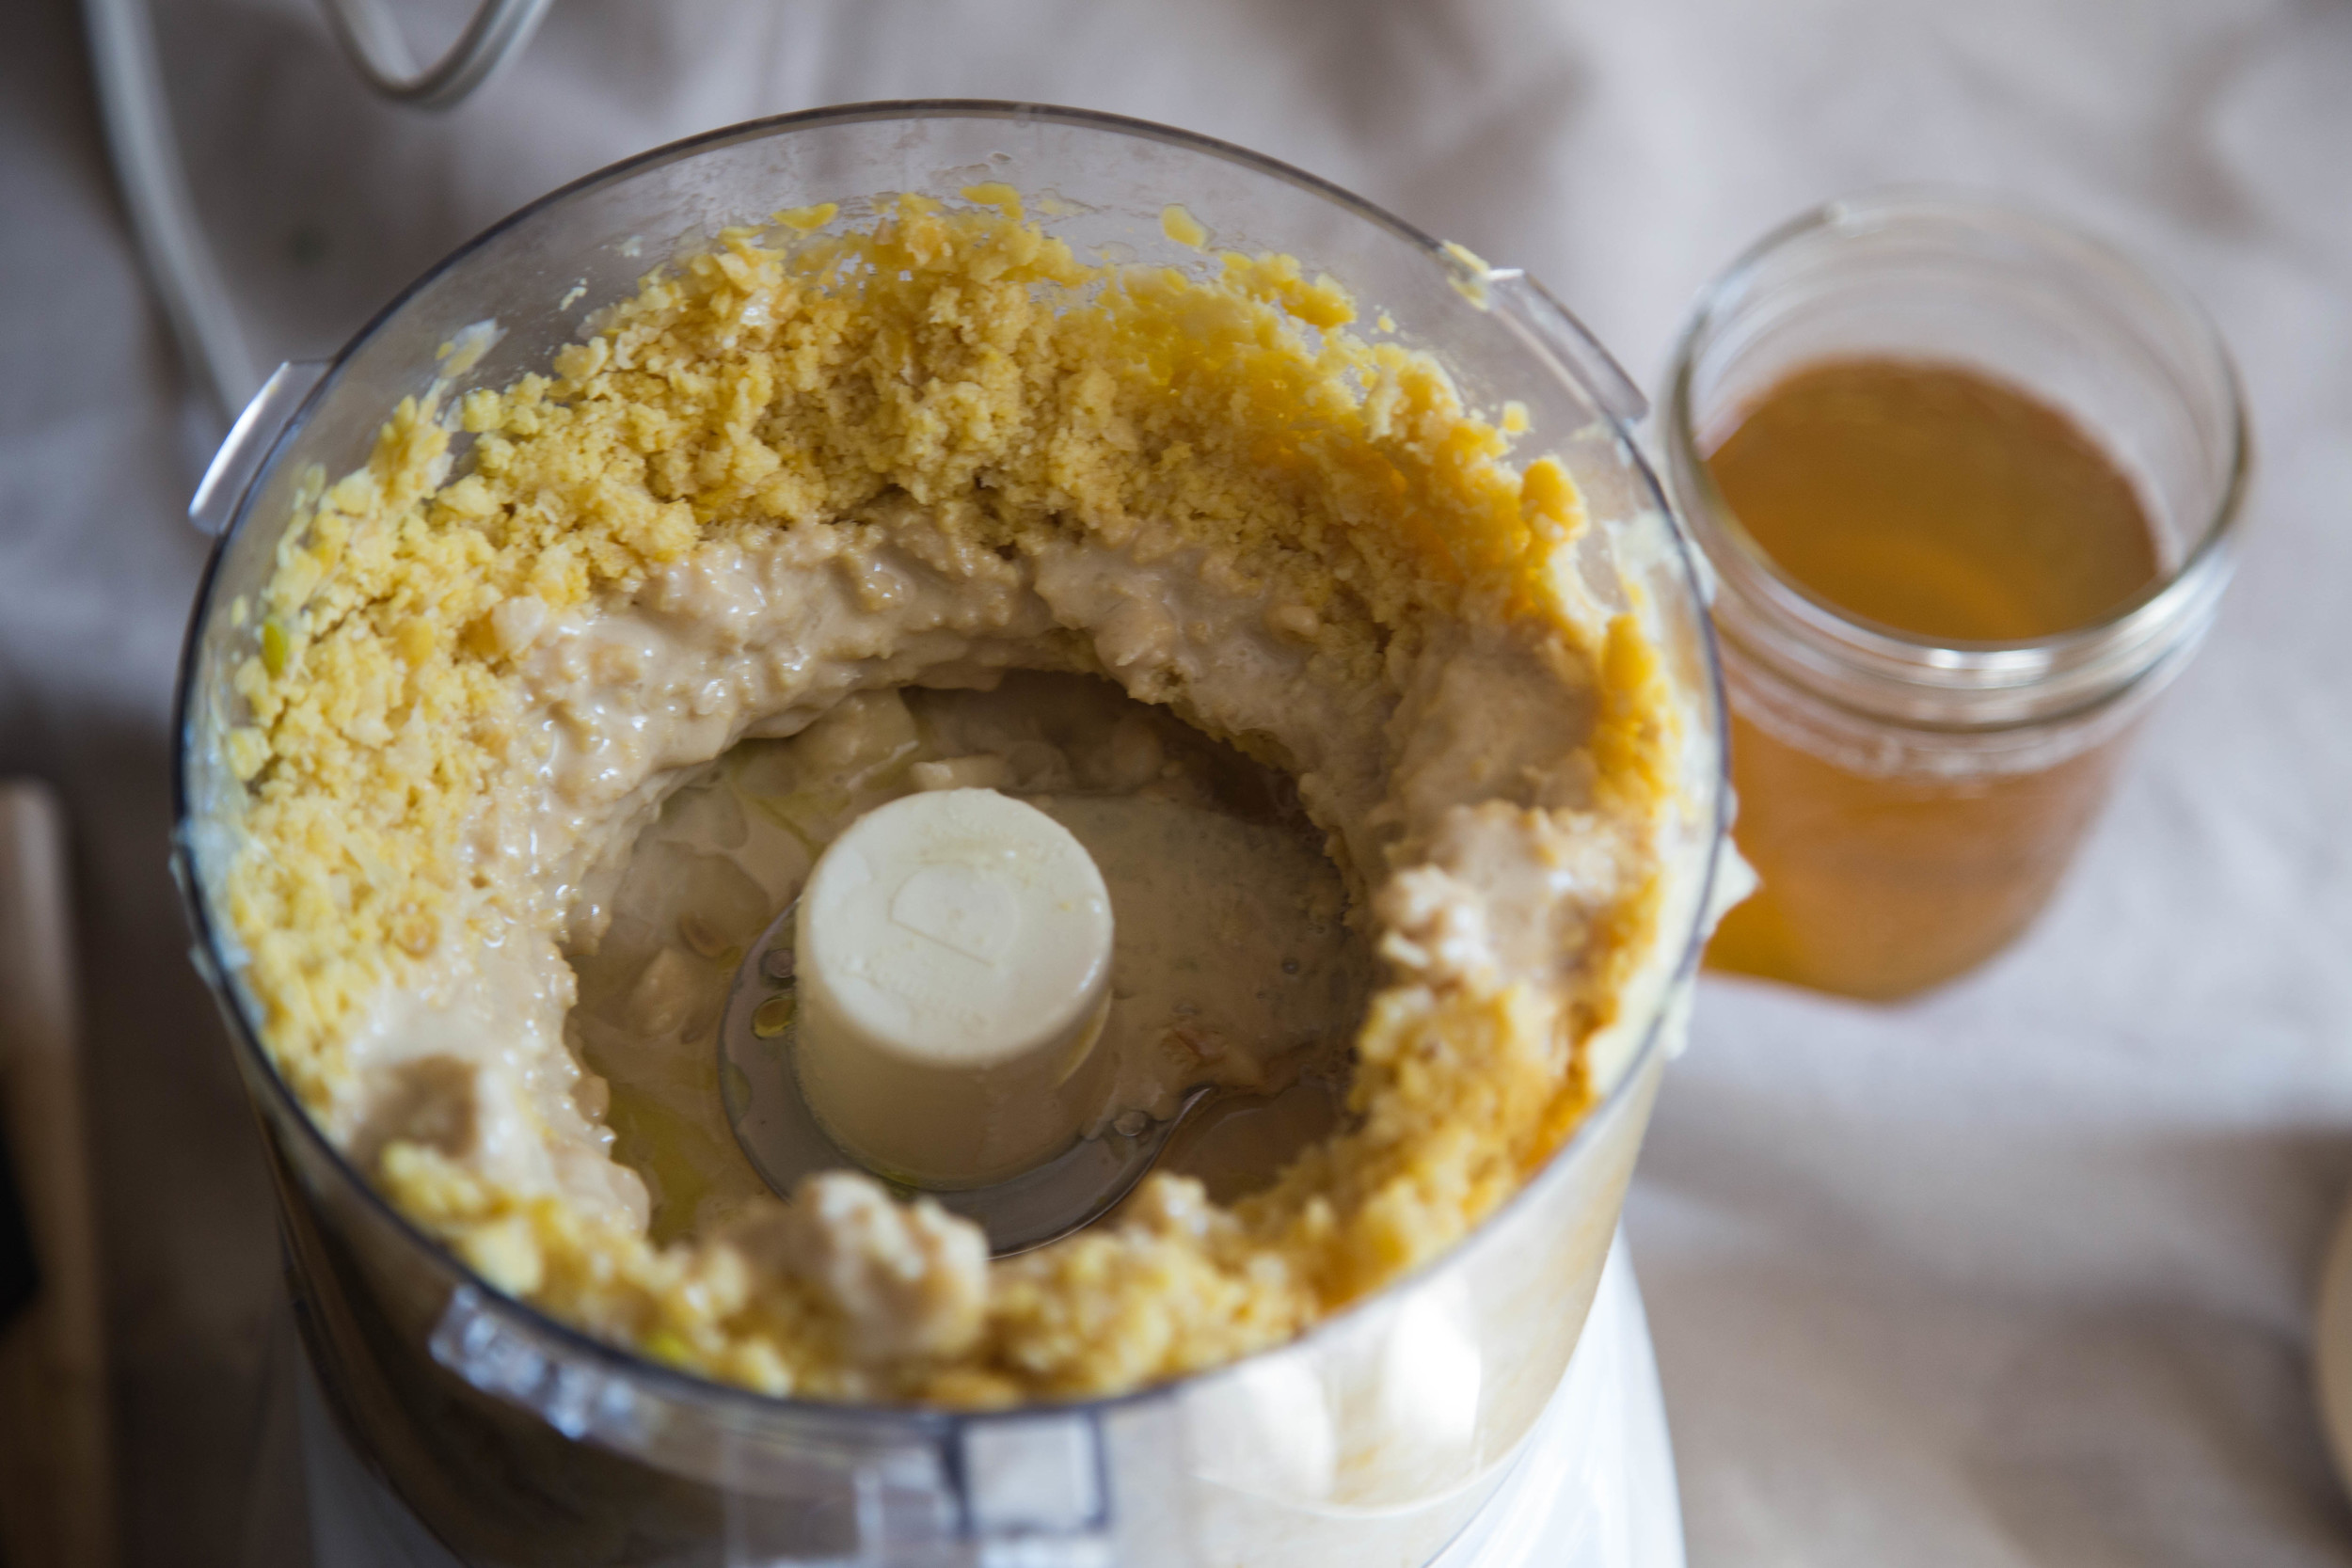
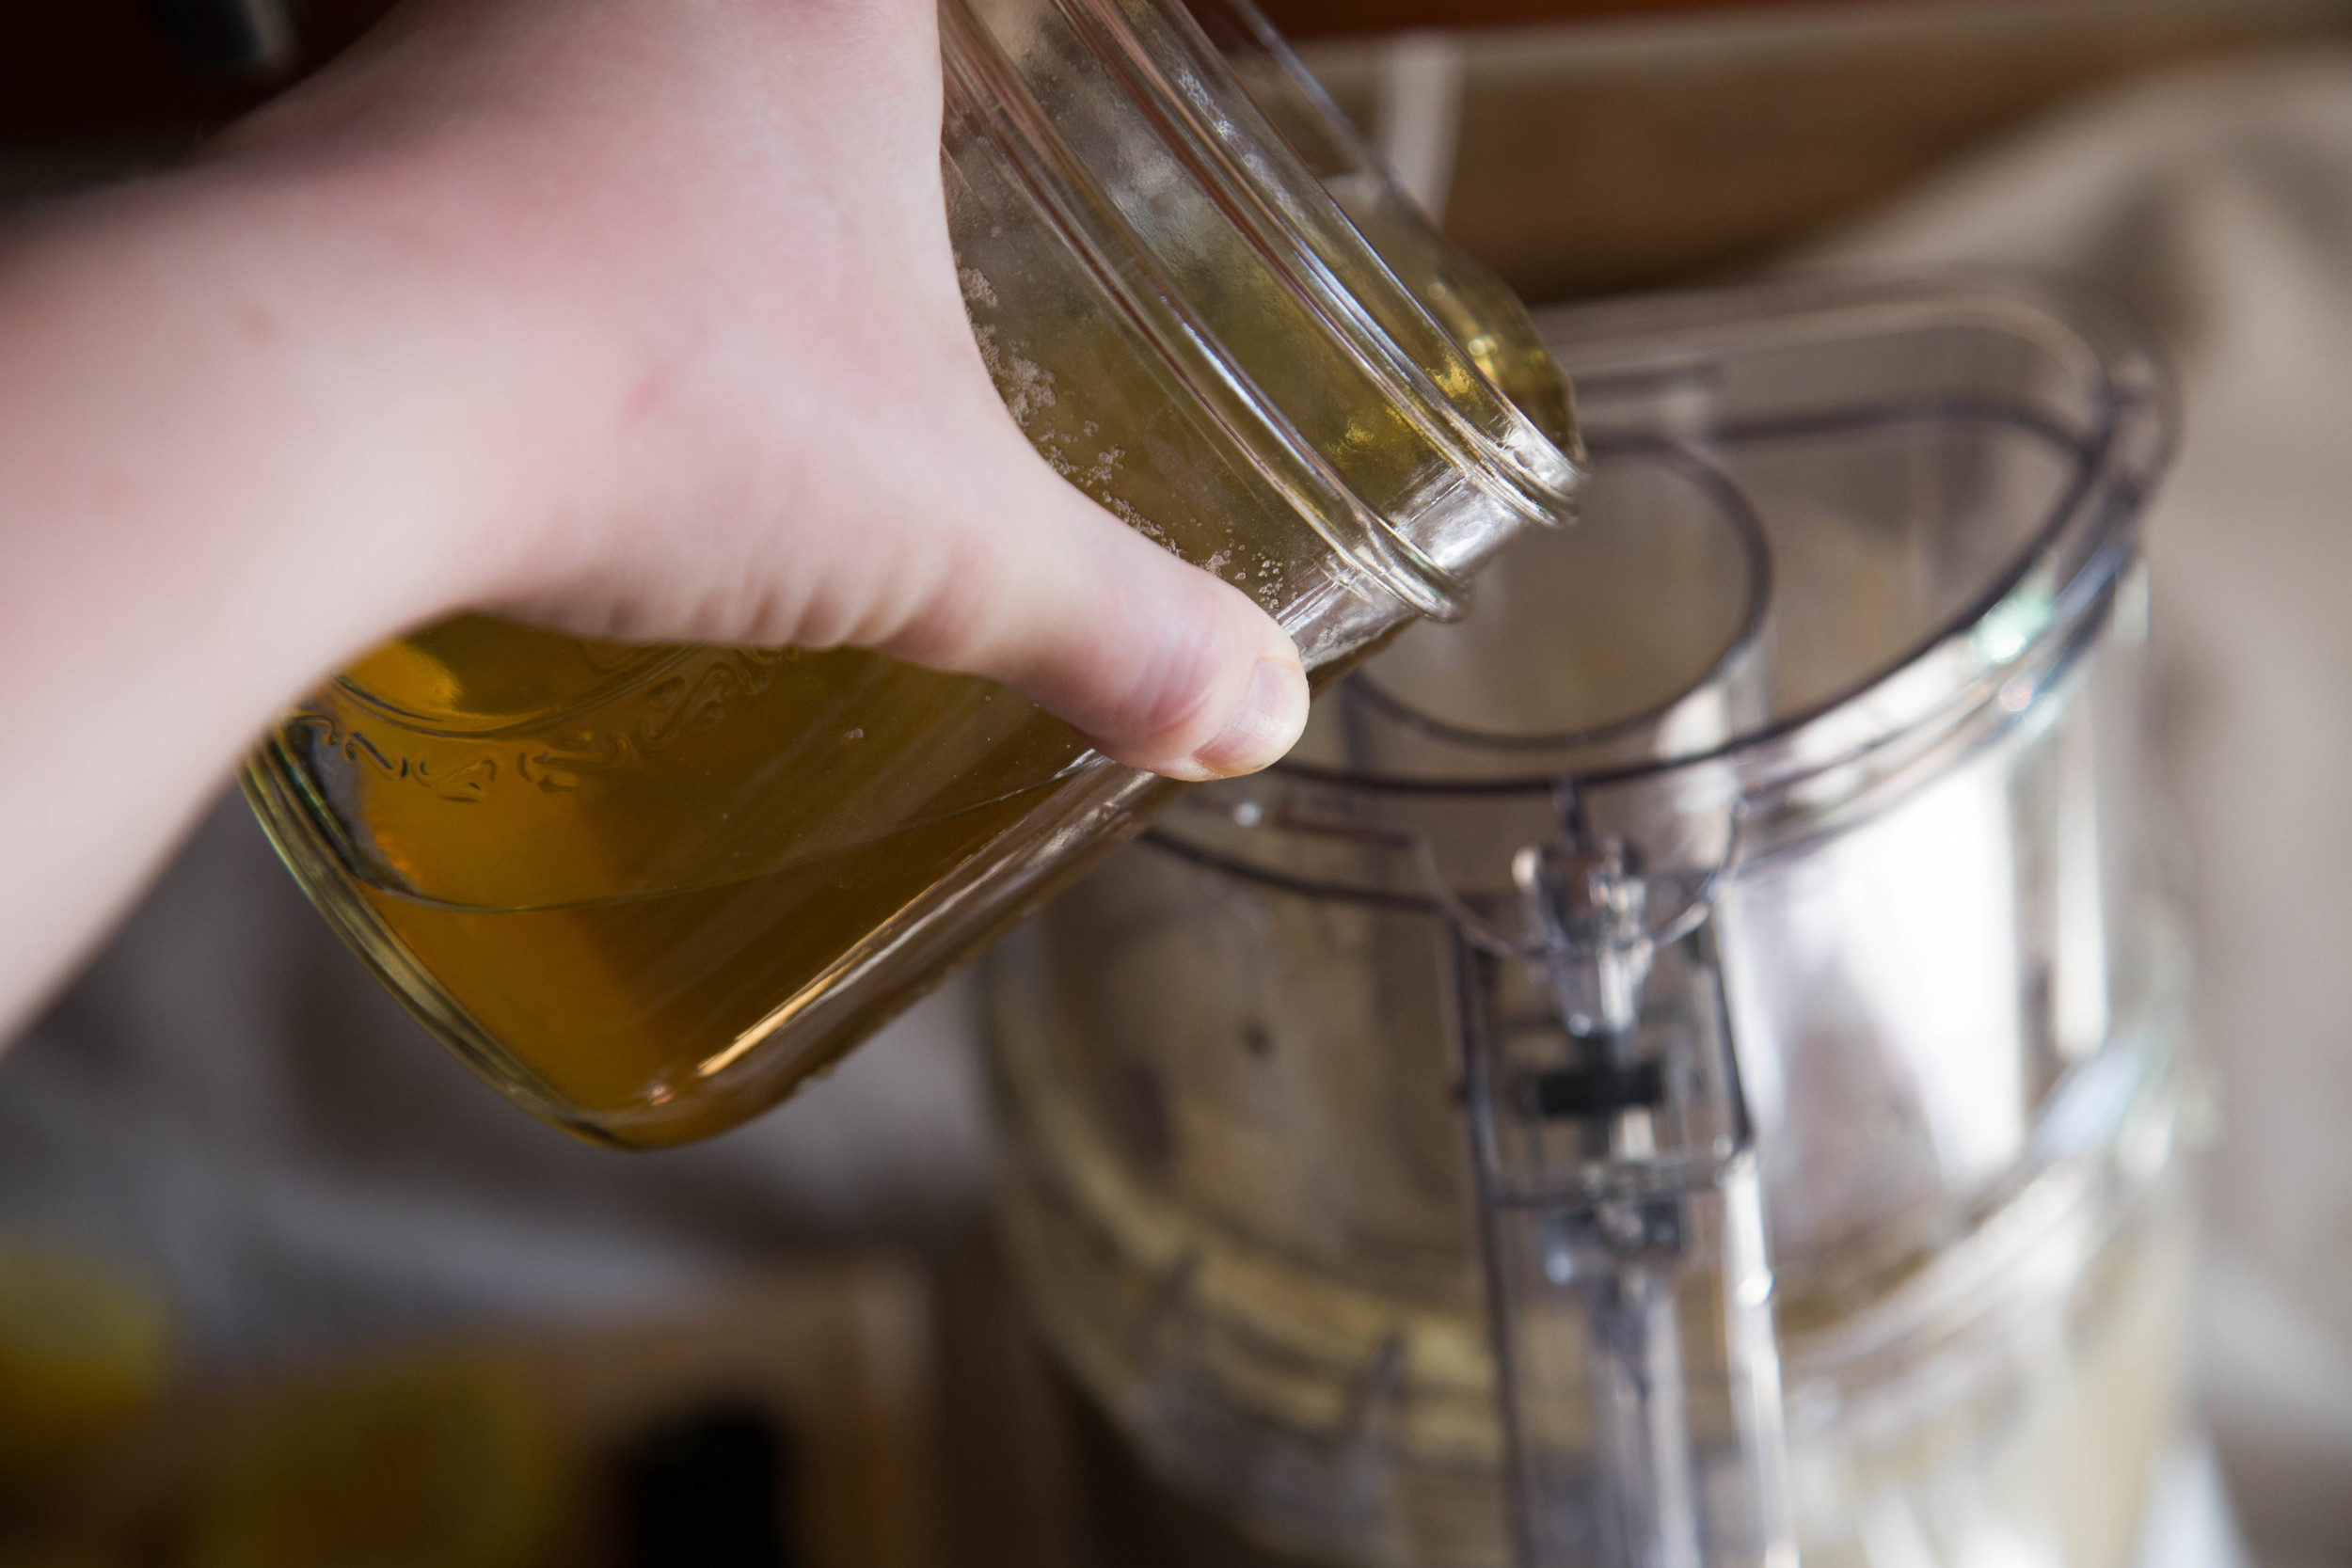
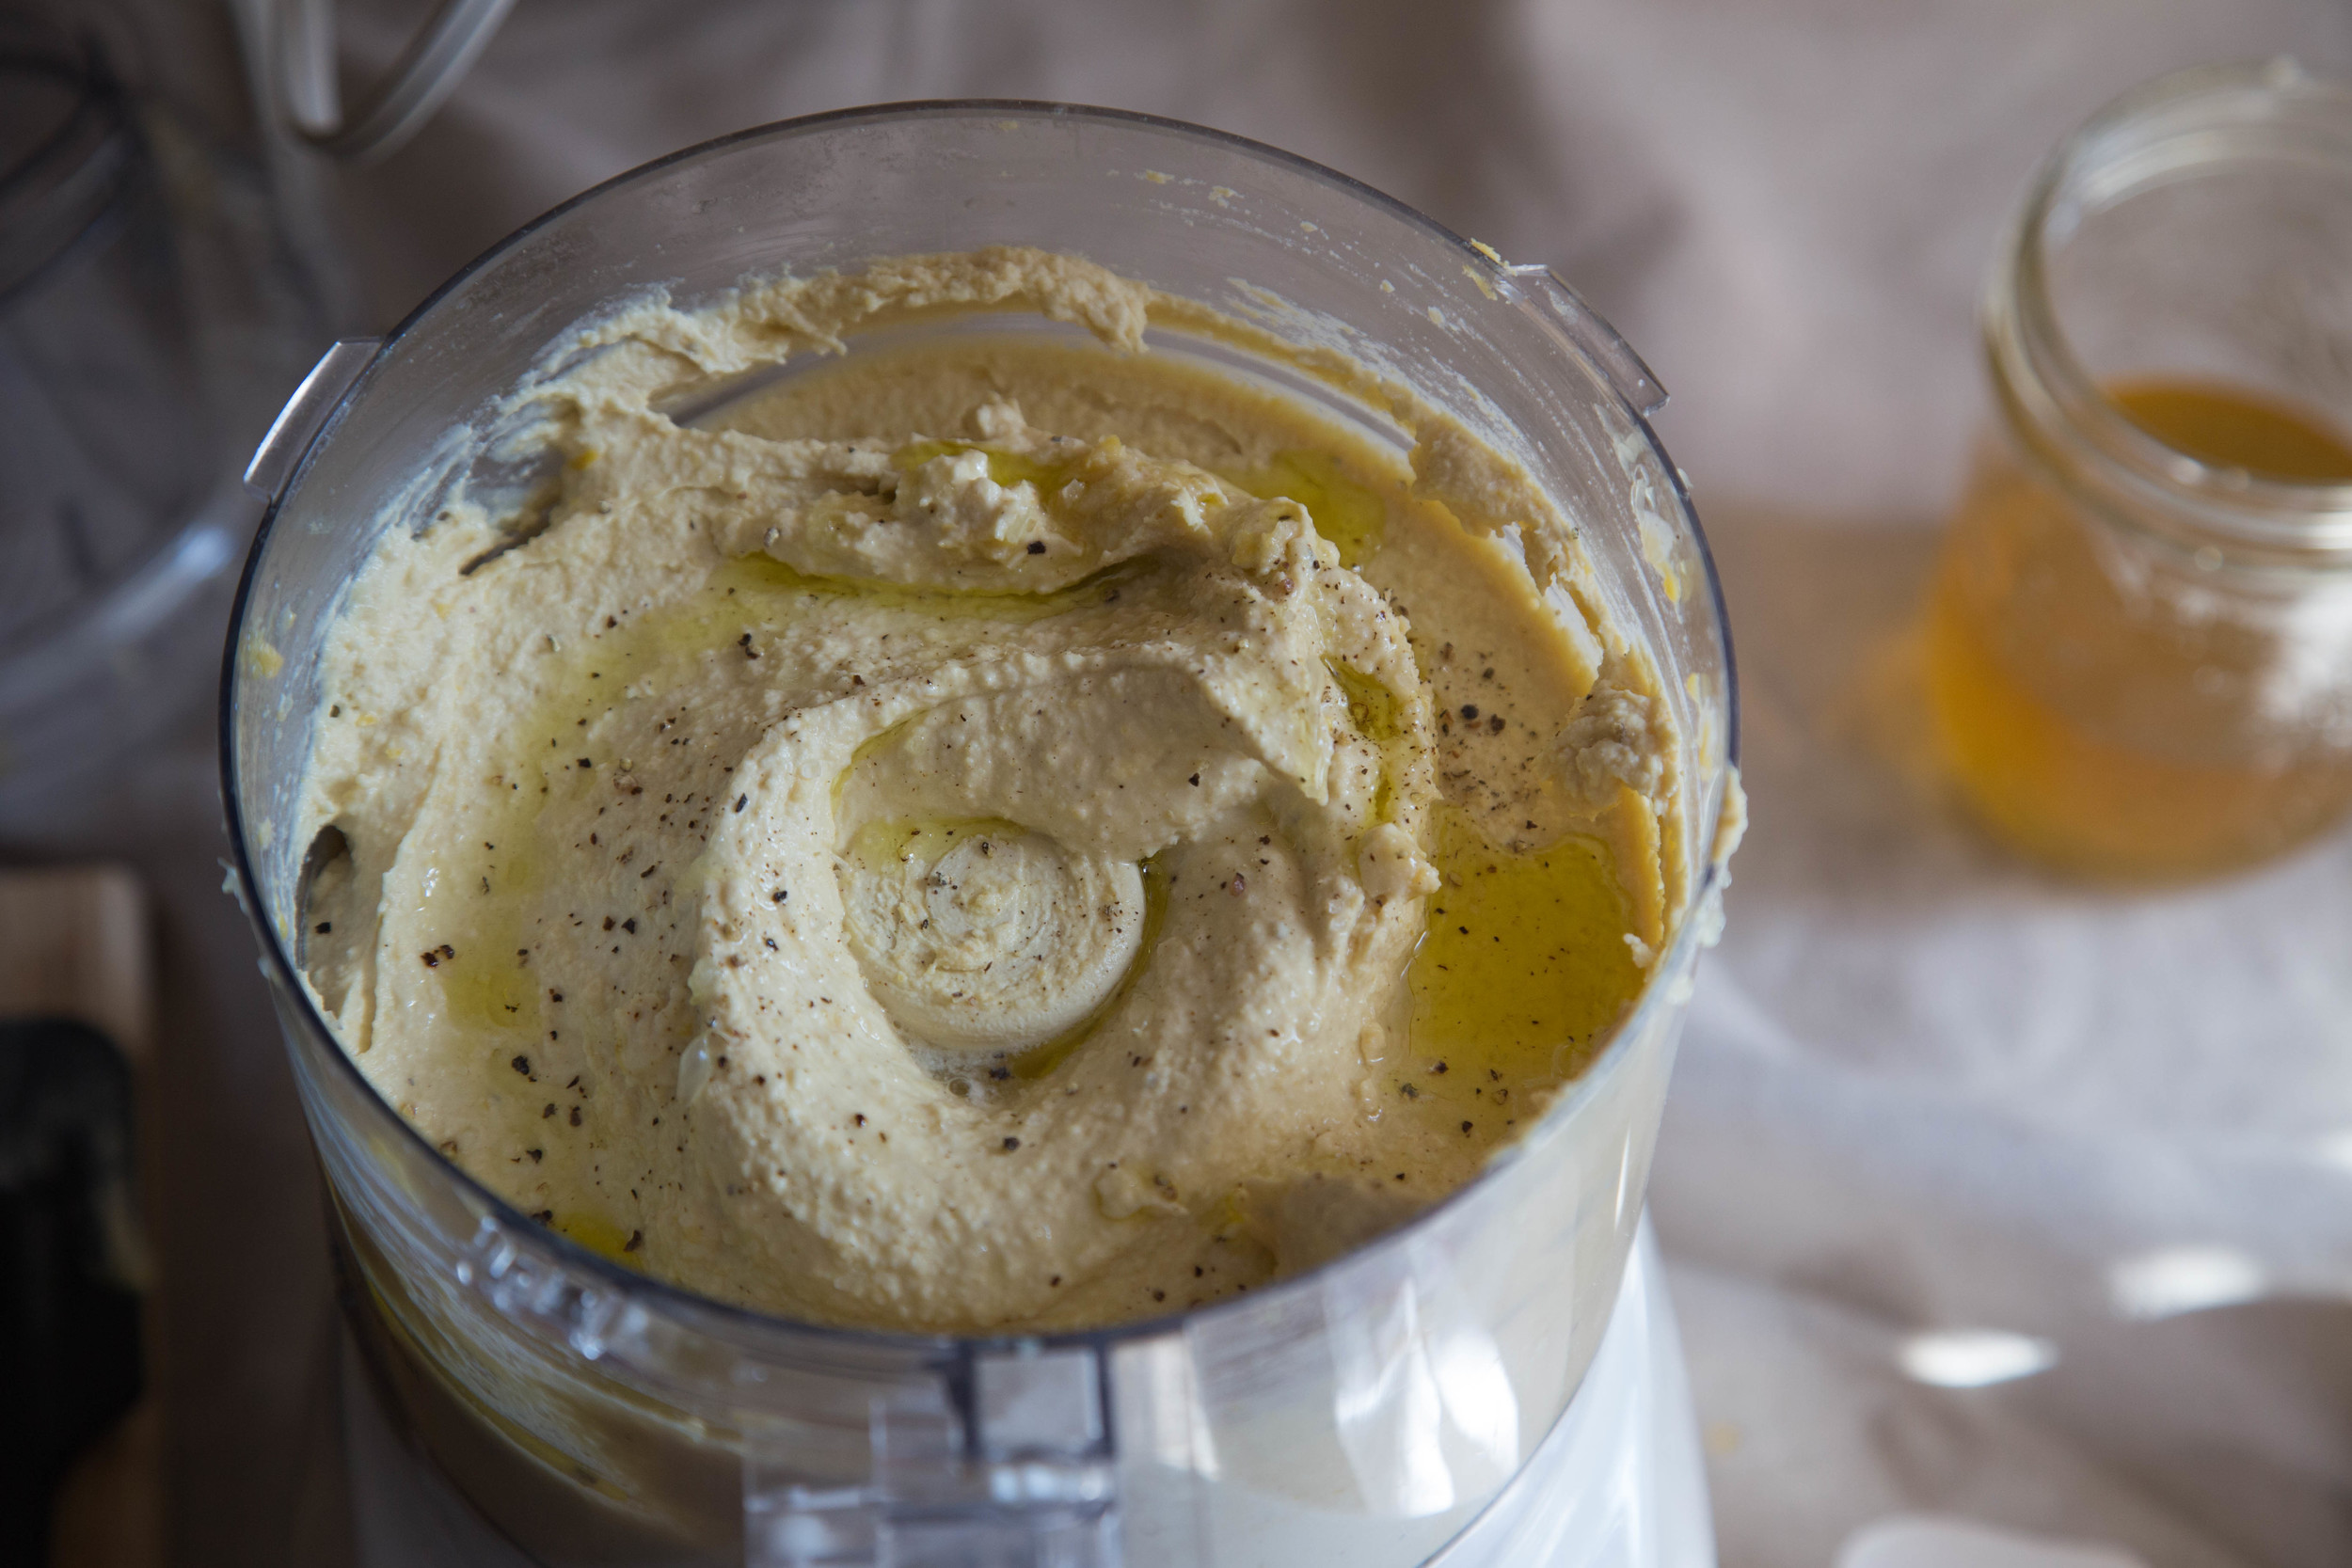
Drain chickpeas but keep the cooking water. Put chickpeas in the food processor with the garlic and blitz for about 30 seconds - 1 minute. Add tahini, most of the lemon juice, cumin, most of the olive oil, salt & pepper. Blitz again and slowly pour in a little of the chickpea water until the mixture turns smooth.
Taste and add in extra lemon, olive oil, salt, or whatever else it needs. Blitz again. Repeat this process until desired taste and consistency are reached. Once done, store hummus in a airtight container in the fridge.
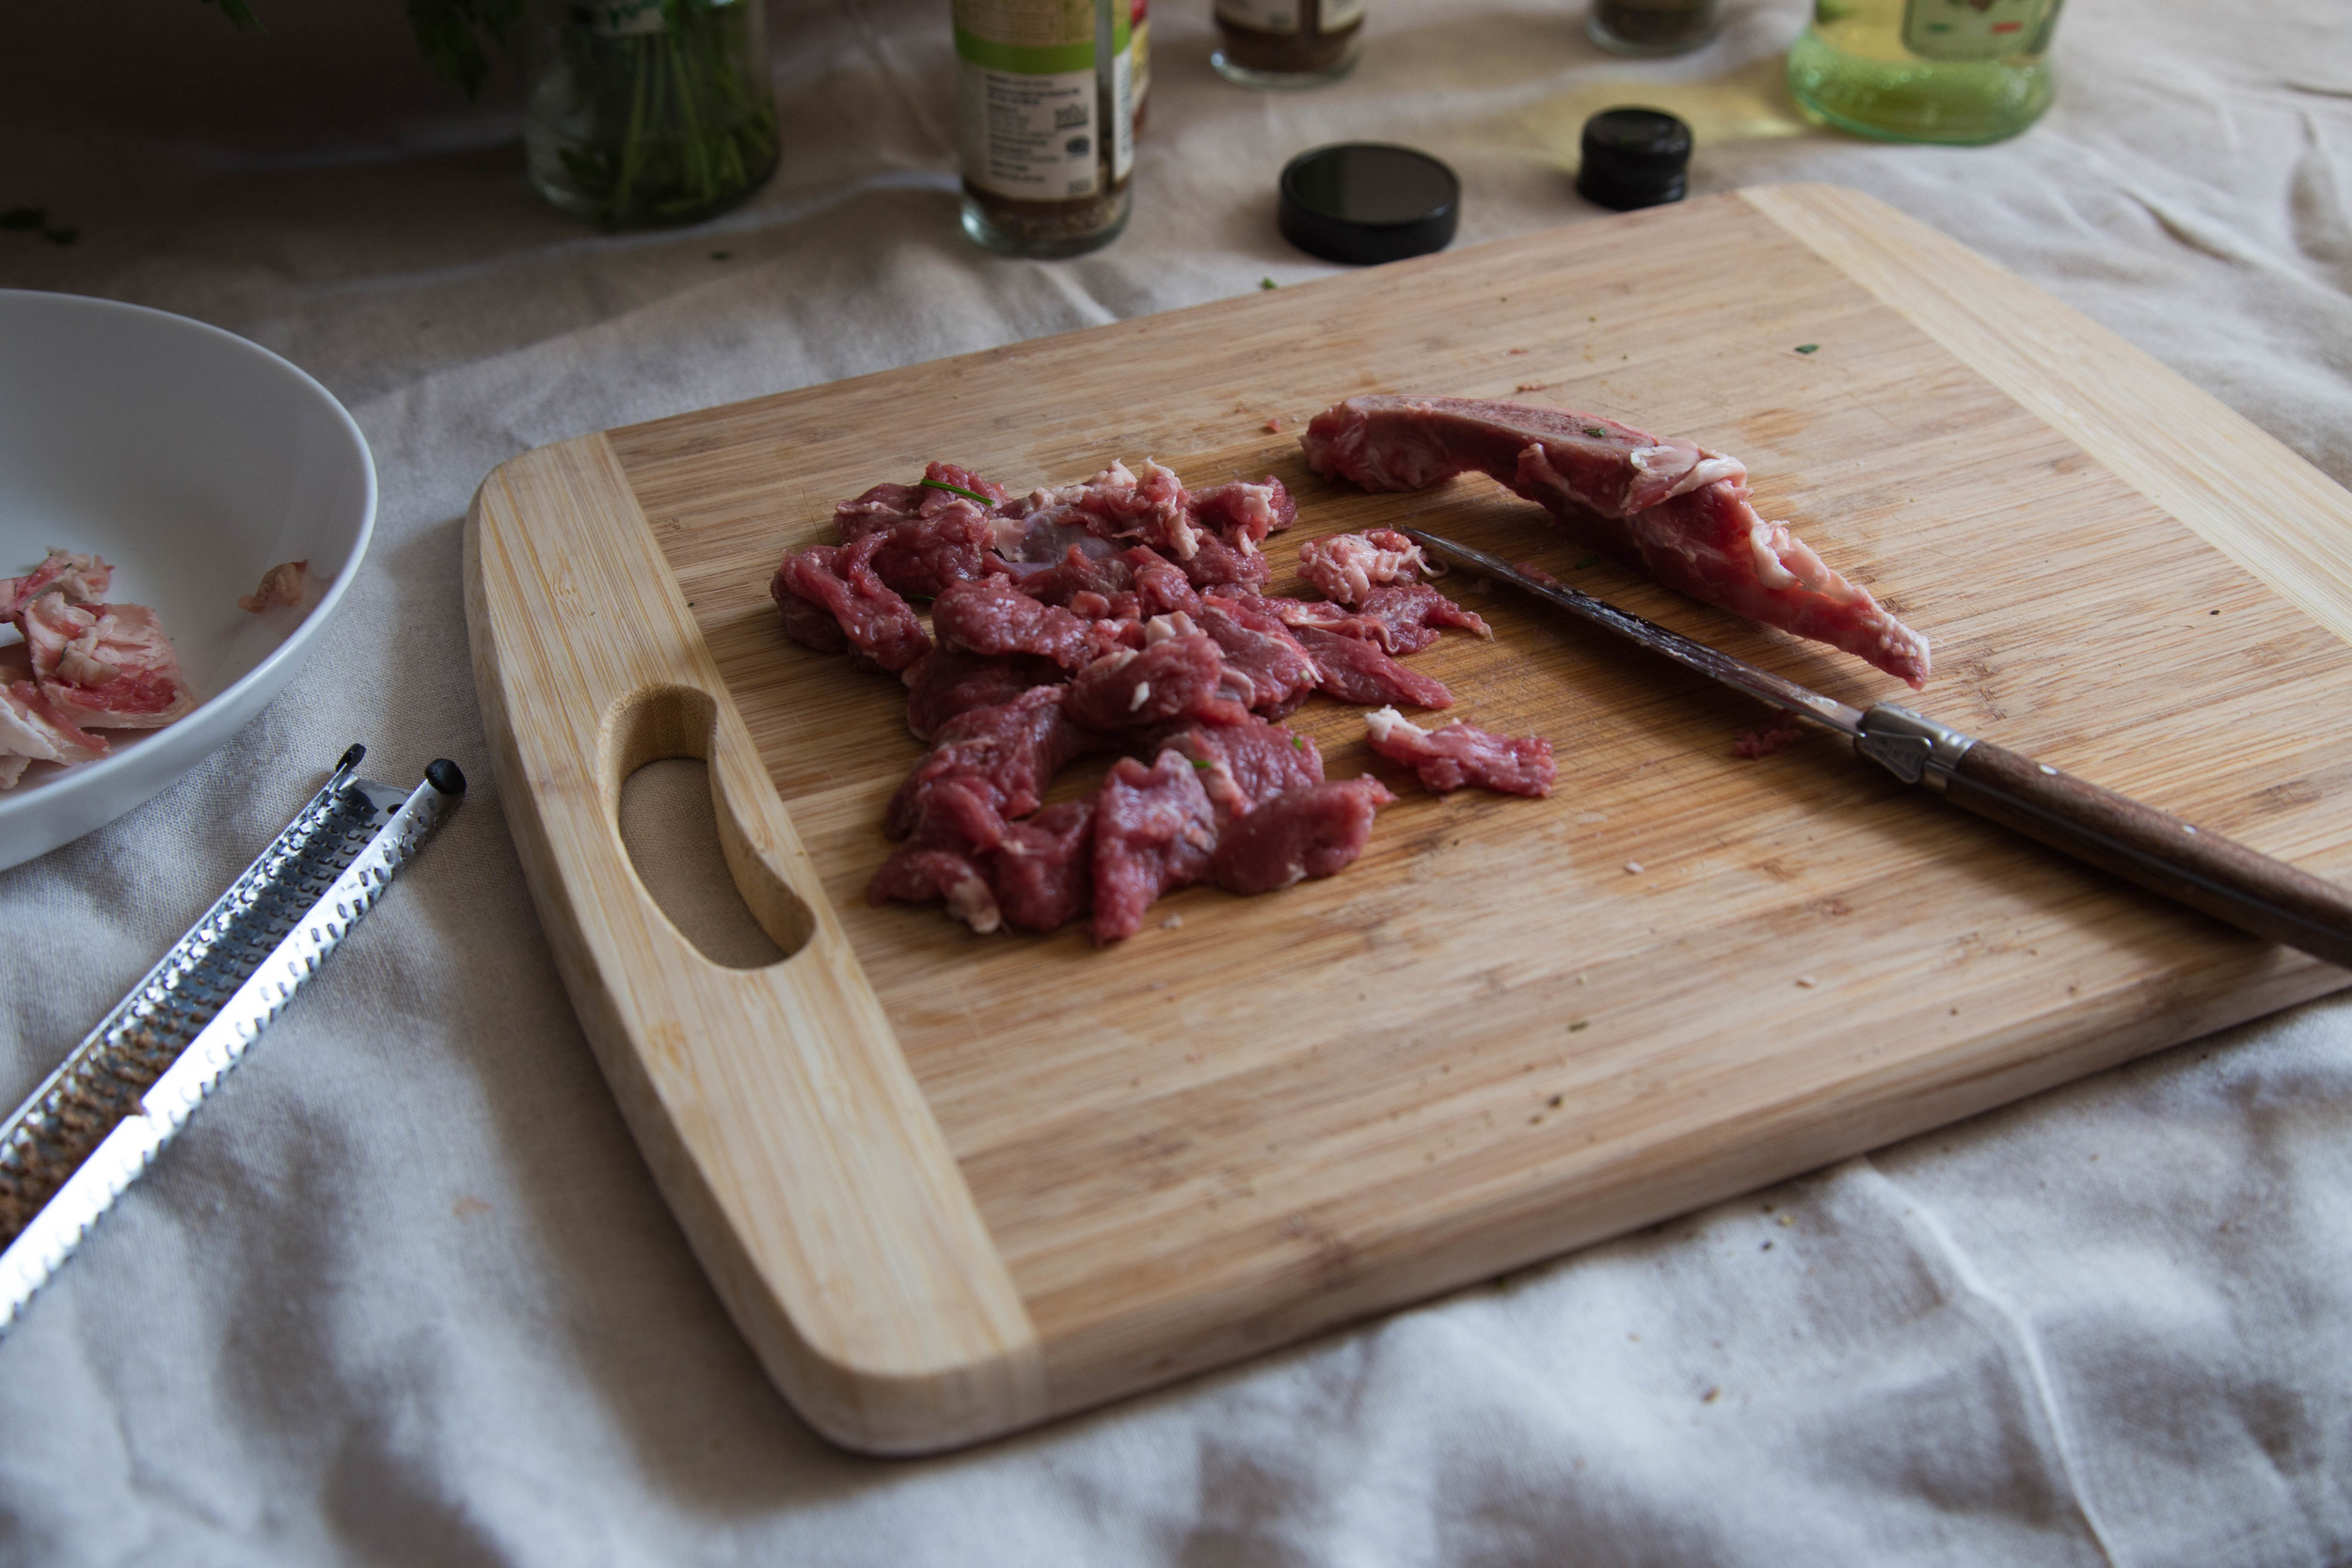
Ottolenghi specifies neck meat for the kawarma, but I find that to fatty and removing the neck bones is a hassle. For this recipe I used a leg steak from Whiffletree Farm and it was delicious. The full recipe as it appears in the book can be found here. I usually don't measure the spices, I often use extra herbs, I swap dried oregano for fresh, and I skip the white pepper.
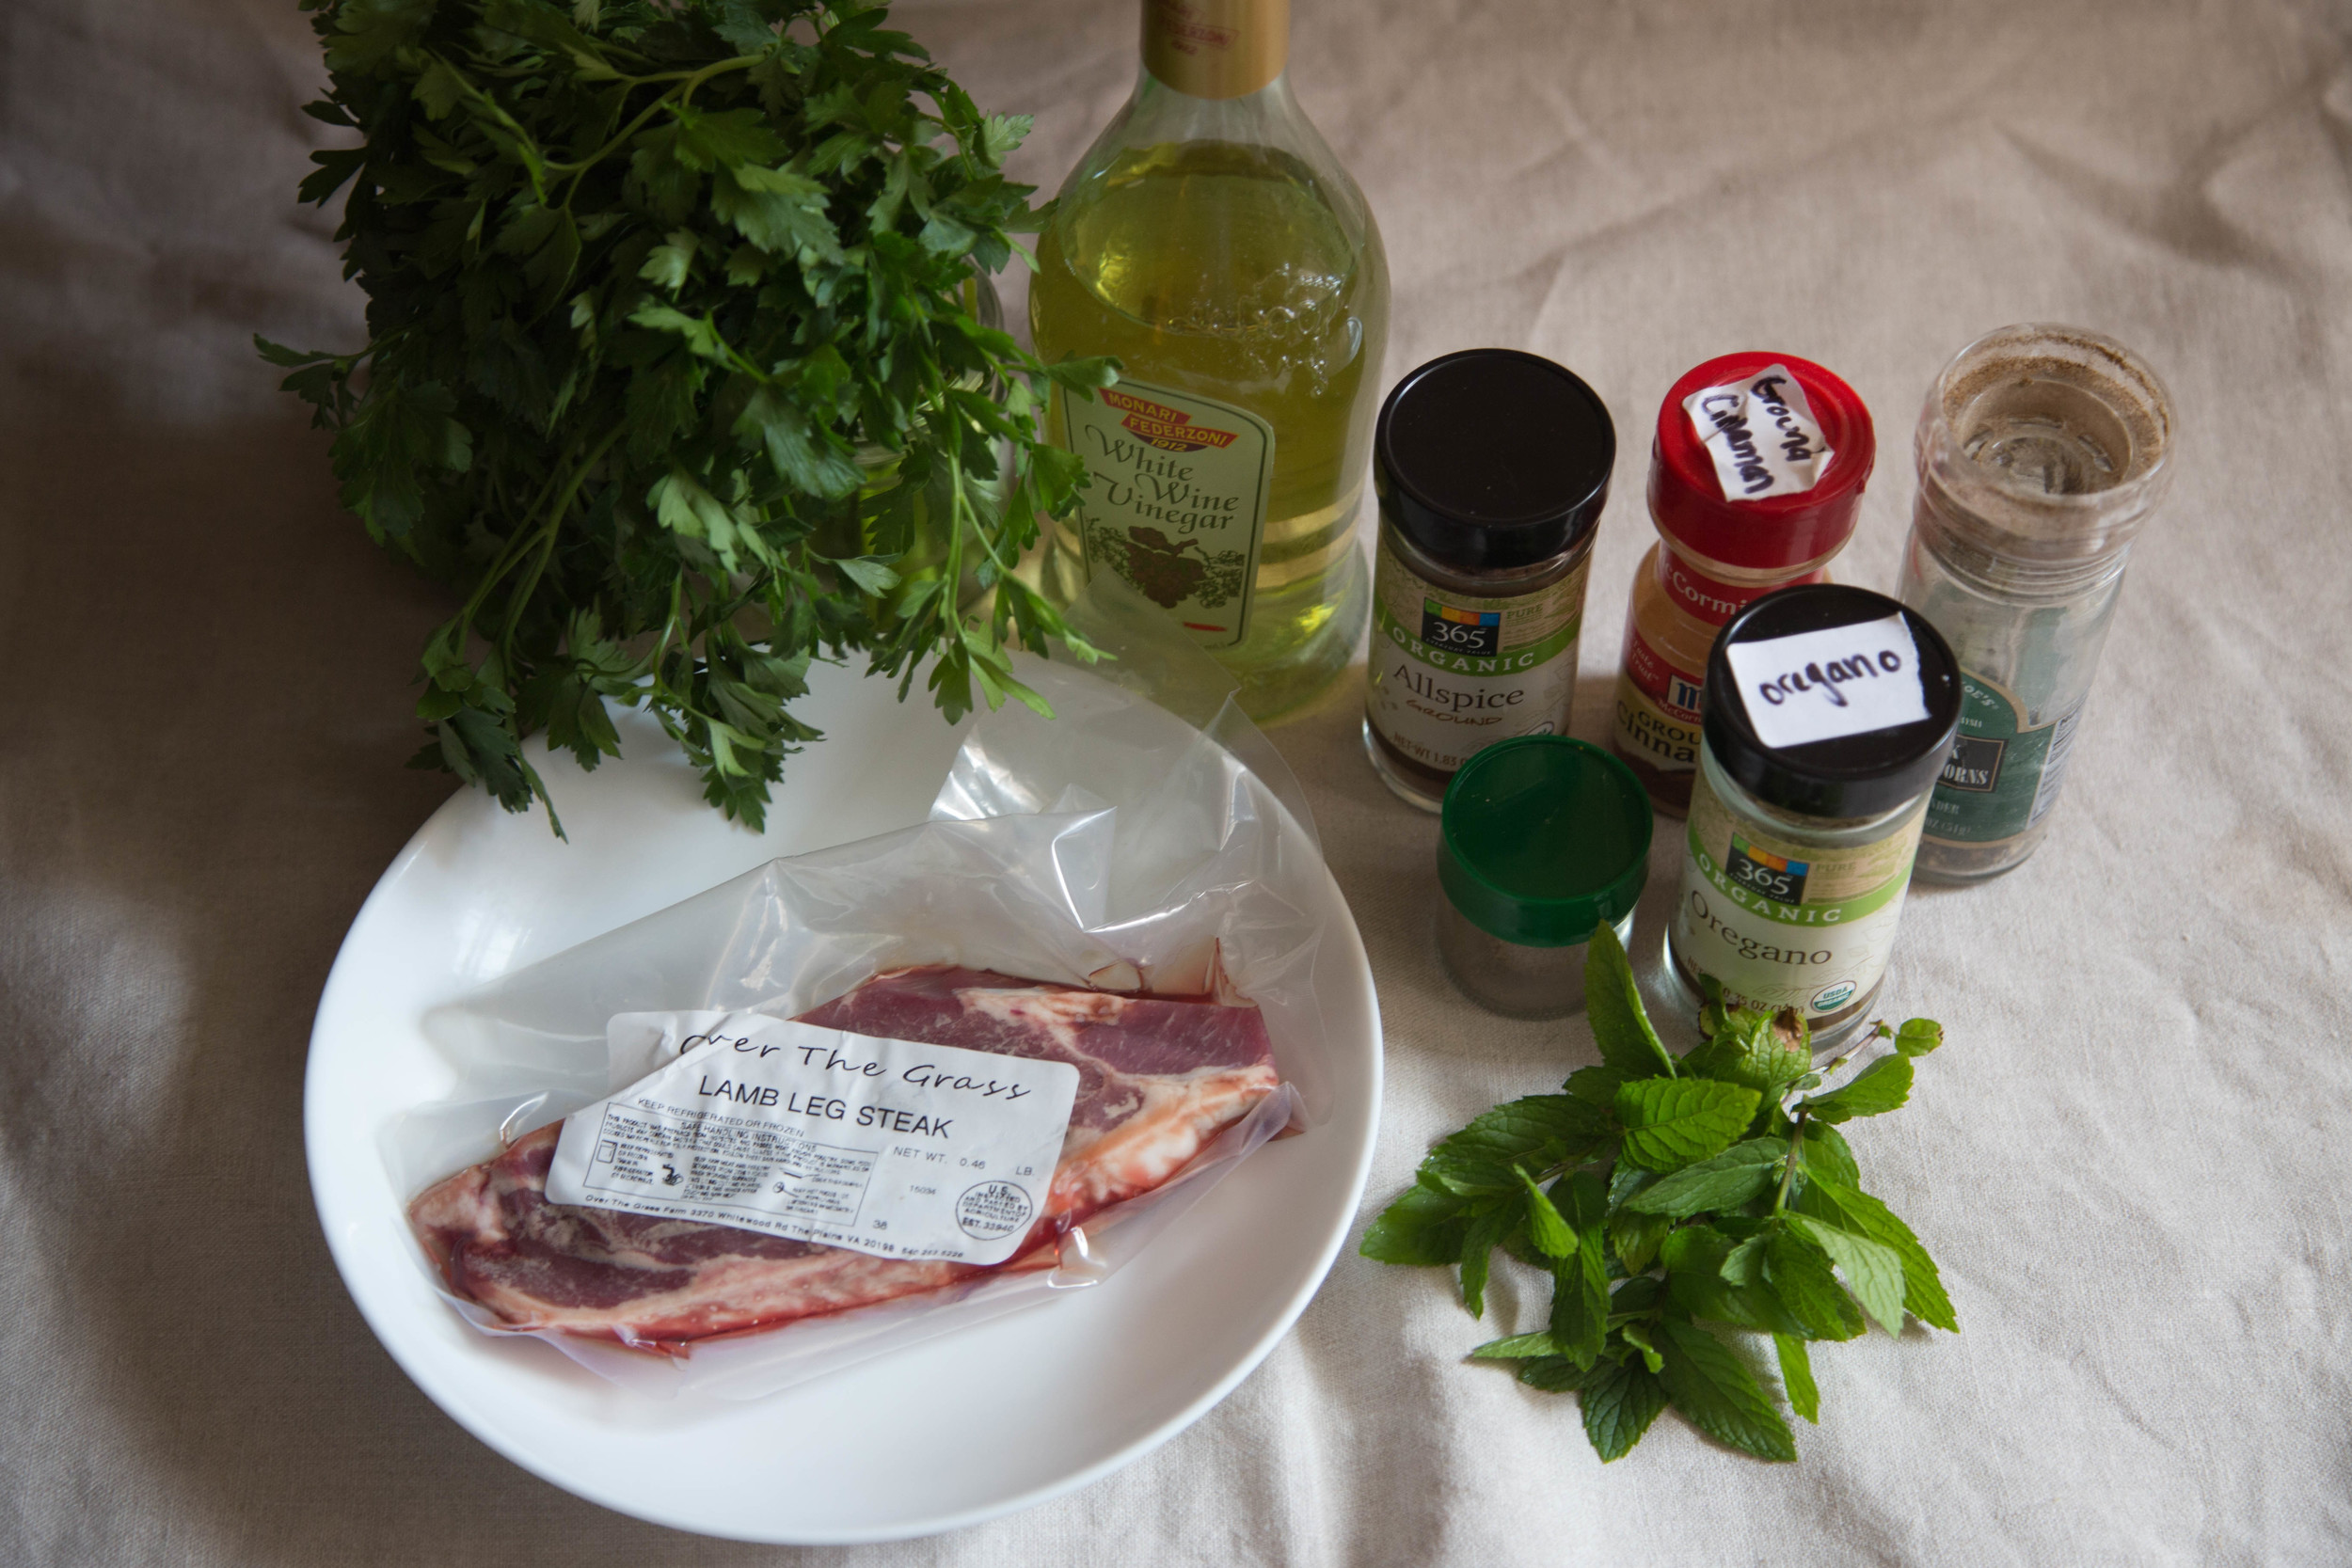
Stuff for the Kawarma
Lamb leg steak
good pinch of black pepper
good pinch of allspice
good pinch of cinnamon
good pinch of freshly grated nutmeg
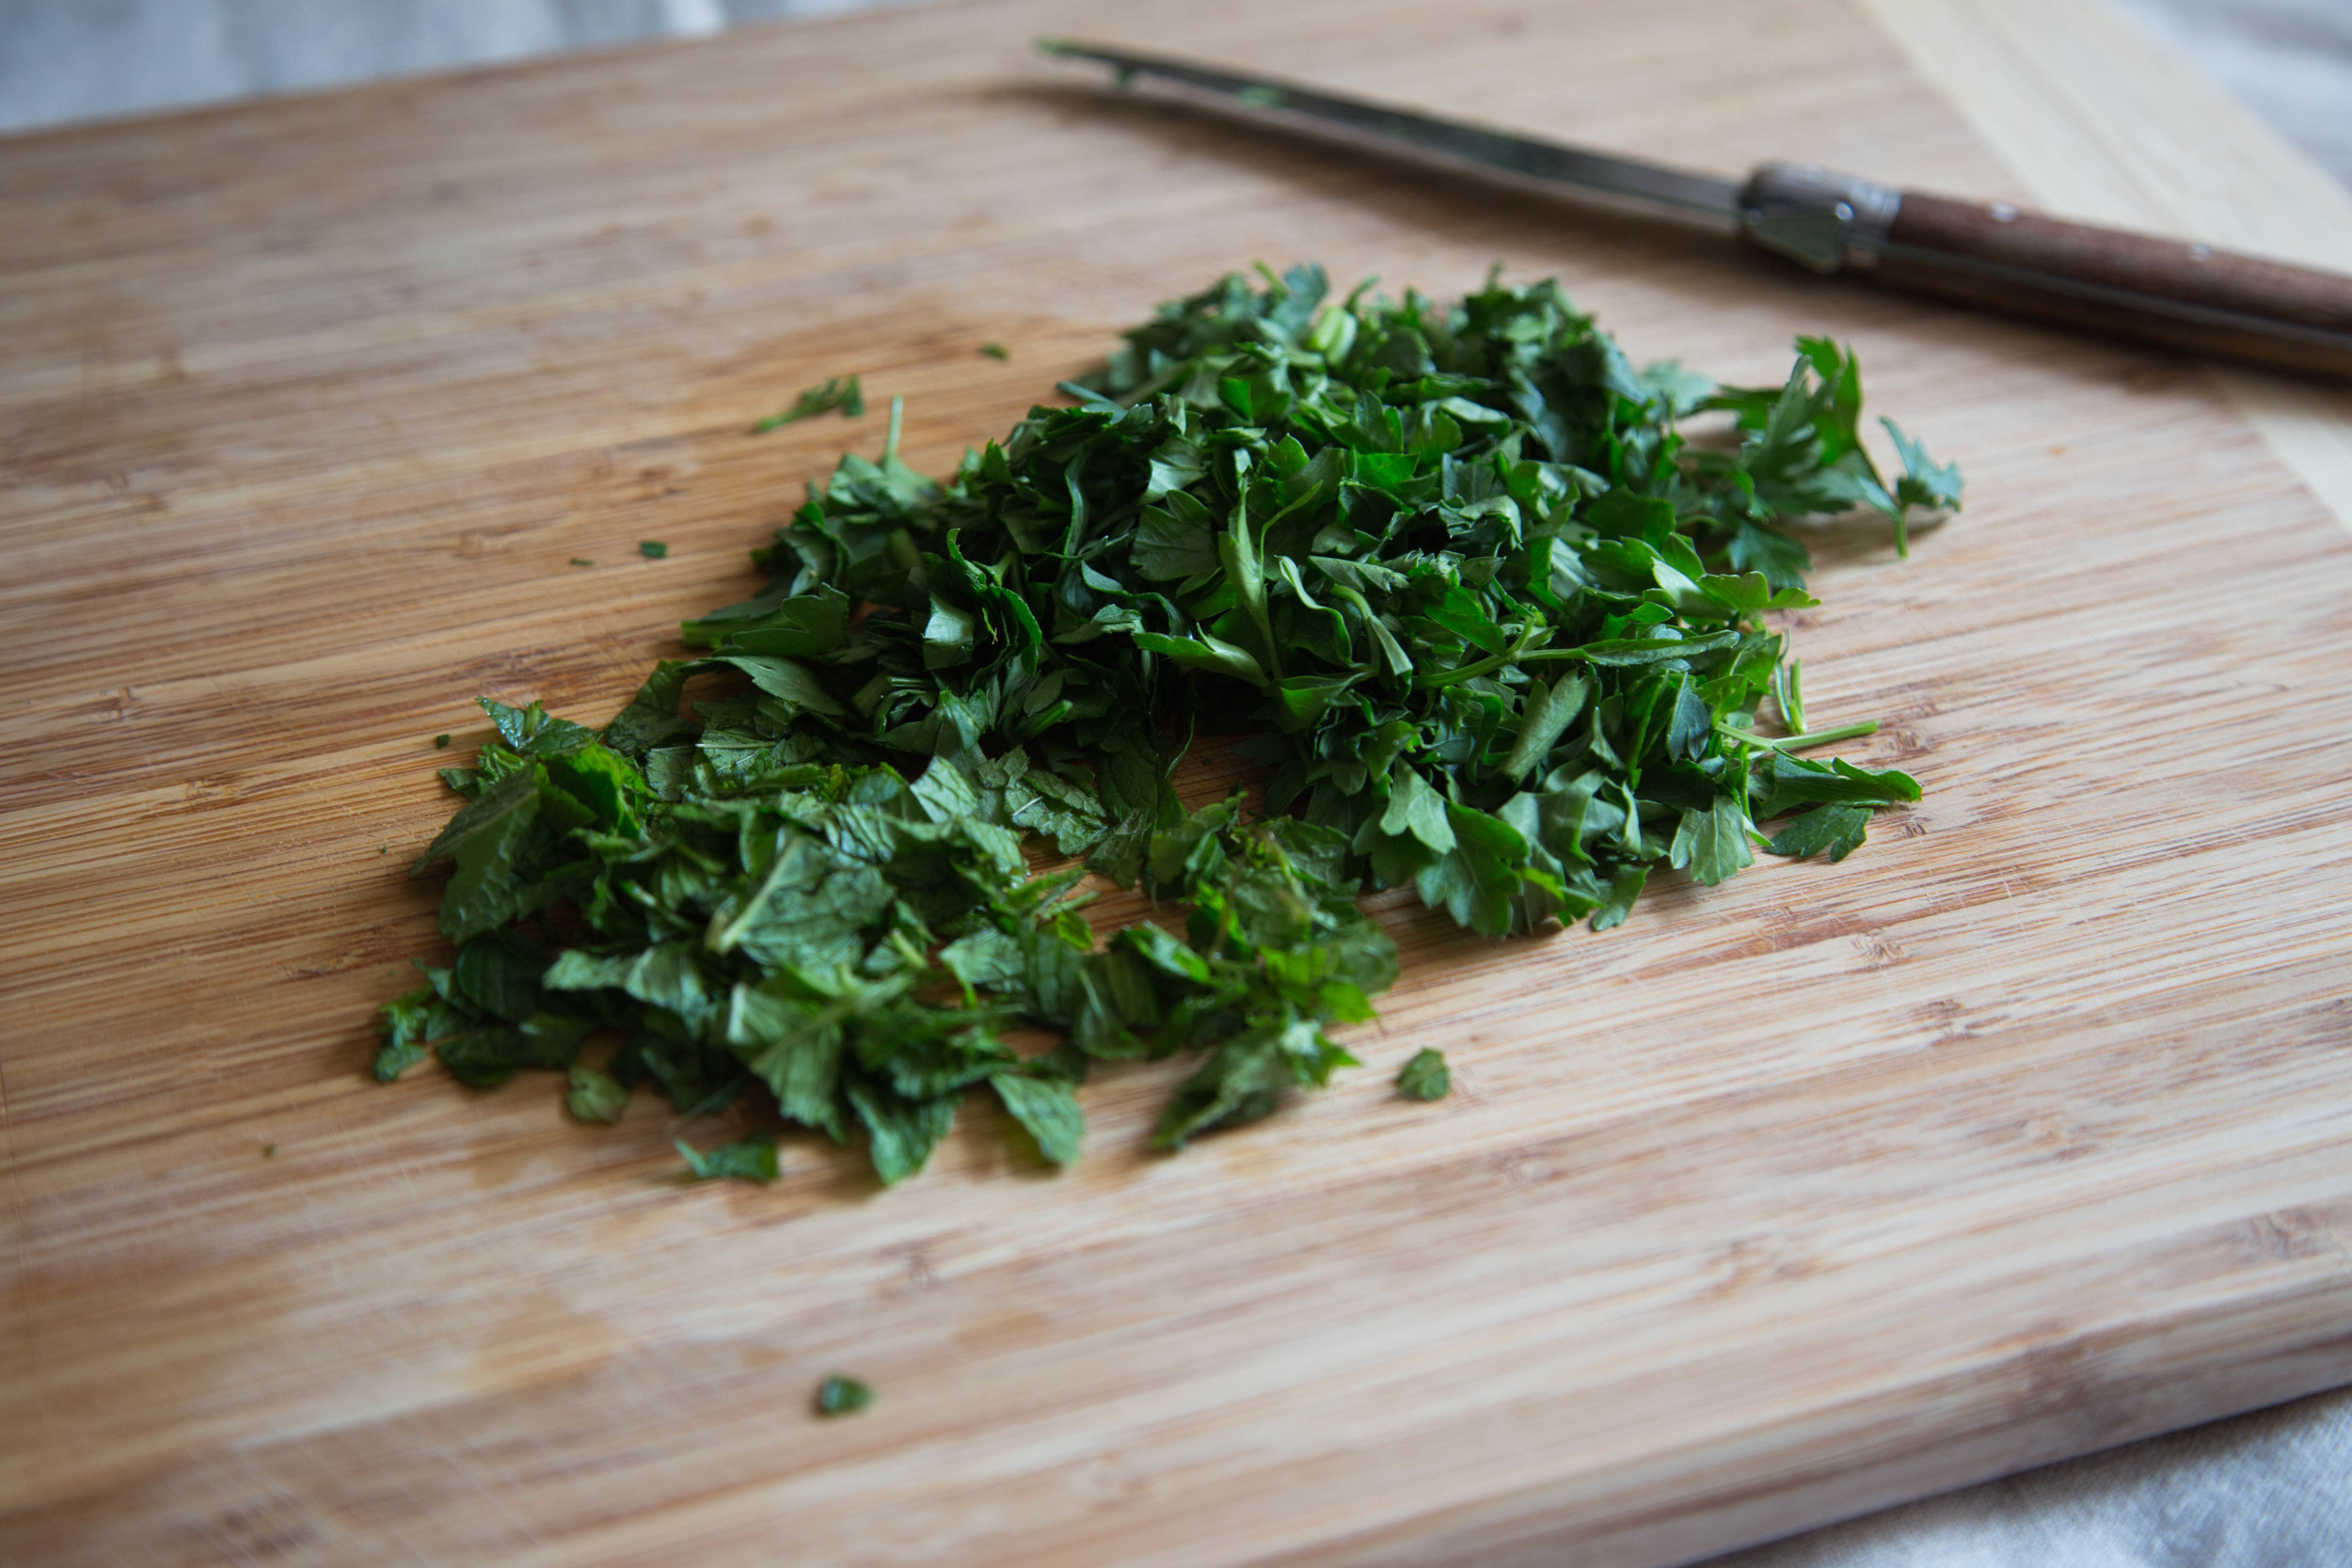
small handful of oregano
small handful of parsley
small handful of mint
1 tbsp white wine vinegar
1 tbsp butter
1 tbsp olive oil
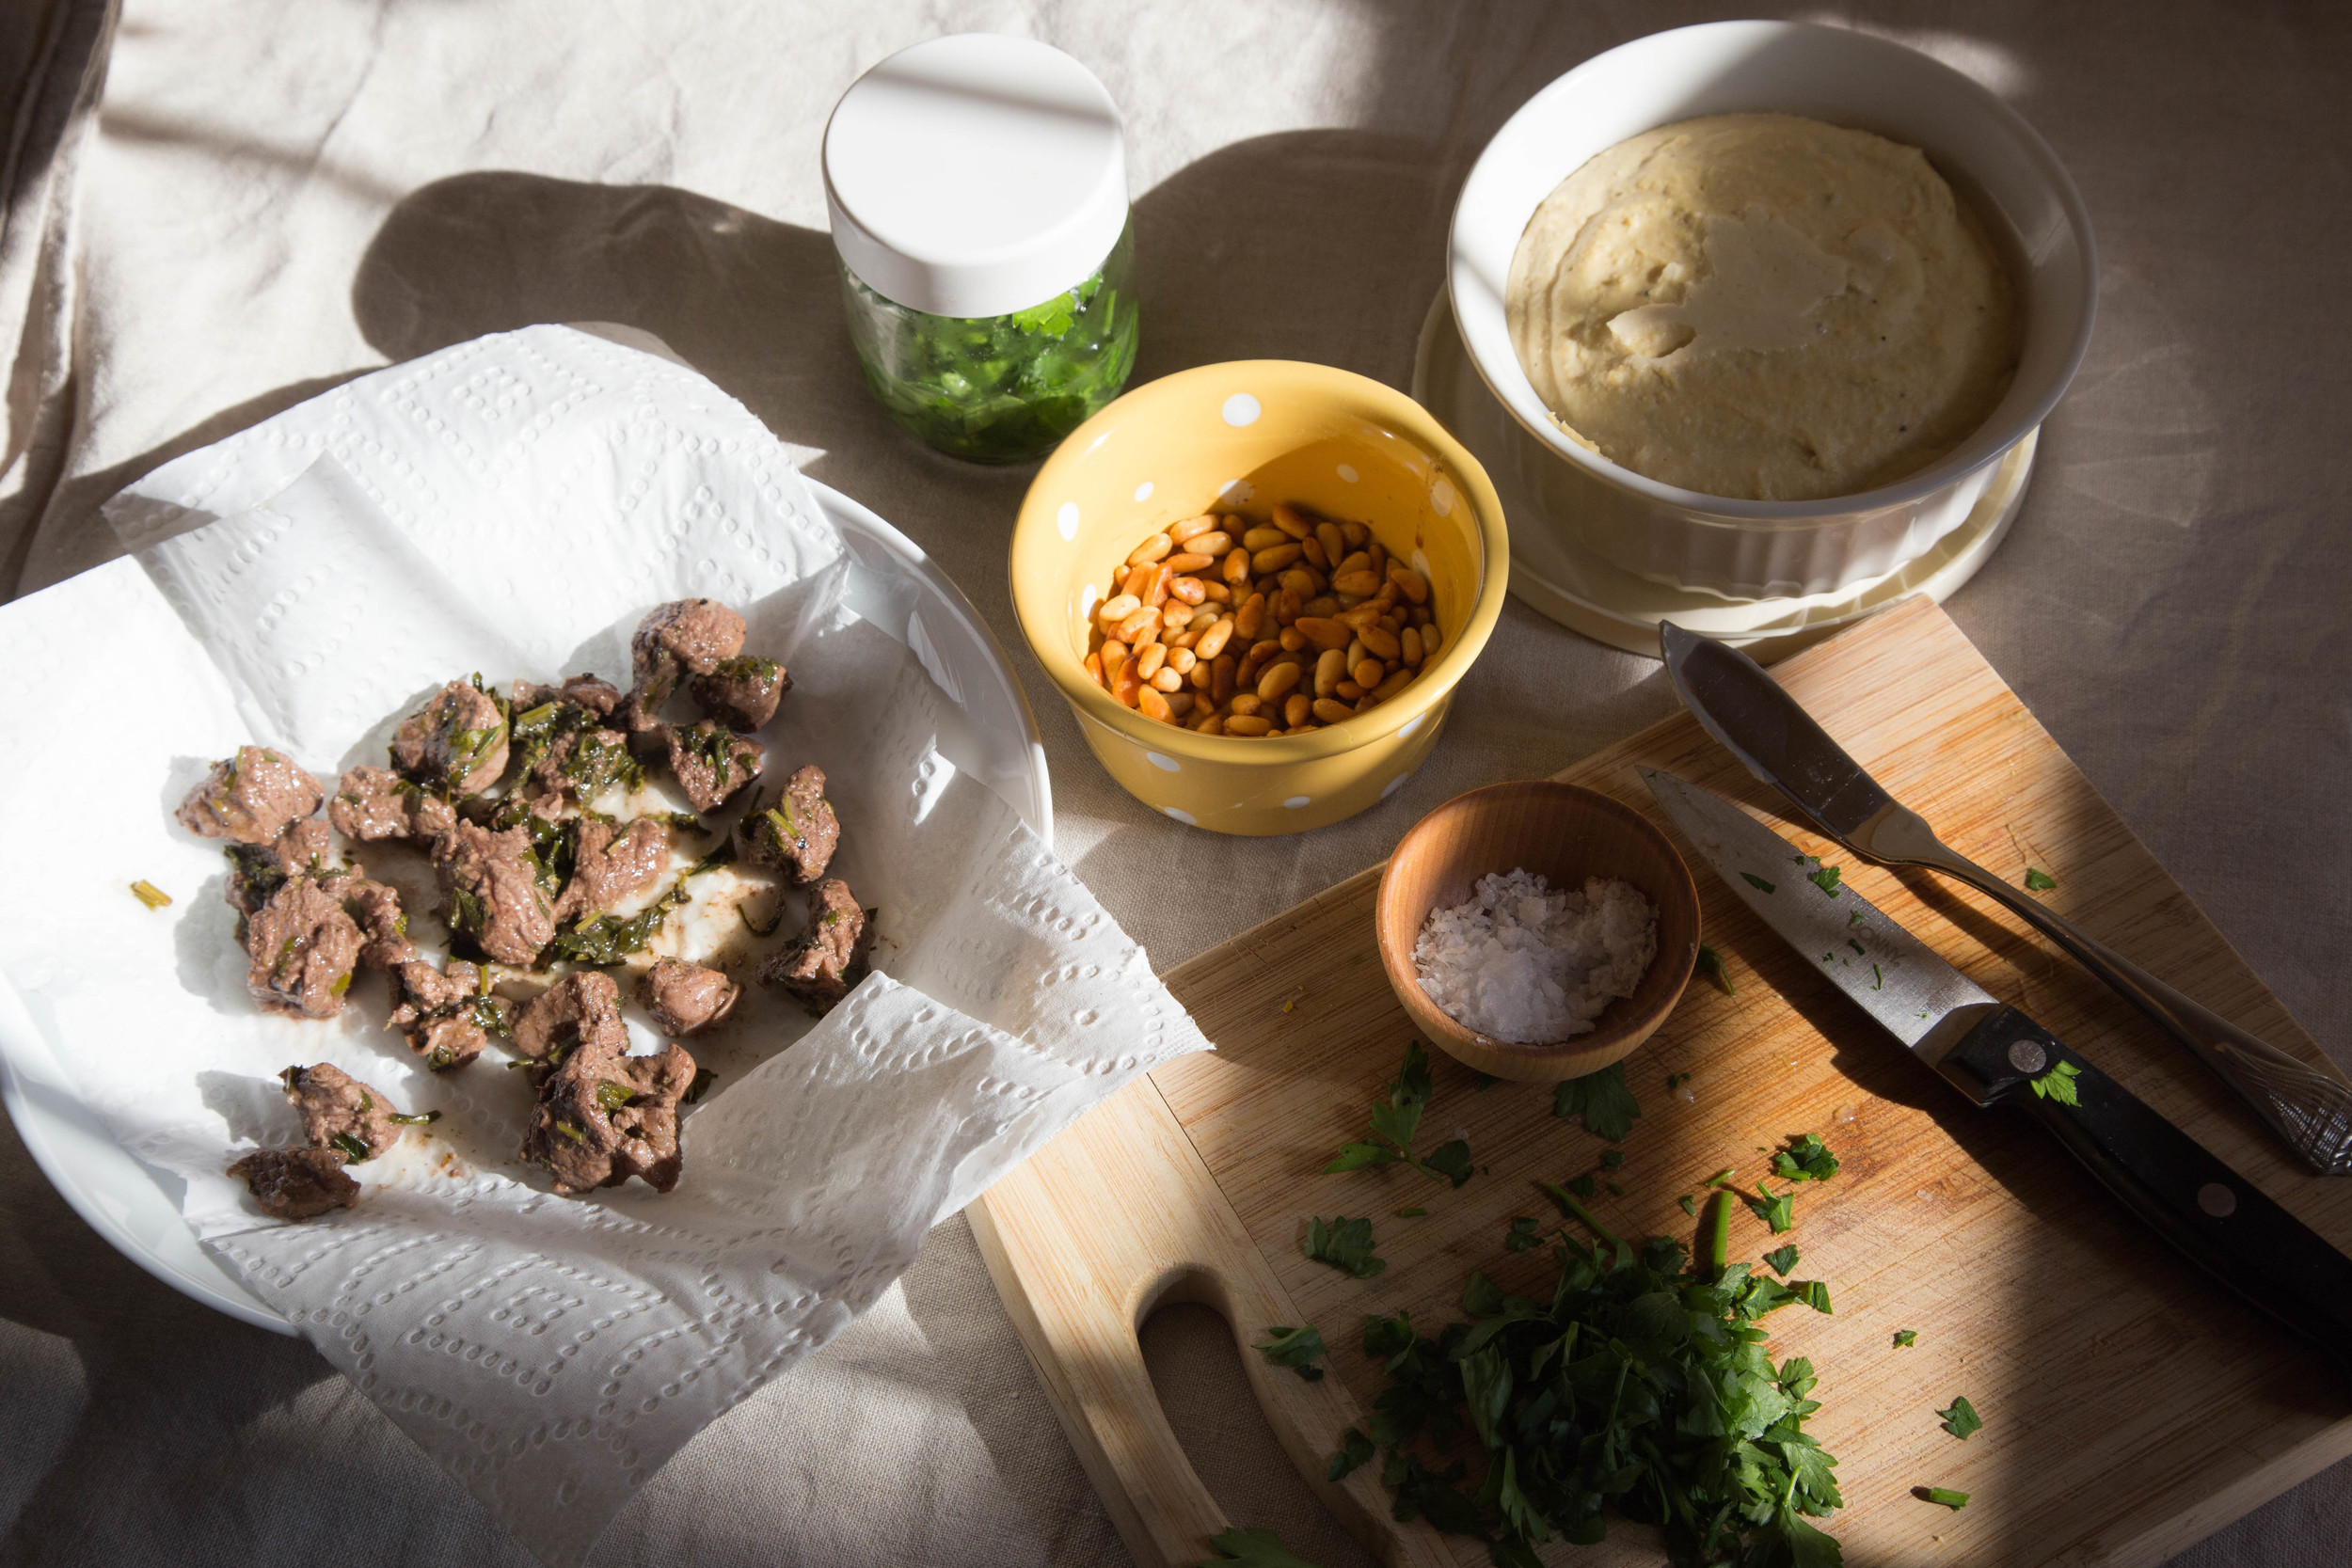
handful of pine nuts
Steps for the Kawarma
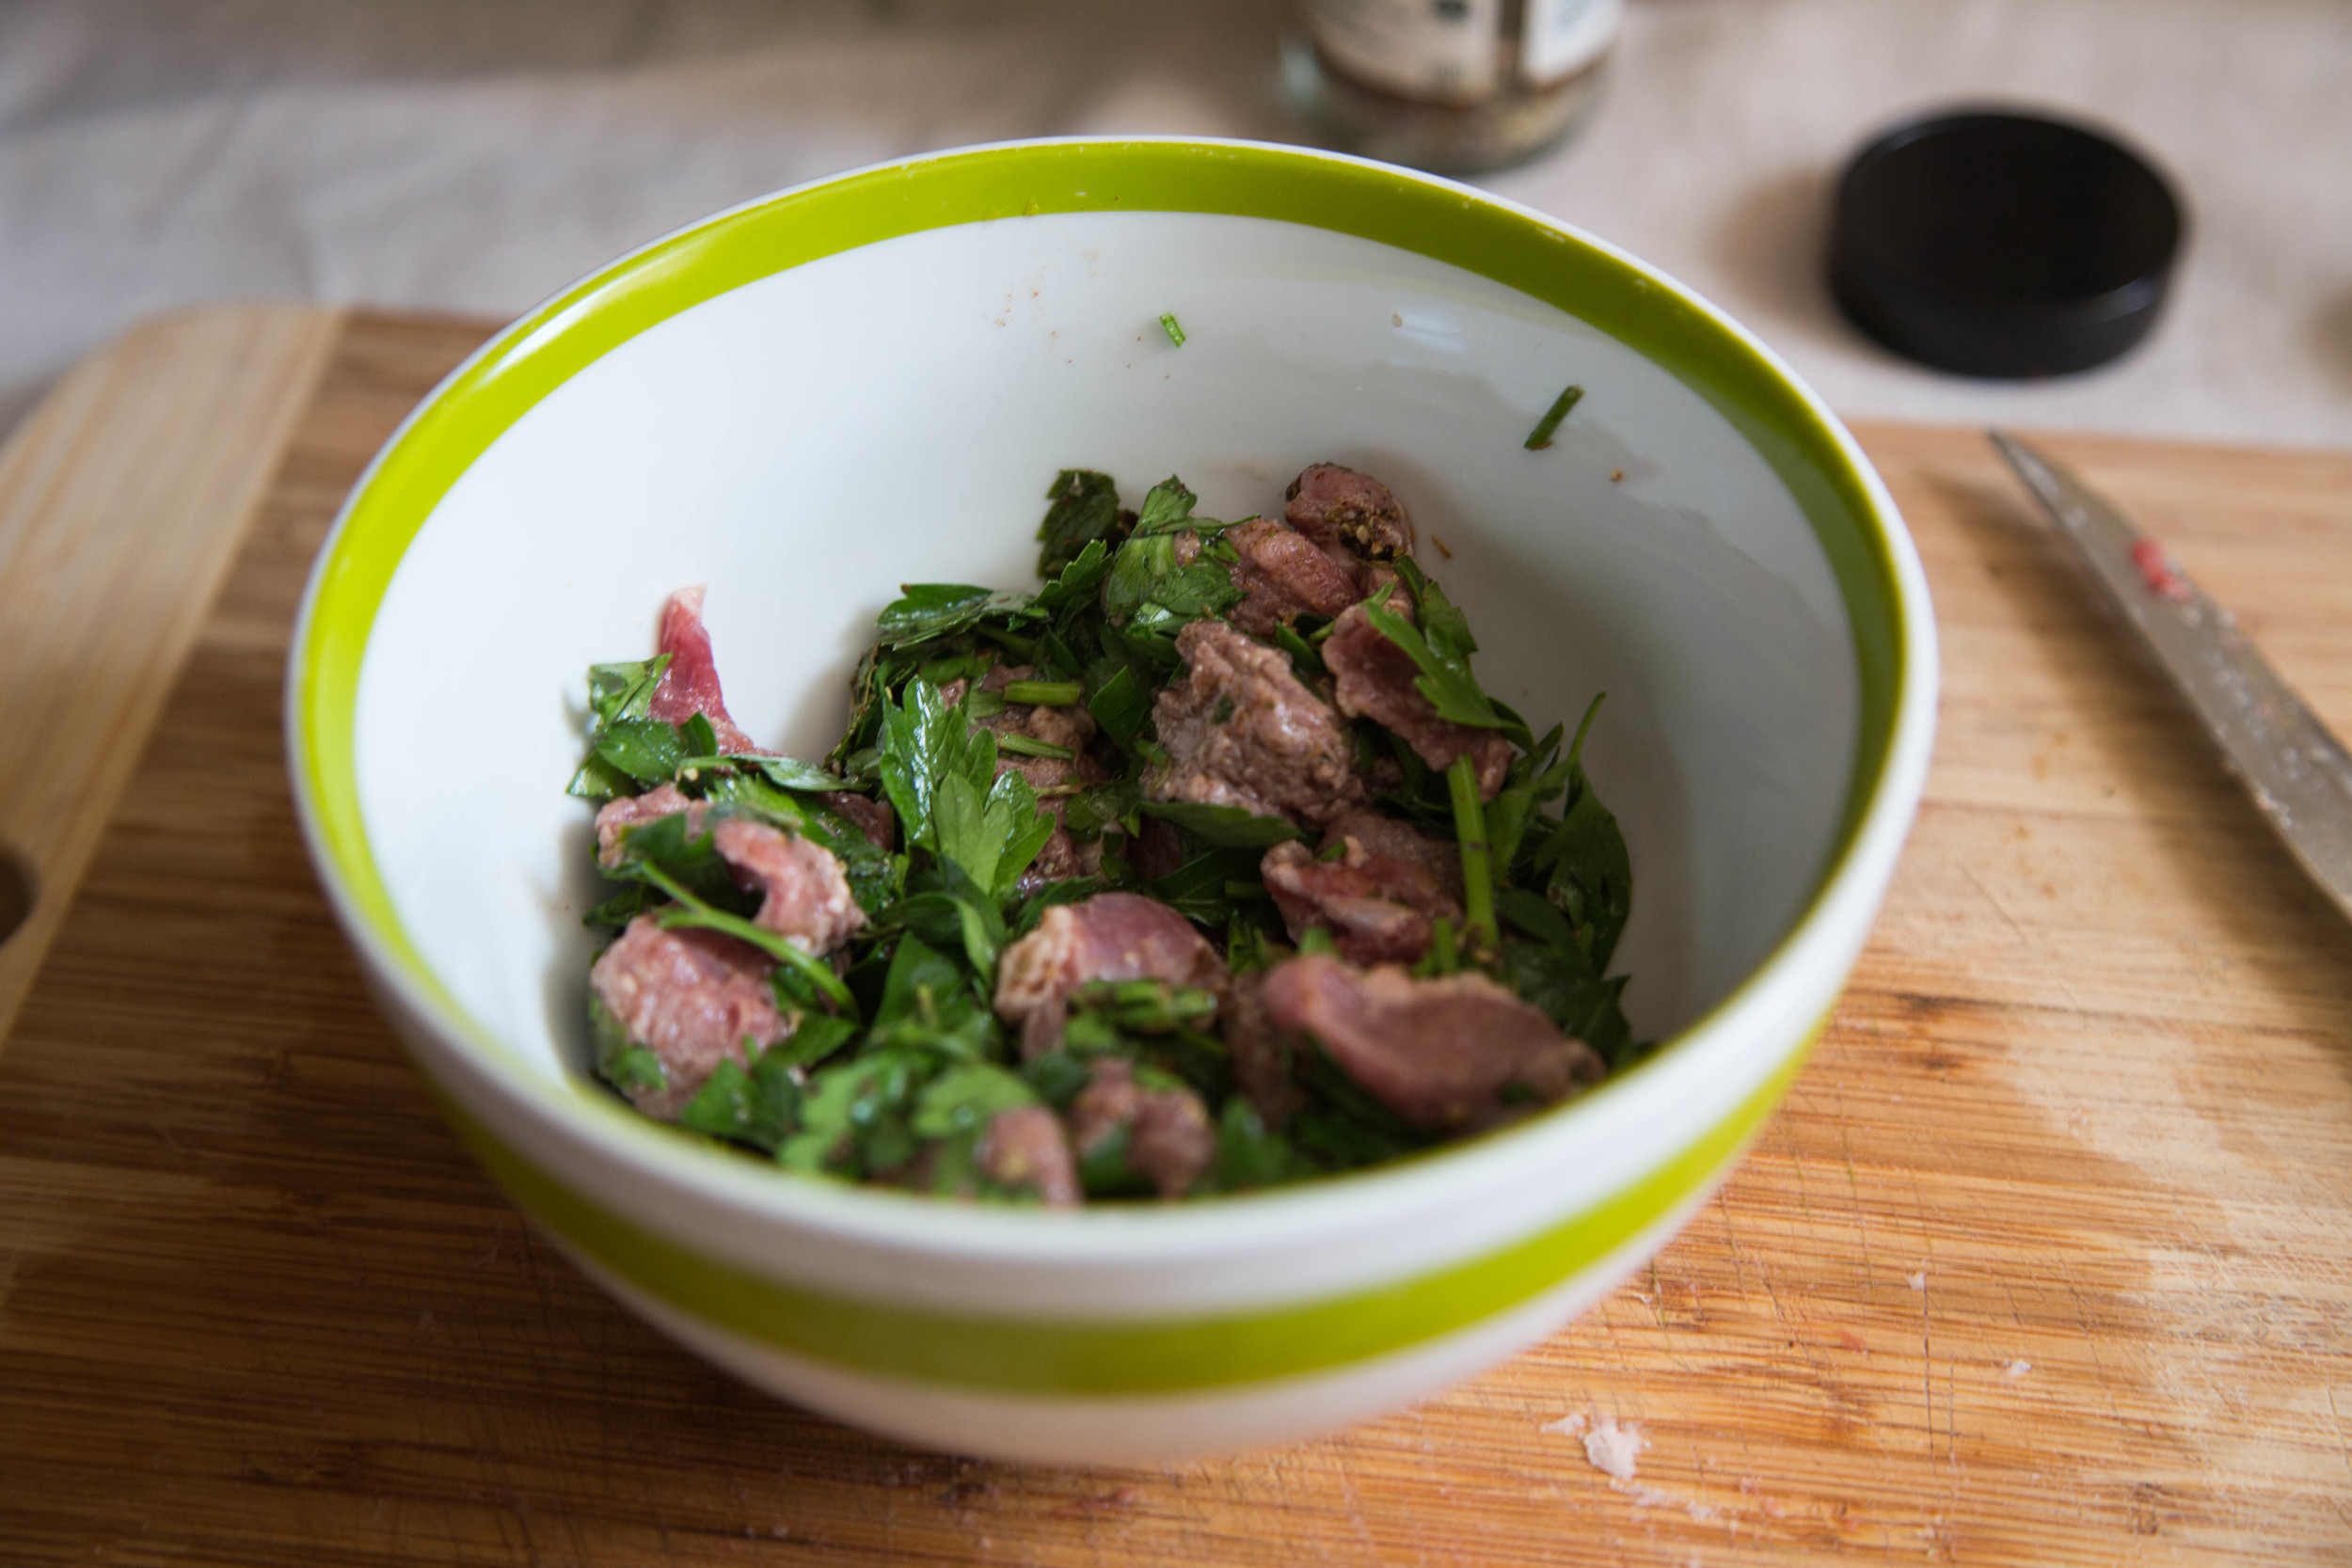
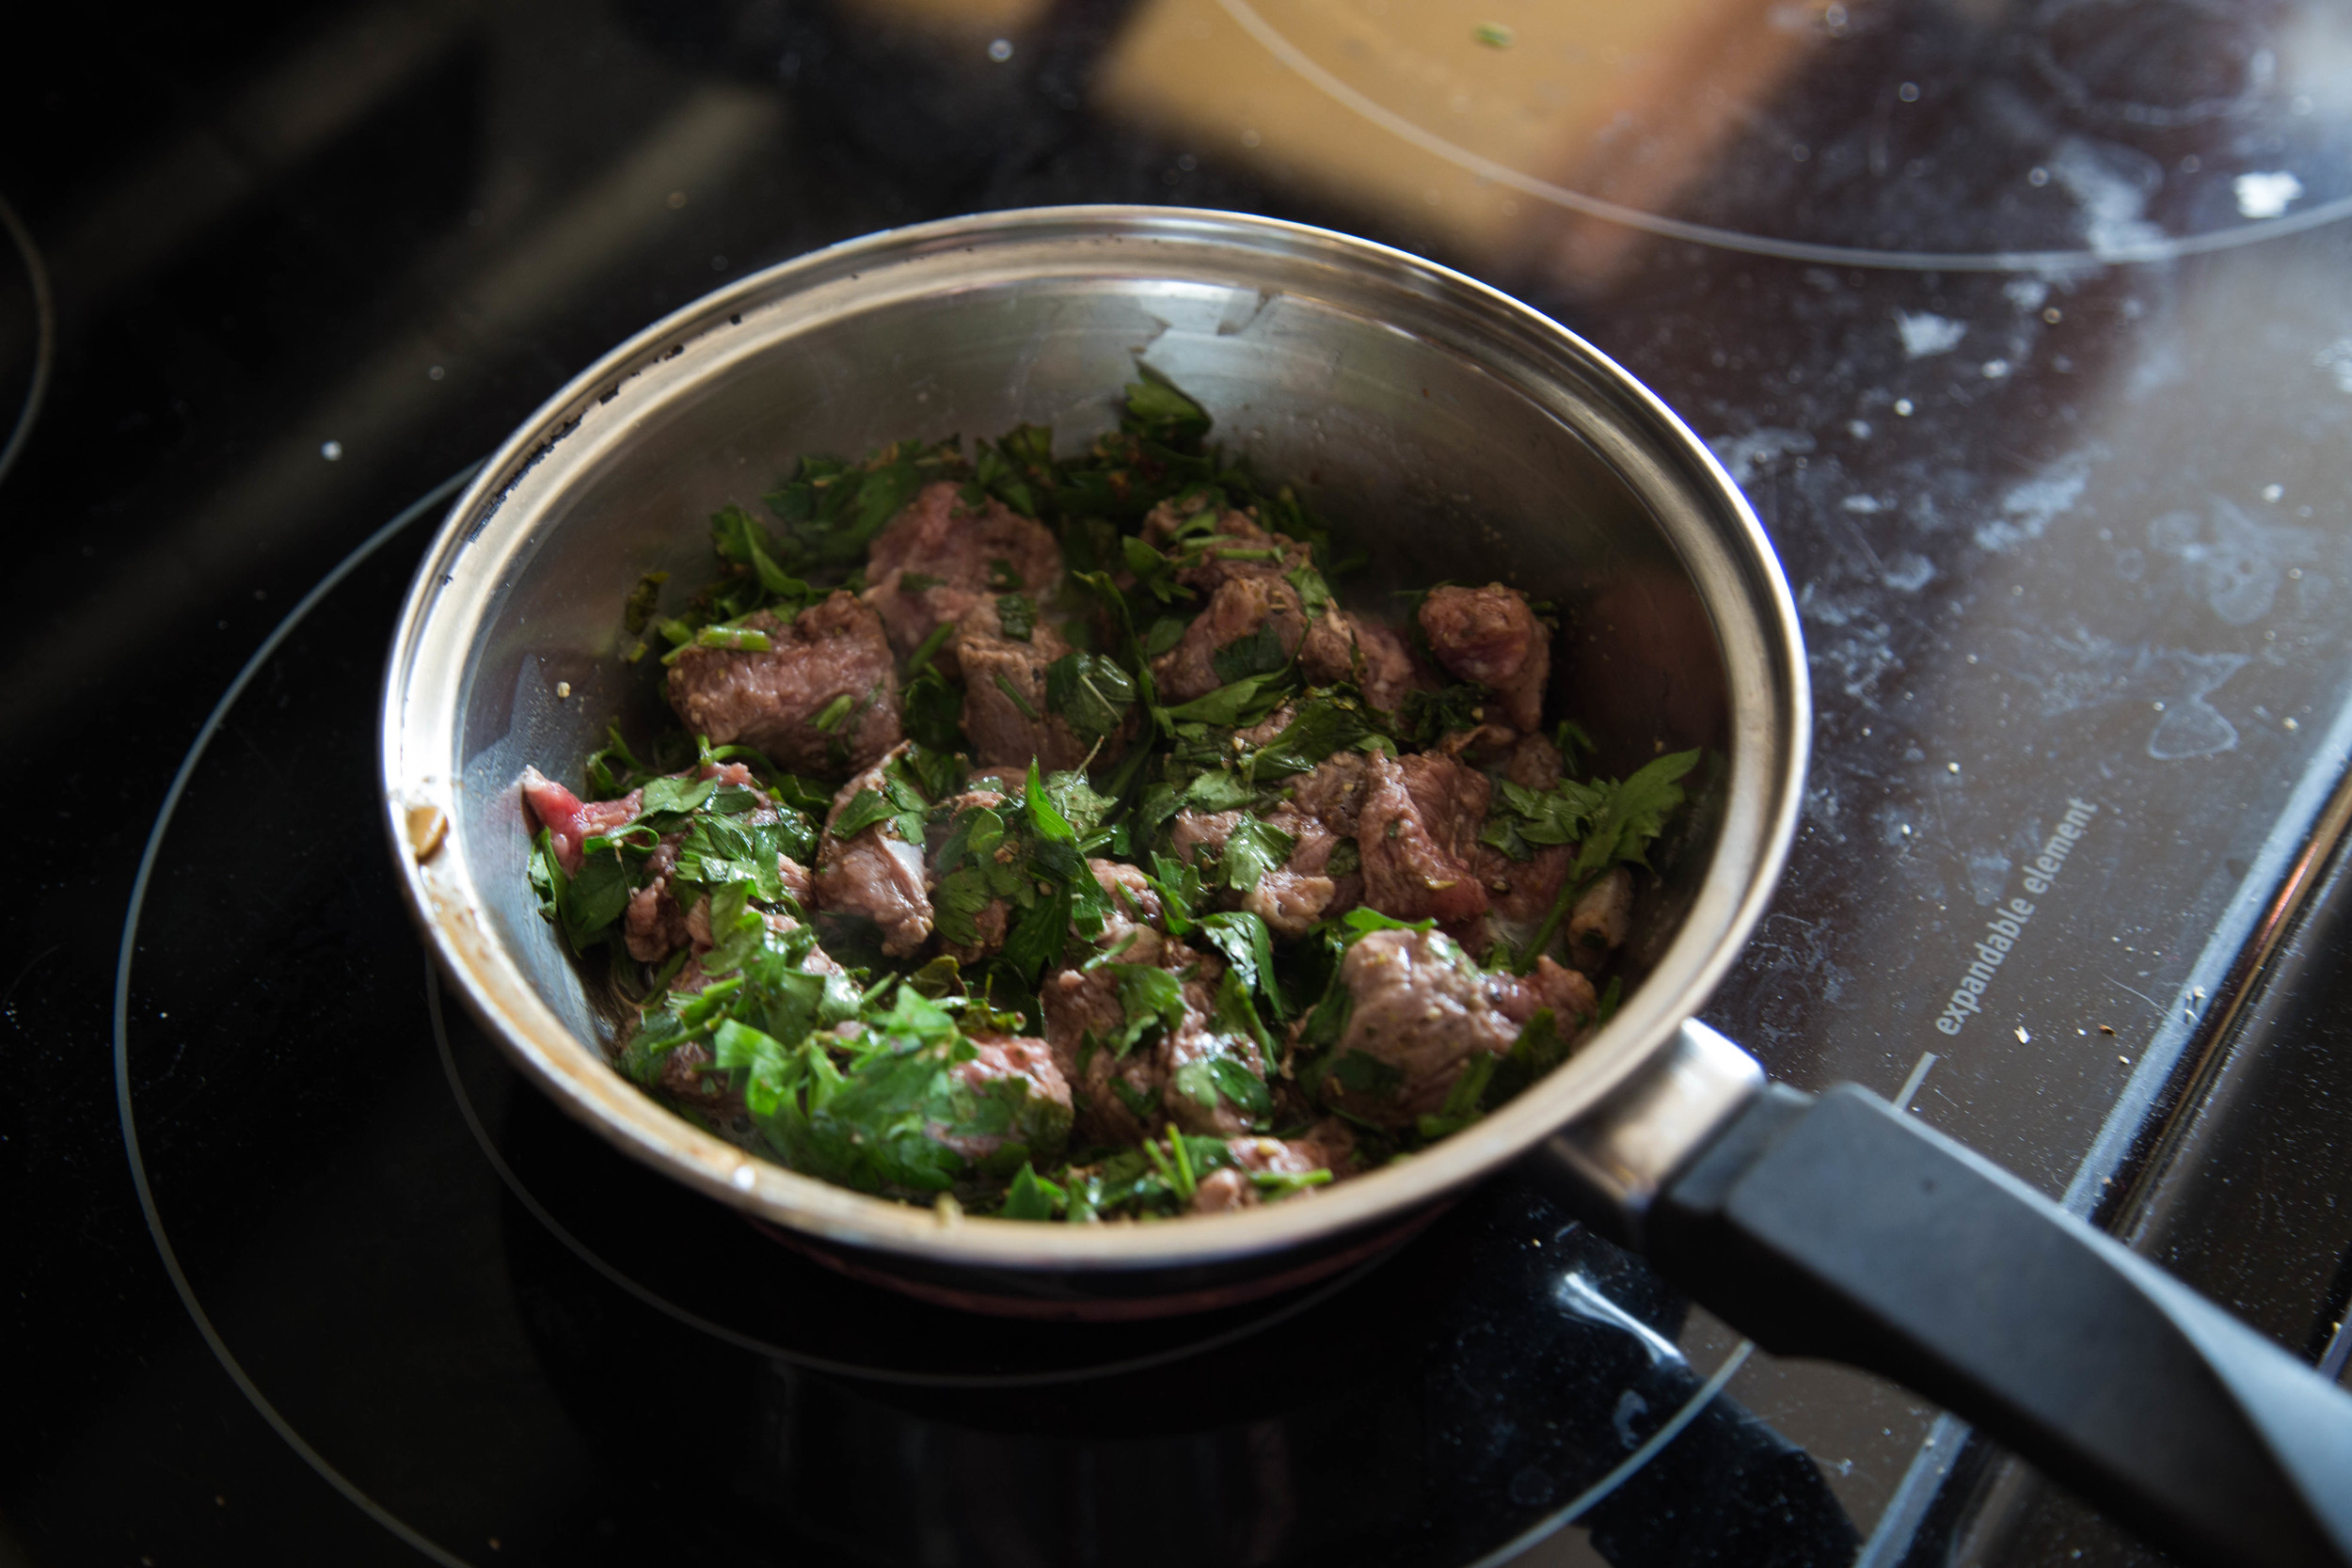
Chop the lamb into bite size chunks and place in bowl to marinate. Chop the herbs and add them to the bowl with the spices and the vinegar. Mix everything together and let it marinate in the fridge for 30 minutes to an hour.
Once marinated, heat butter and olive oil in pan over a medium heat. Add the lamb and cook for about 10 minutes or until cooked through.
Toast the pine nuts in a small pan over a medium heat until they begin to turn golden brown.
To plate, spread hummus in a bowl and top with the lamb, pine nuts, lemon sauce (see below), and lightly season with salt & pepper.
Steps for Lemon Sauce
Finely chop the parsley, chili, and garlic. Mix in a small bowl or container with the lemon juice, white wine vinegar, and salt.
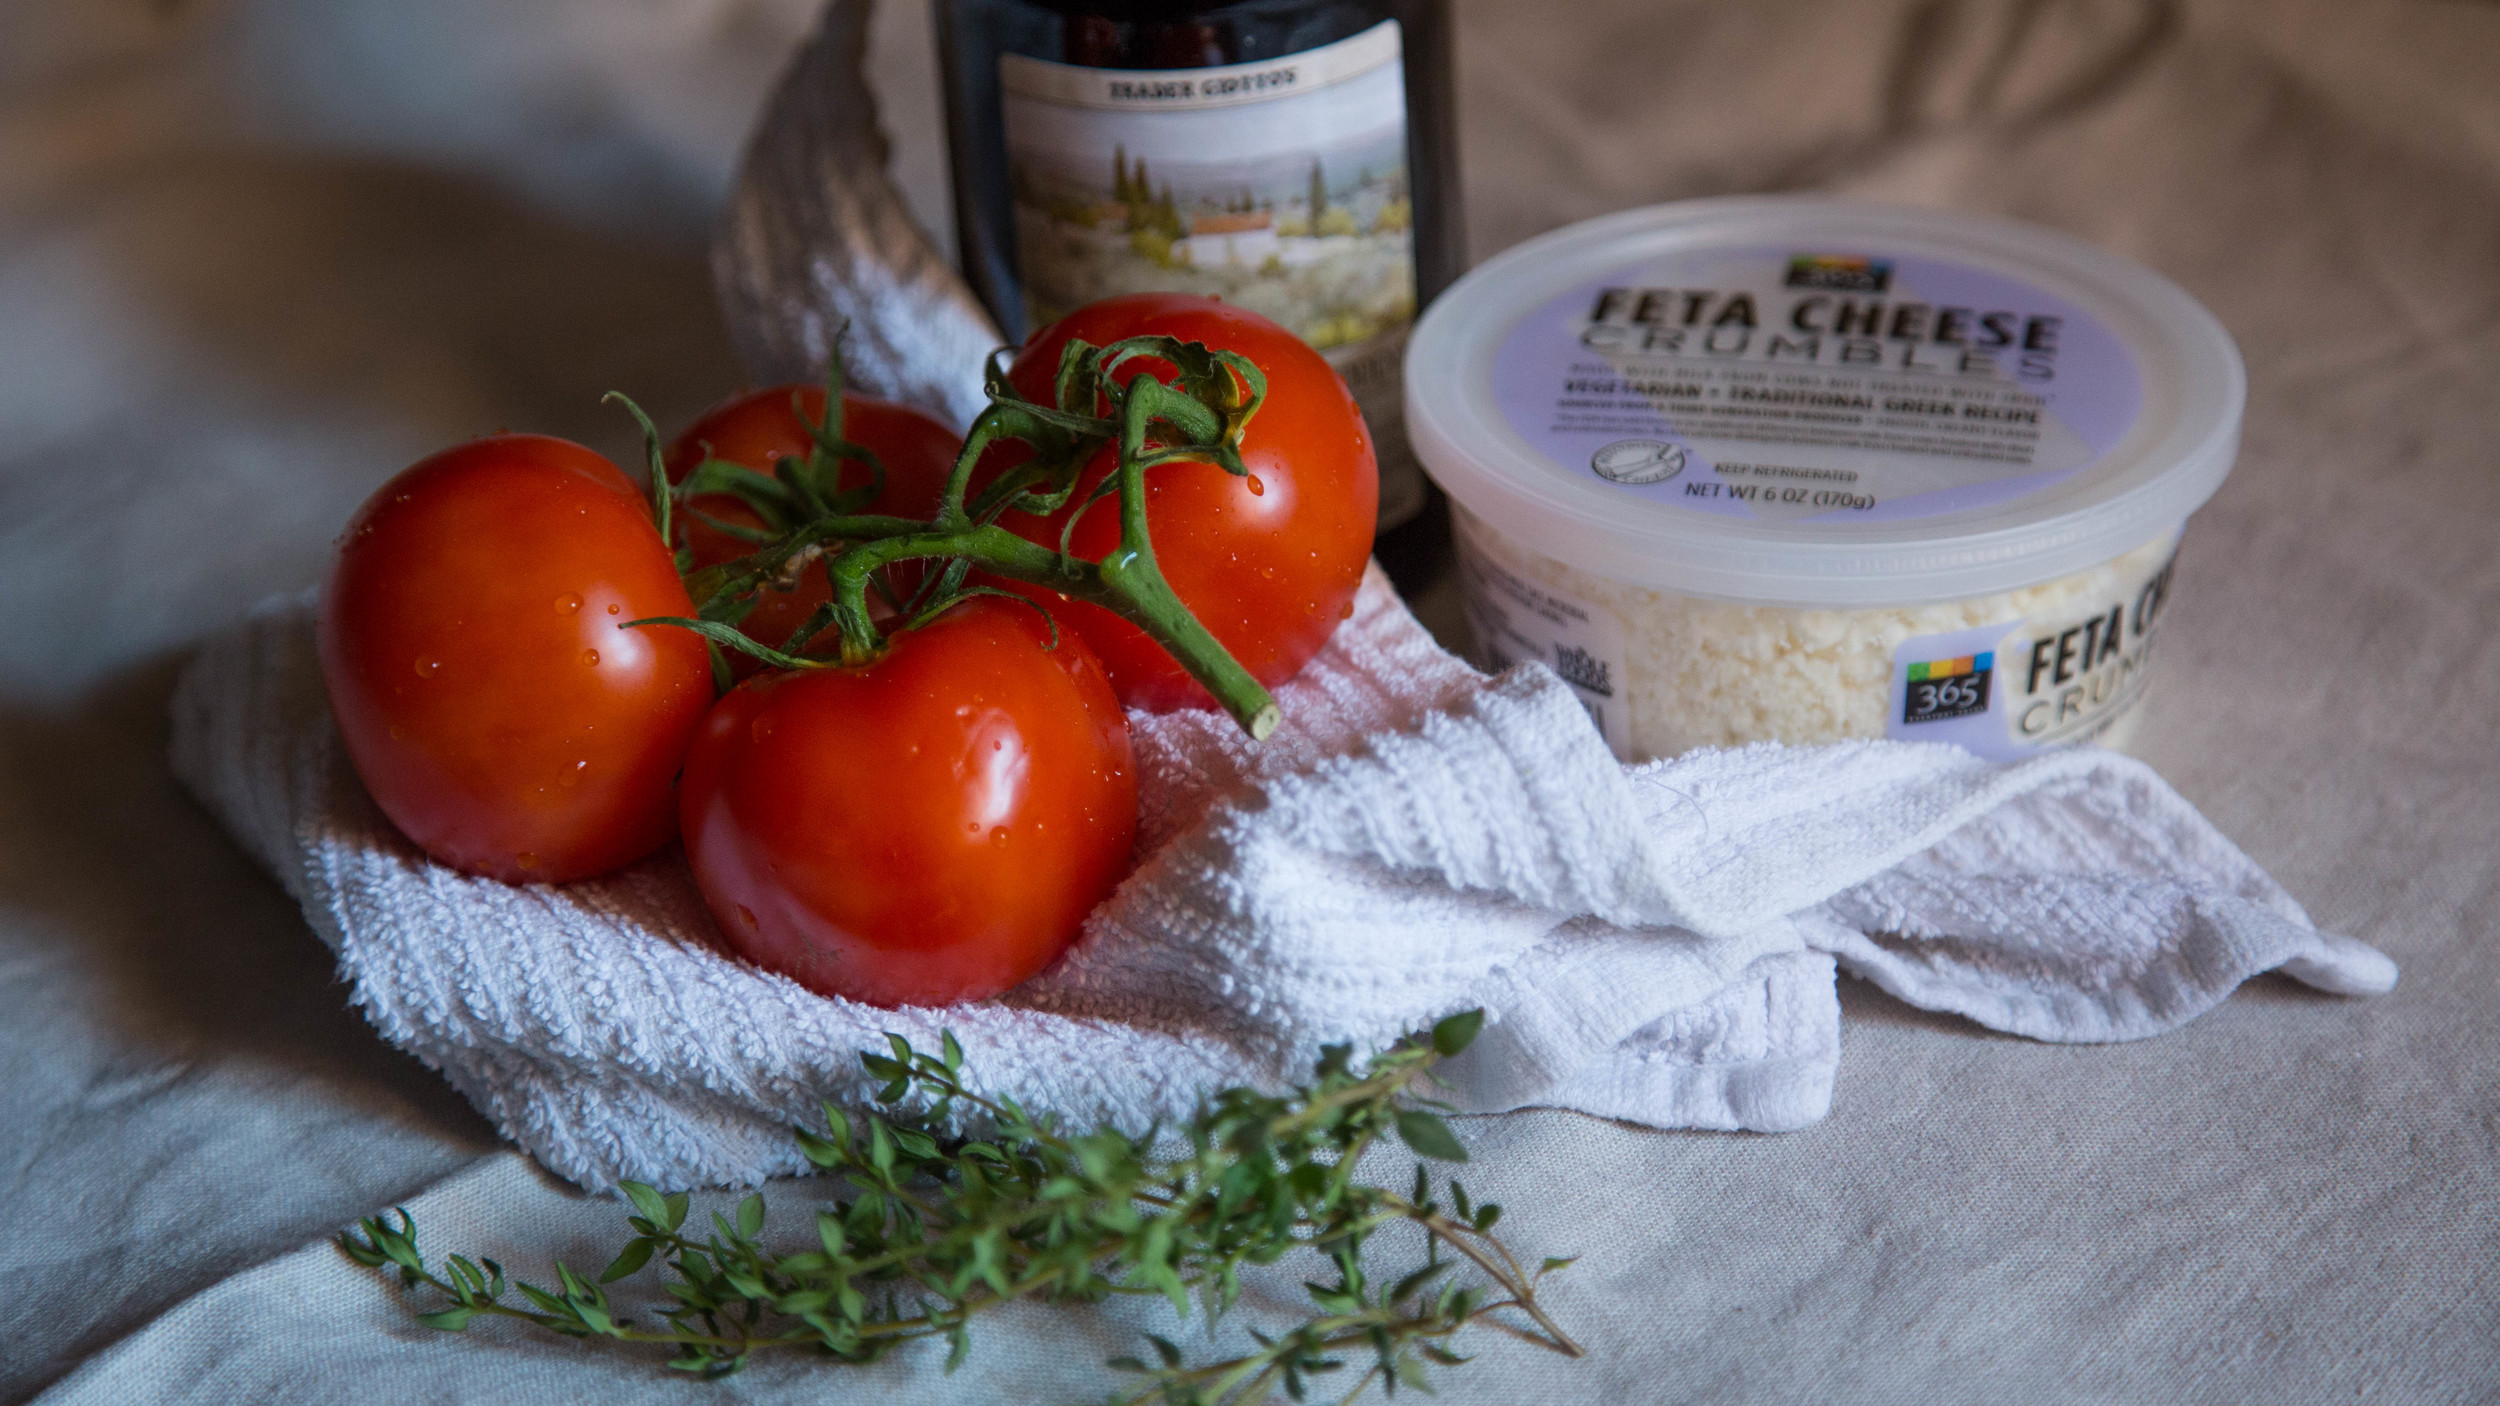
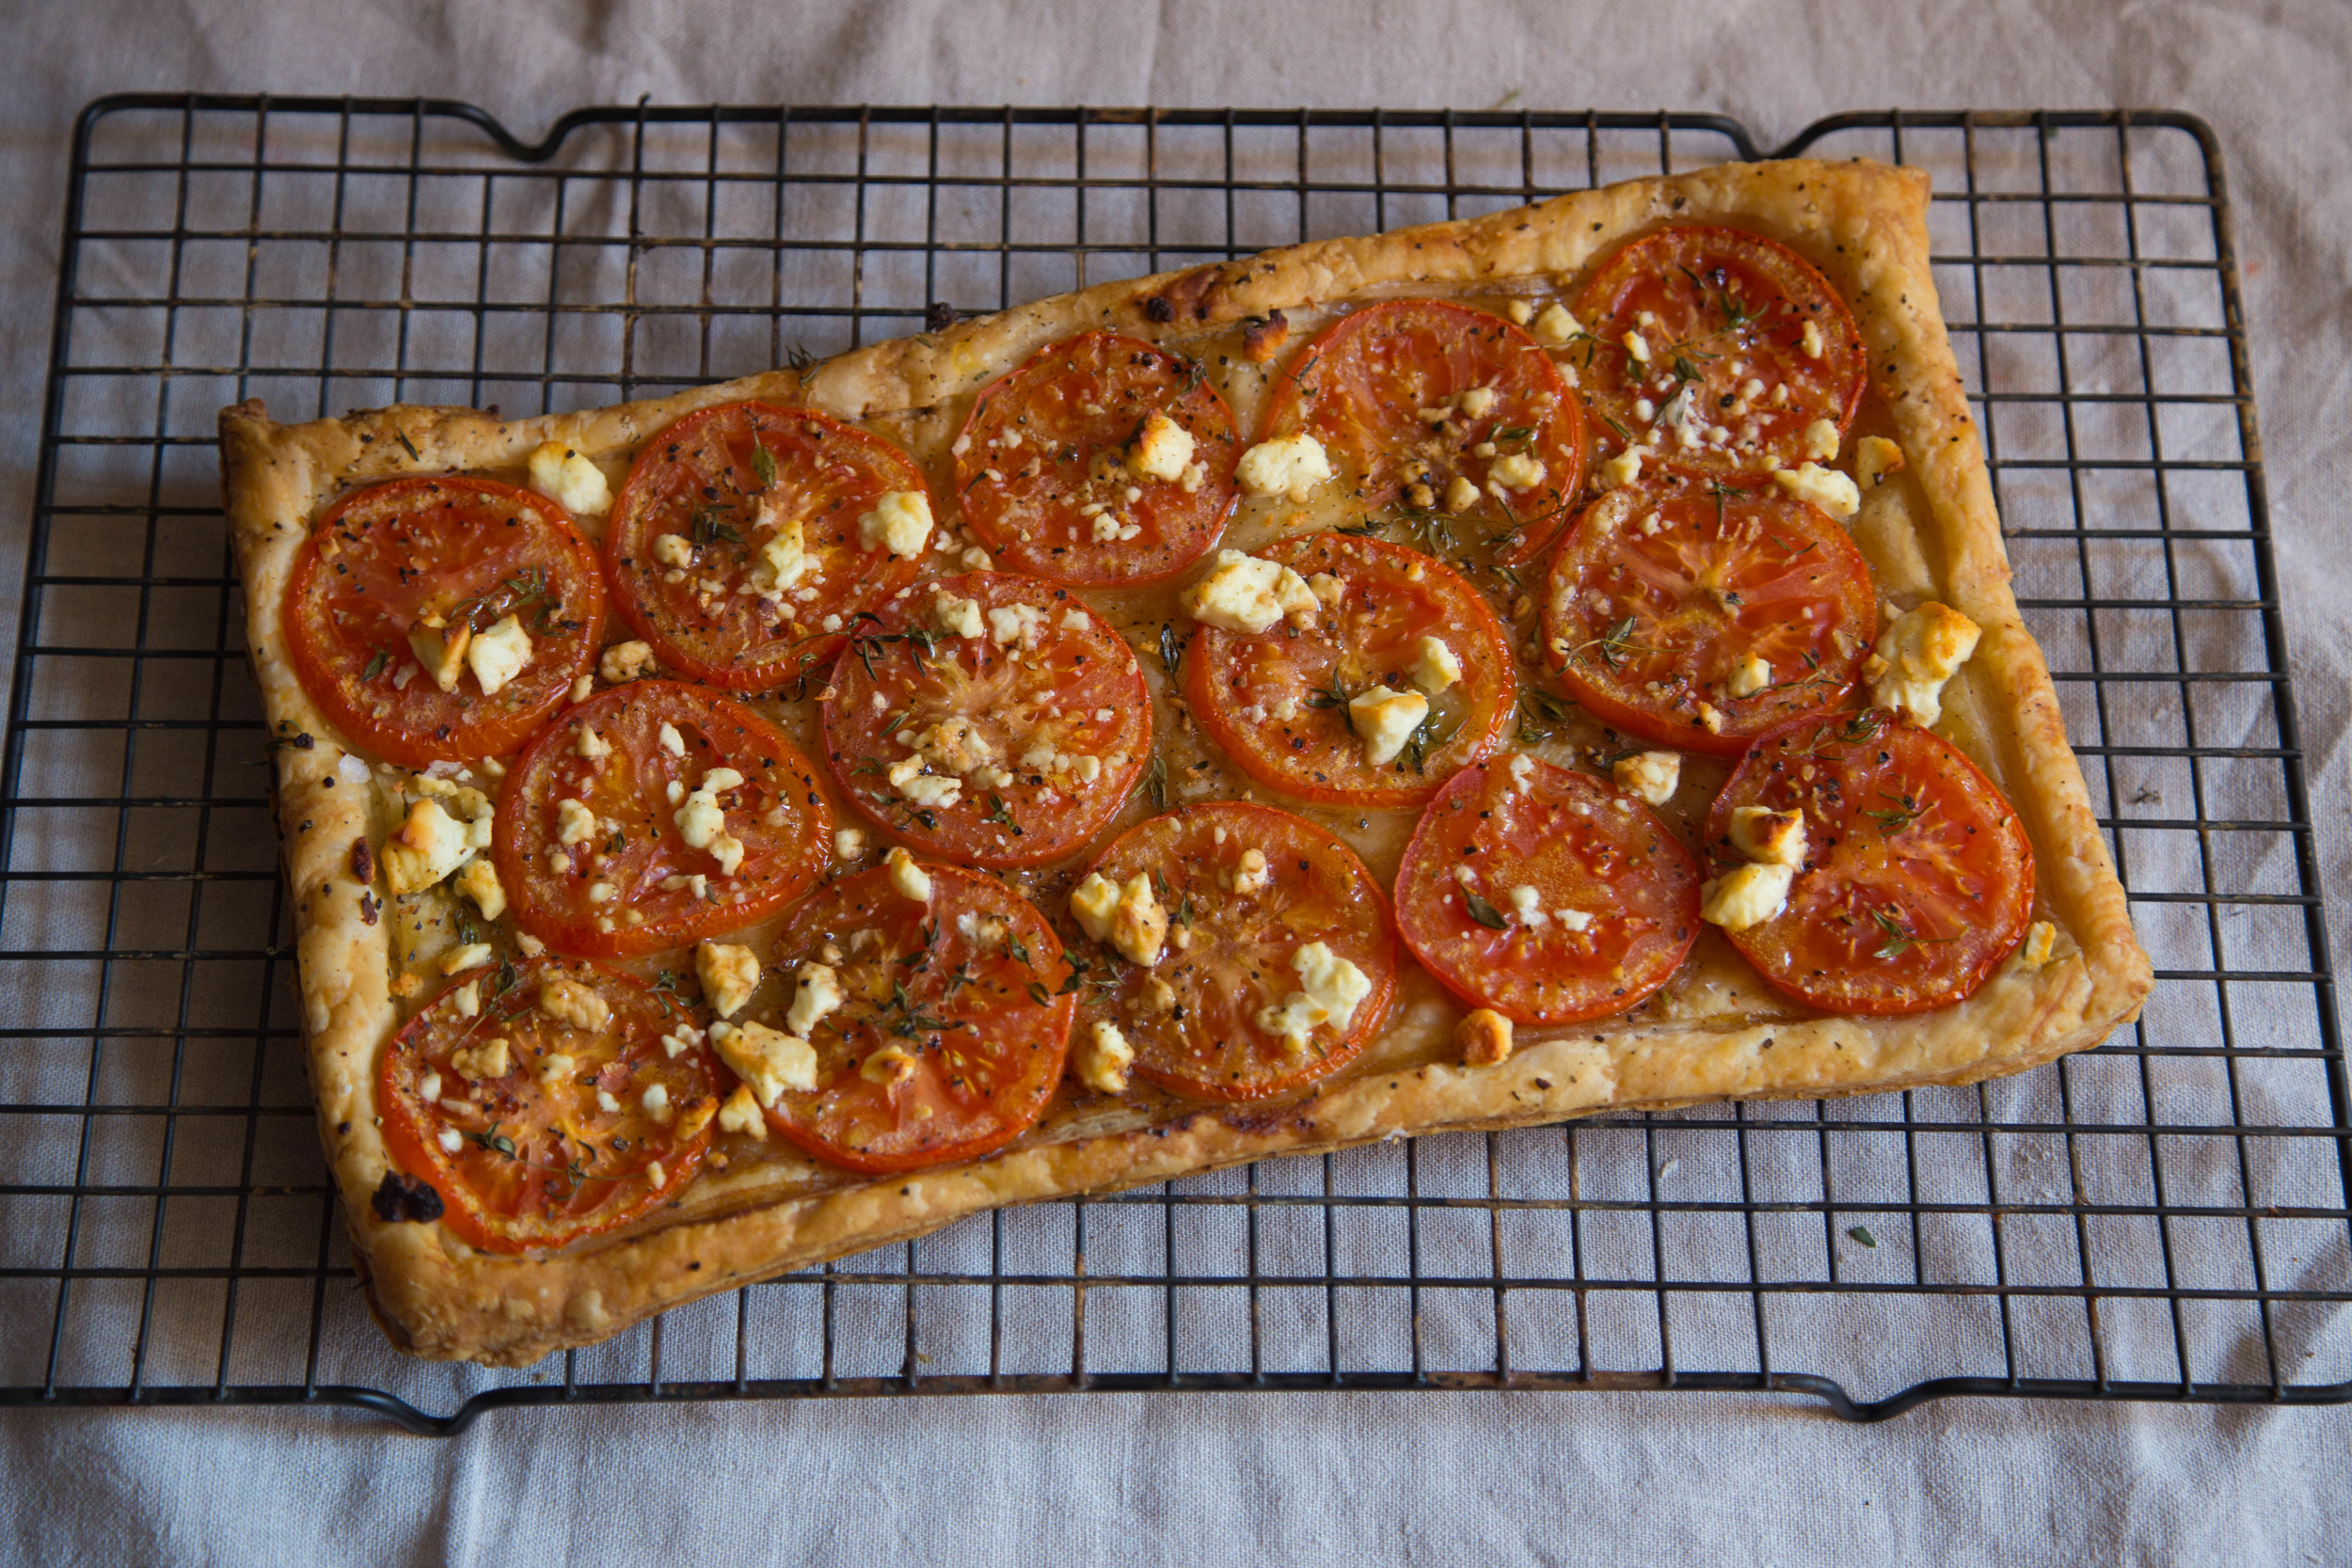
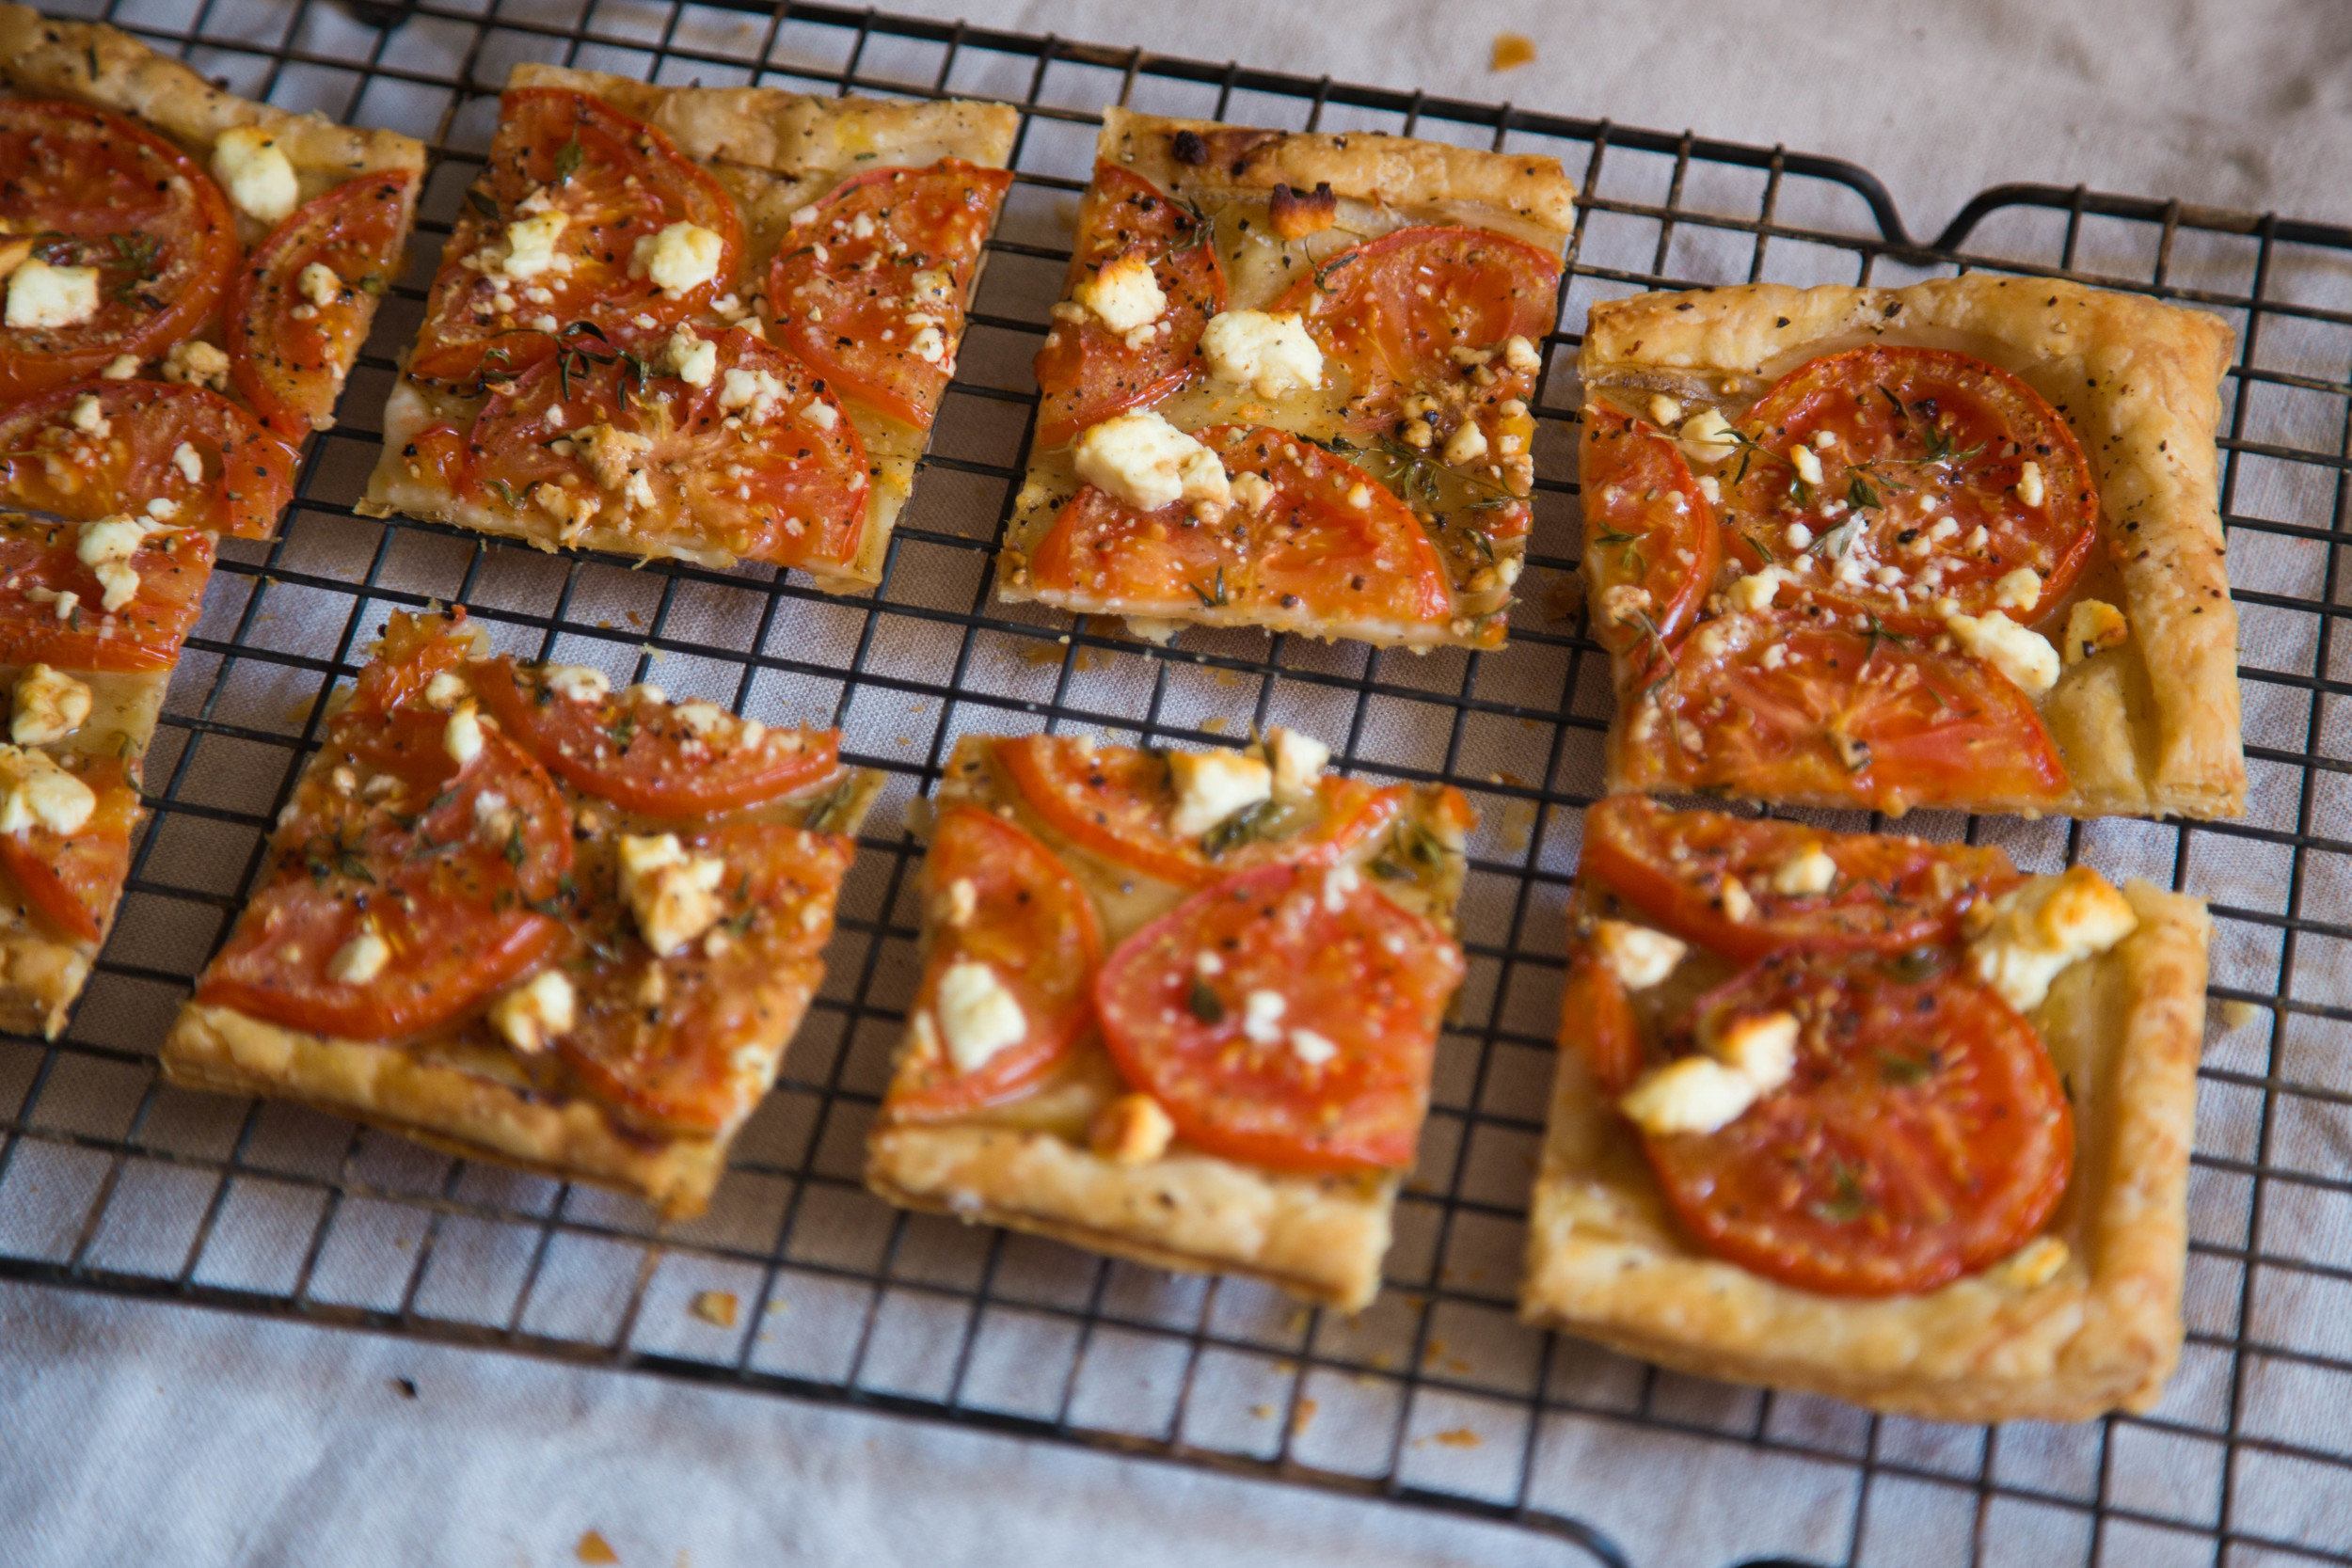
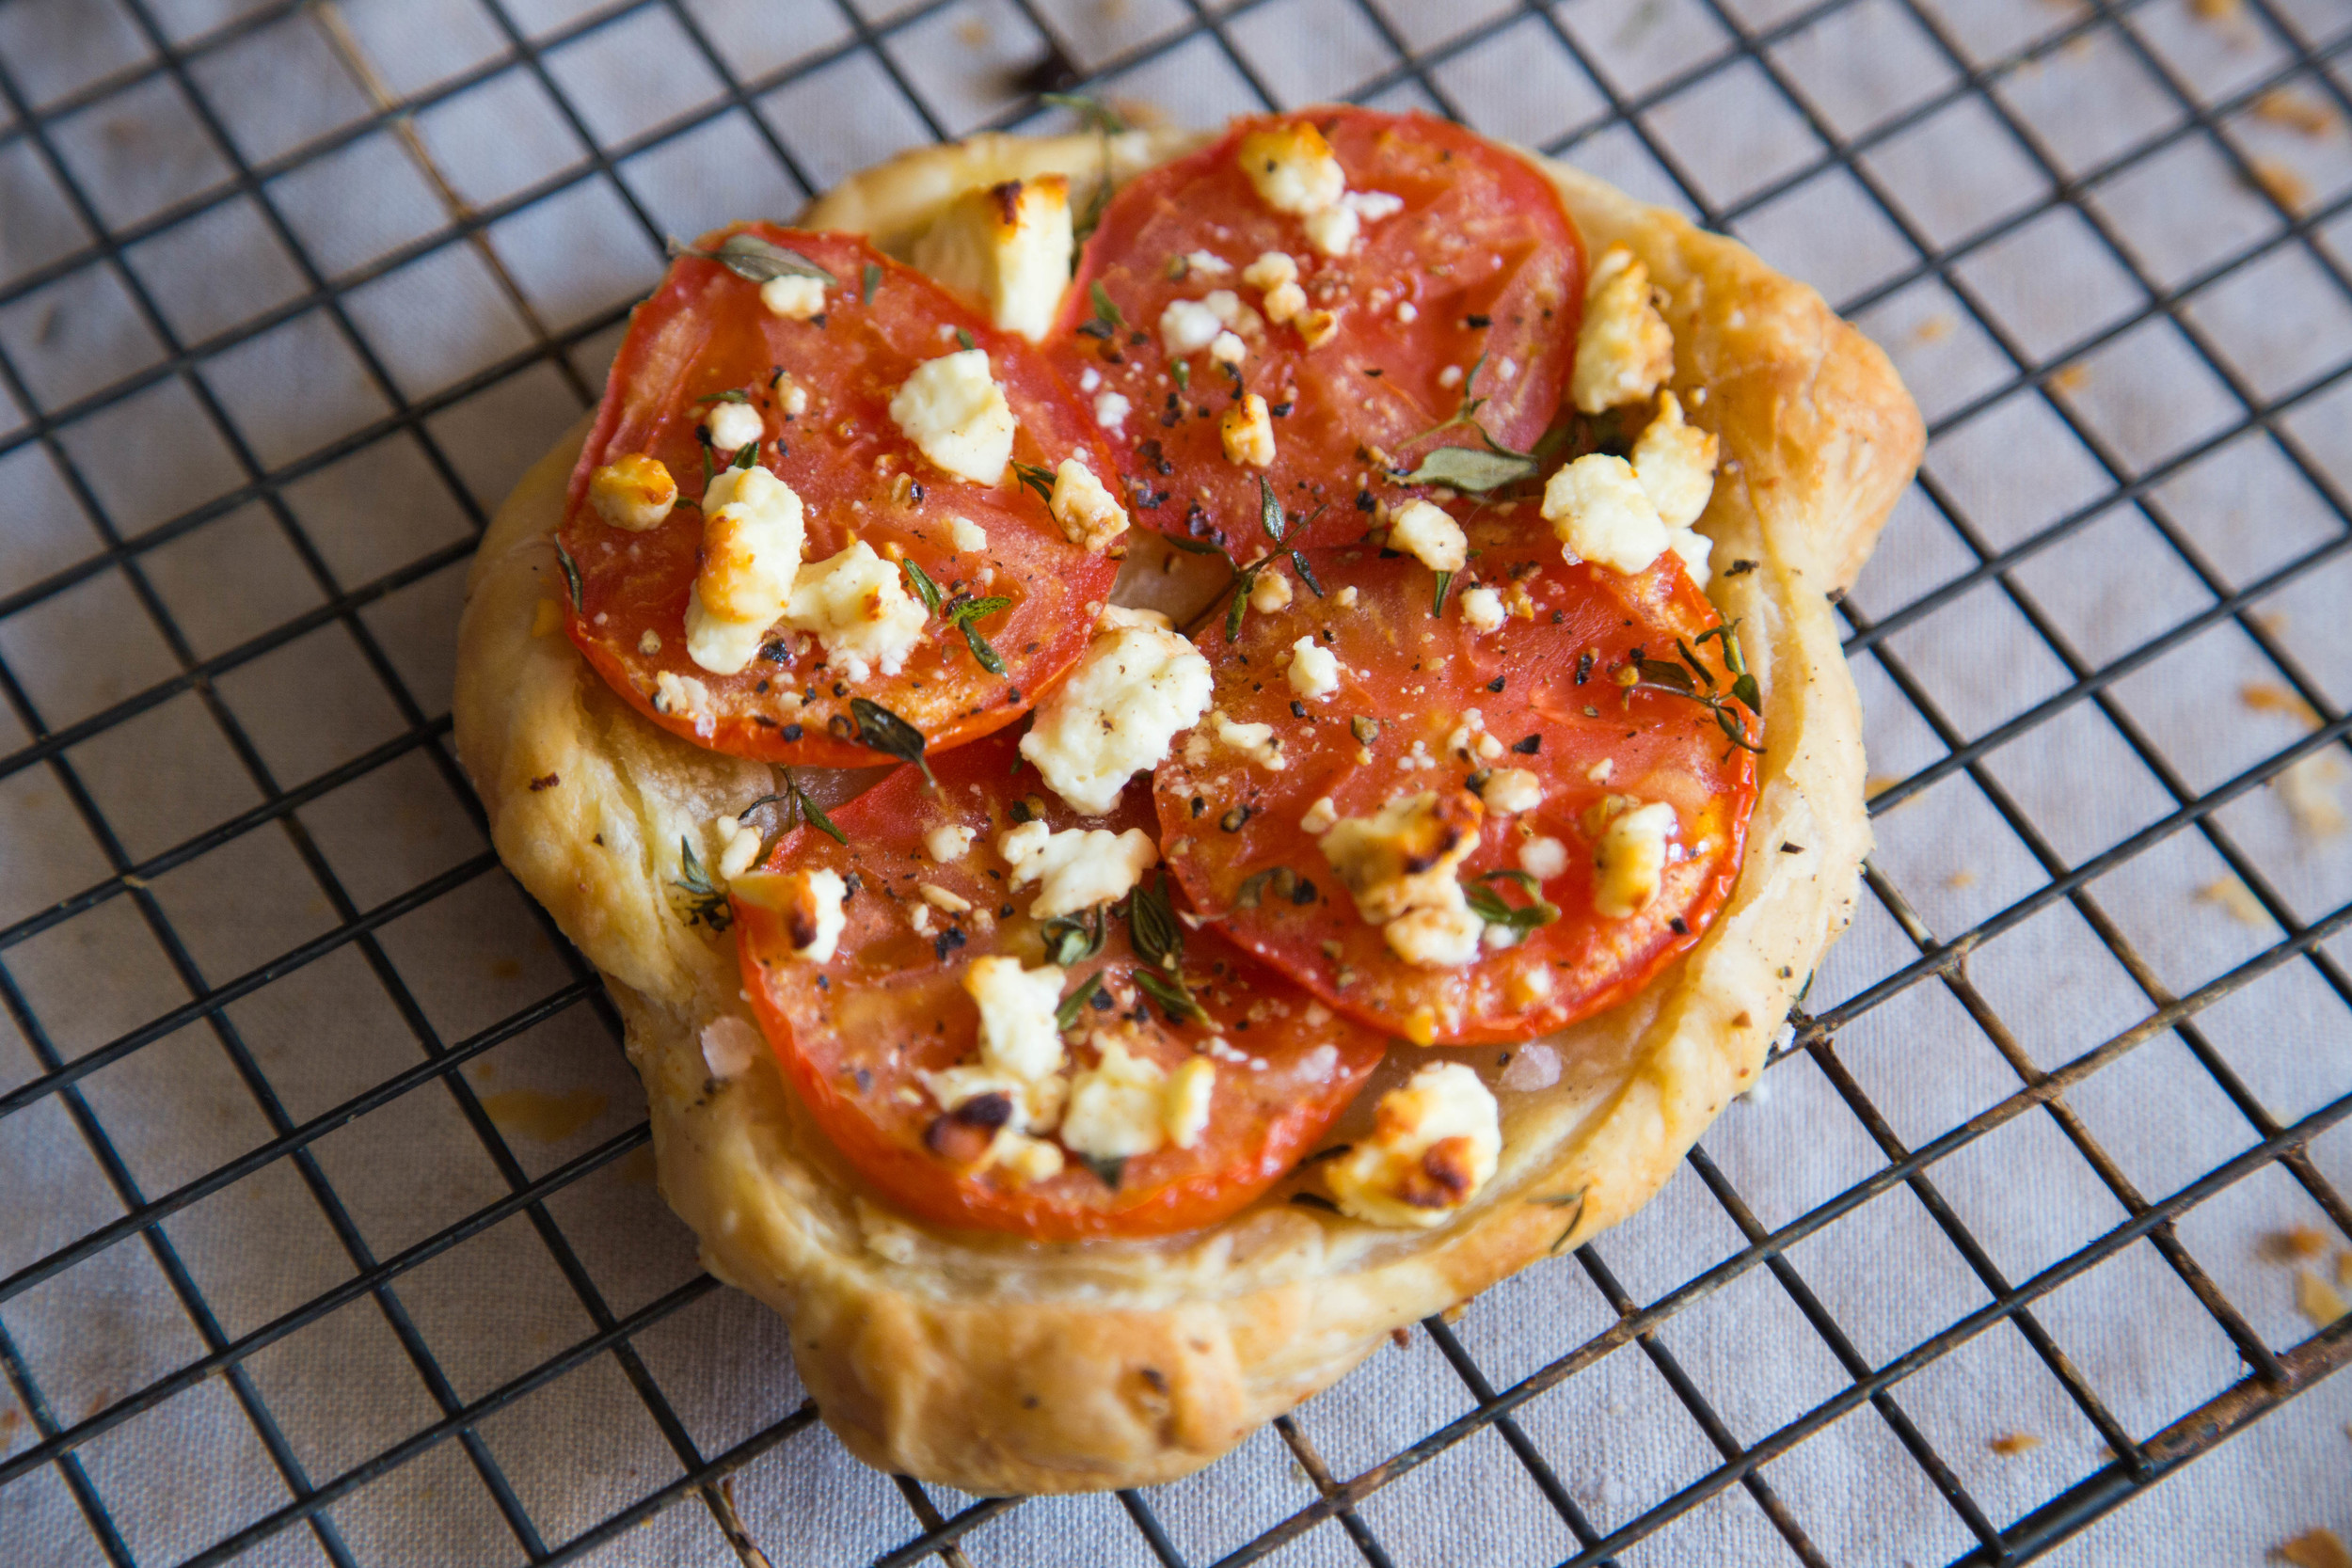
The weather has been a bit up and down, but it's June now so it's summer, right? I don't care if it's 60 degrees and raining, it's the season of BBQs, potlucks, picnics, and general eating outdoorsness (totally a word). The question is, what do you bring to such occasions? Meat? Salad? Chips? Beer? All of the above? Well, you can't really go wrong with any of those... but my go to for summer sharing is this tomato tart.
It works all summer, because tomatoes. Everyone loves it, because pastry. It's perfect for people to snack on while they wait for the grill to get going, it's easy enough to transport, and you can eat it hot or cold (though I'd recommend hot).
I also love this because it's simple and easy (my favorite kind of summer food). You don't need a knife or fork to eat it, just a nice beer or a chilled glass of wine and you're all set to enjoy a beautiful summer evening.
Stuff
1 sheet puff pastry
3 vine tomatoes
handful of feta
few sprigs of thyme
drizzle of balsamic vinegar
salt and pepper
Steps
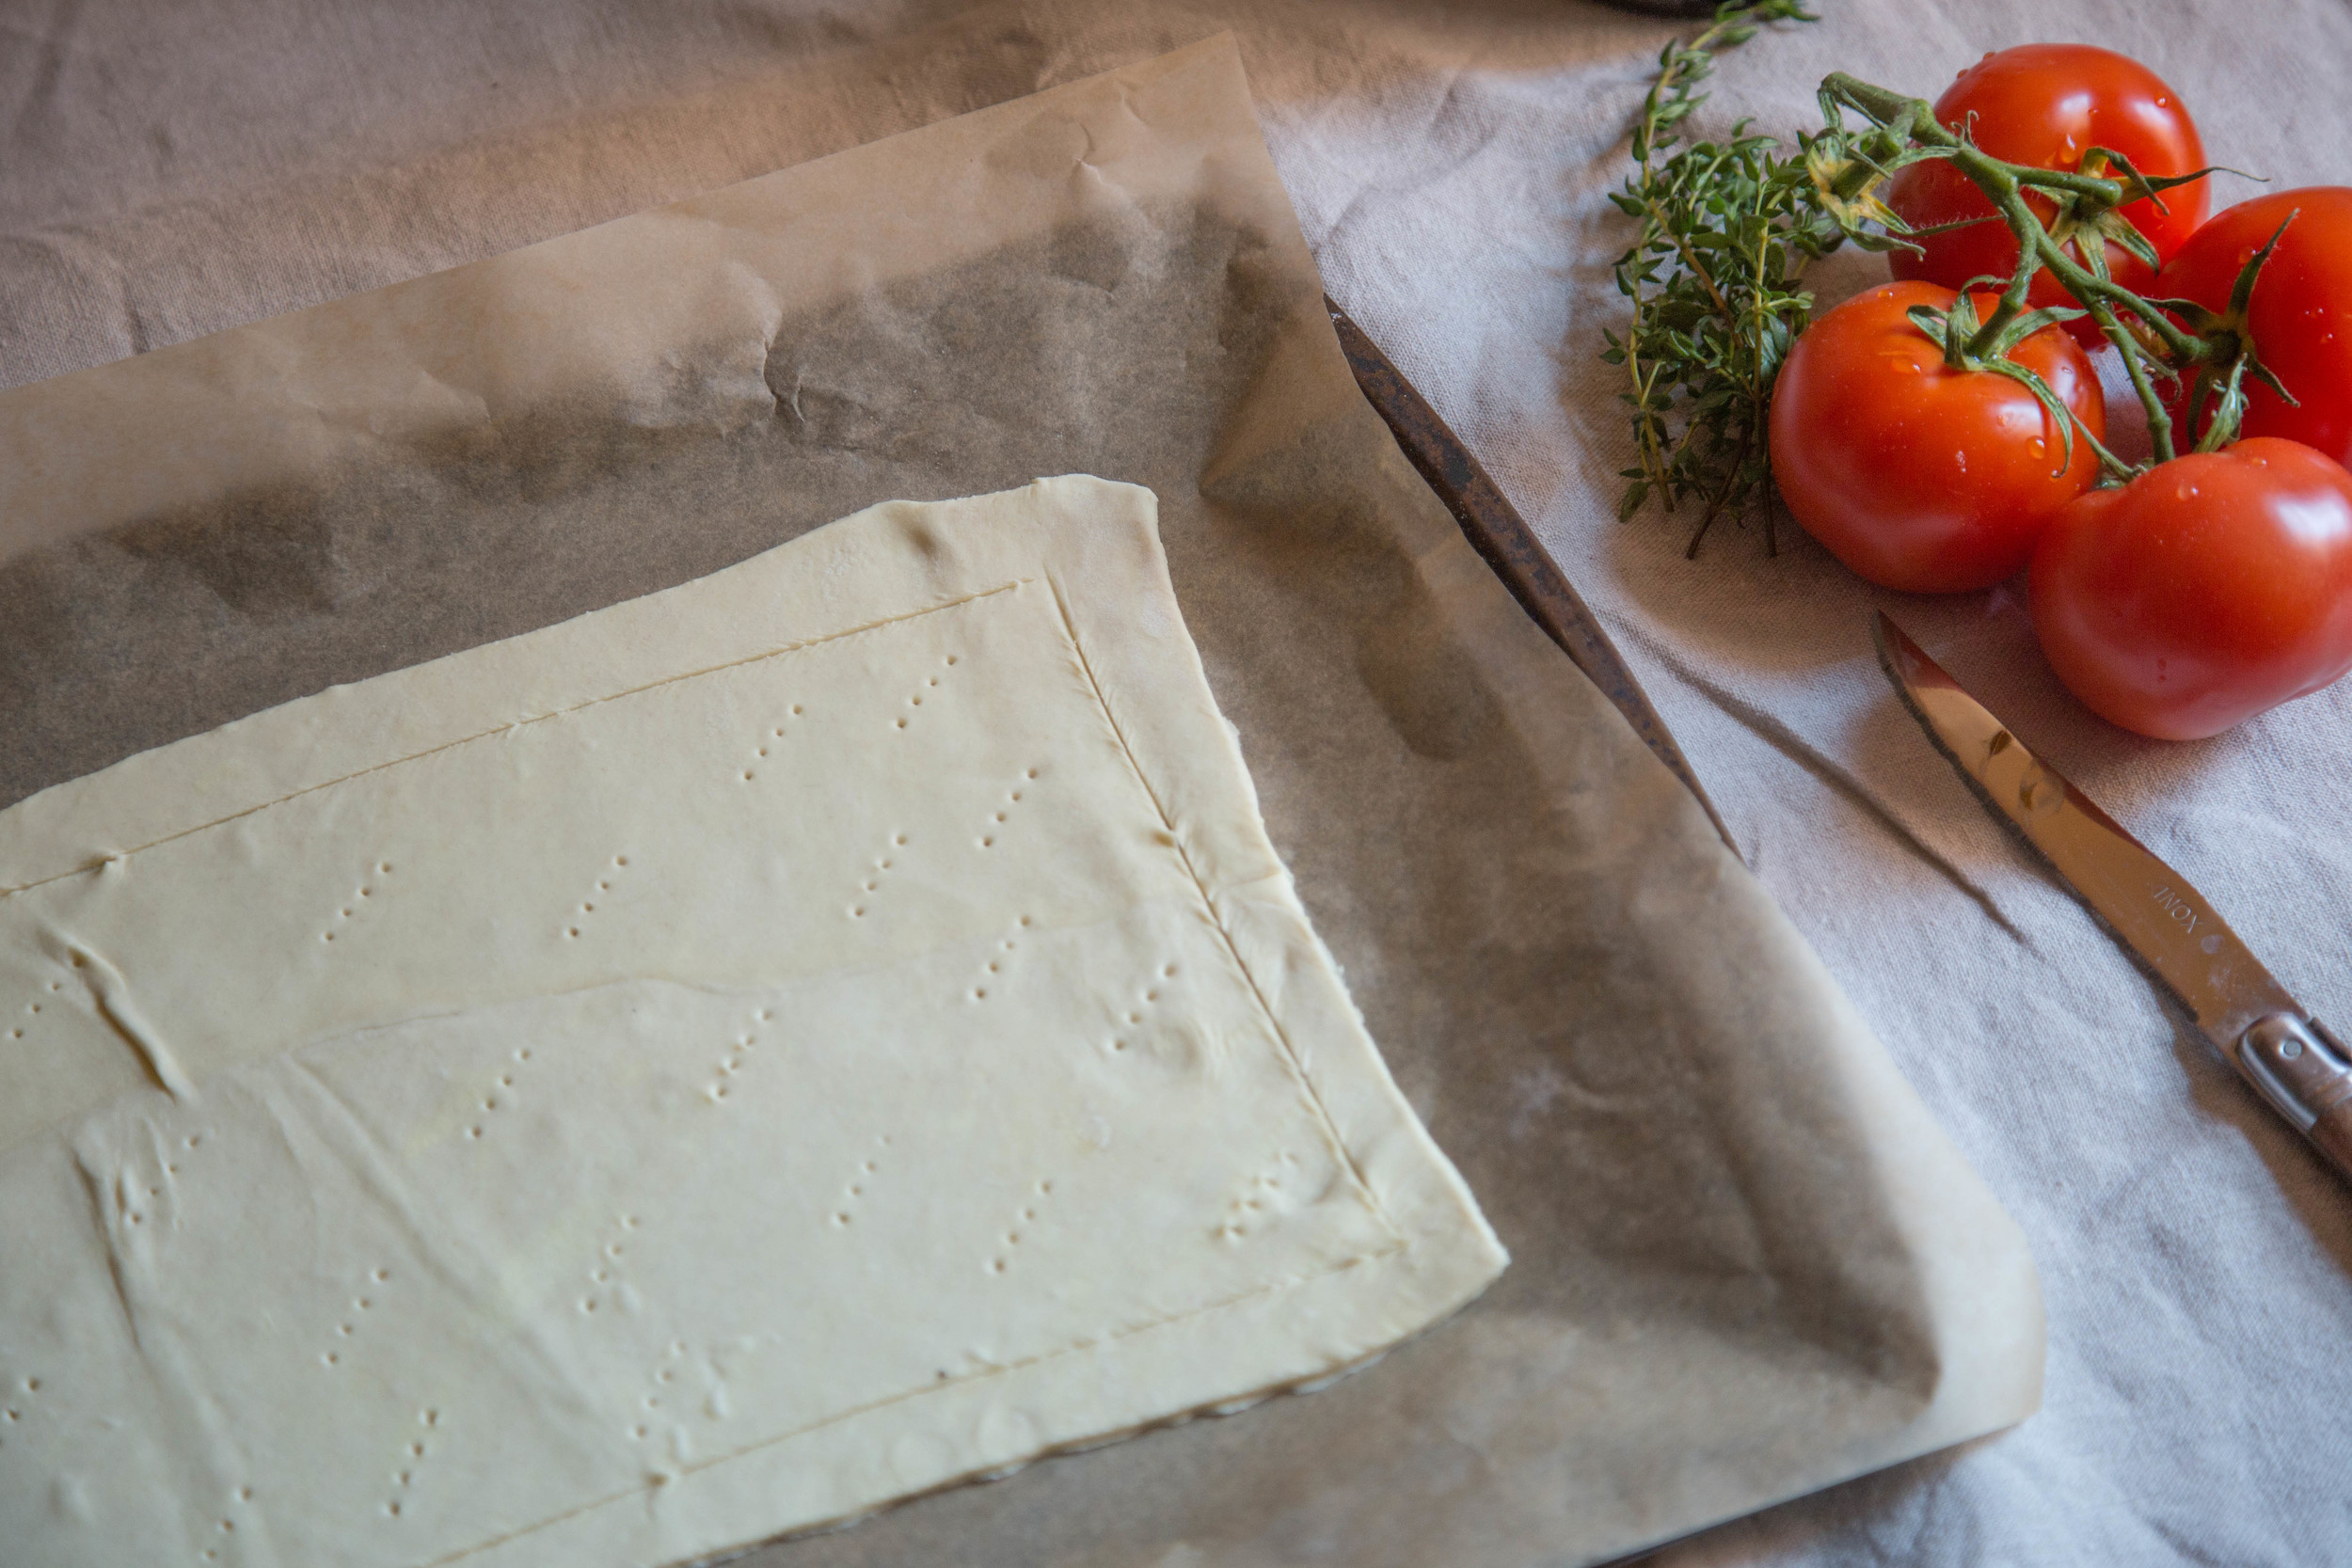
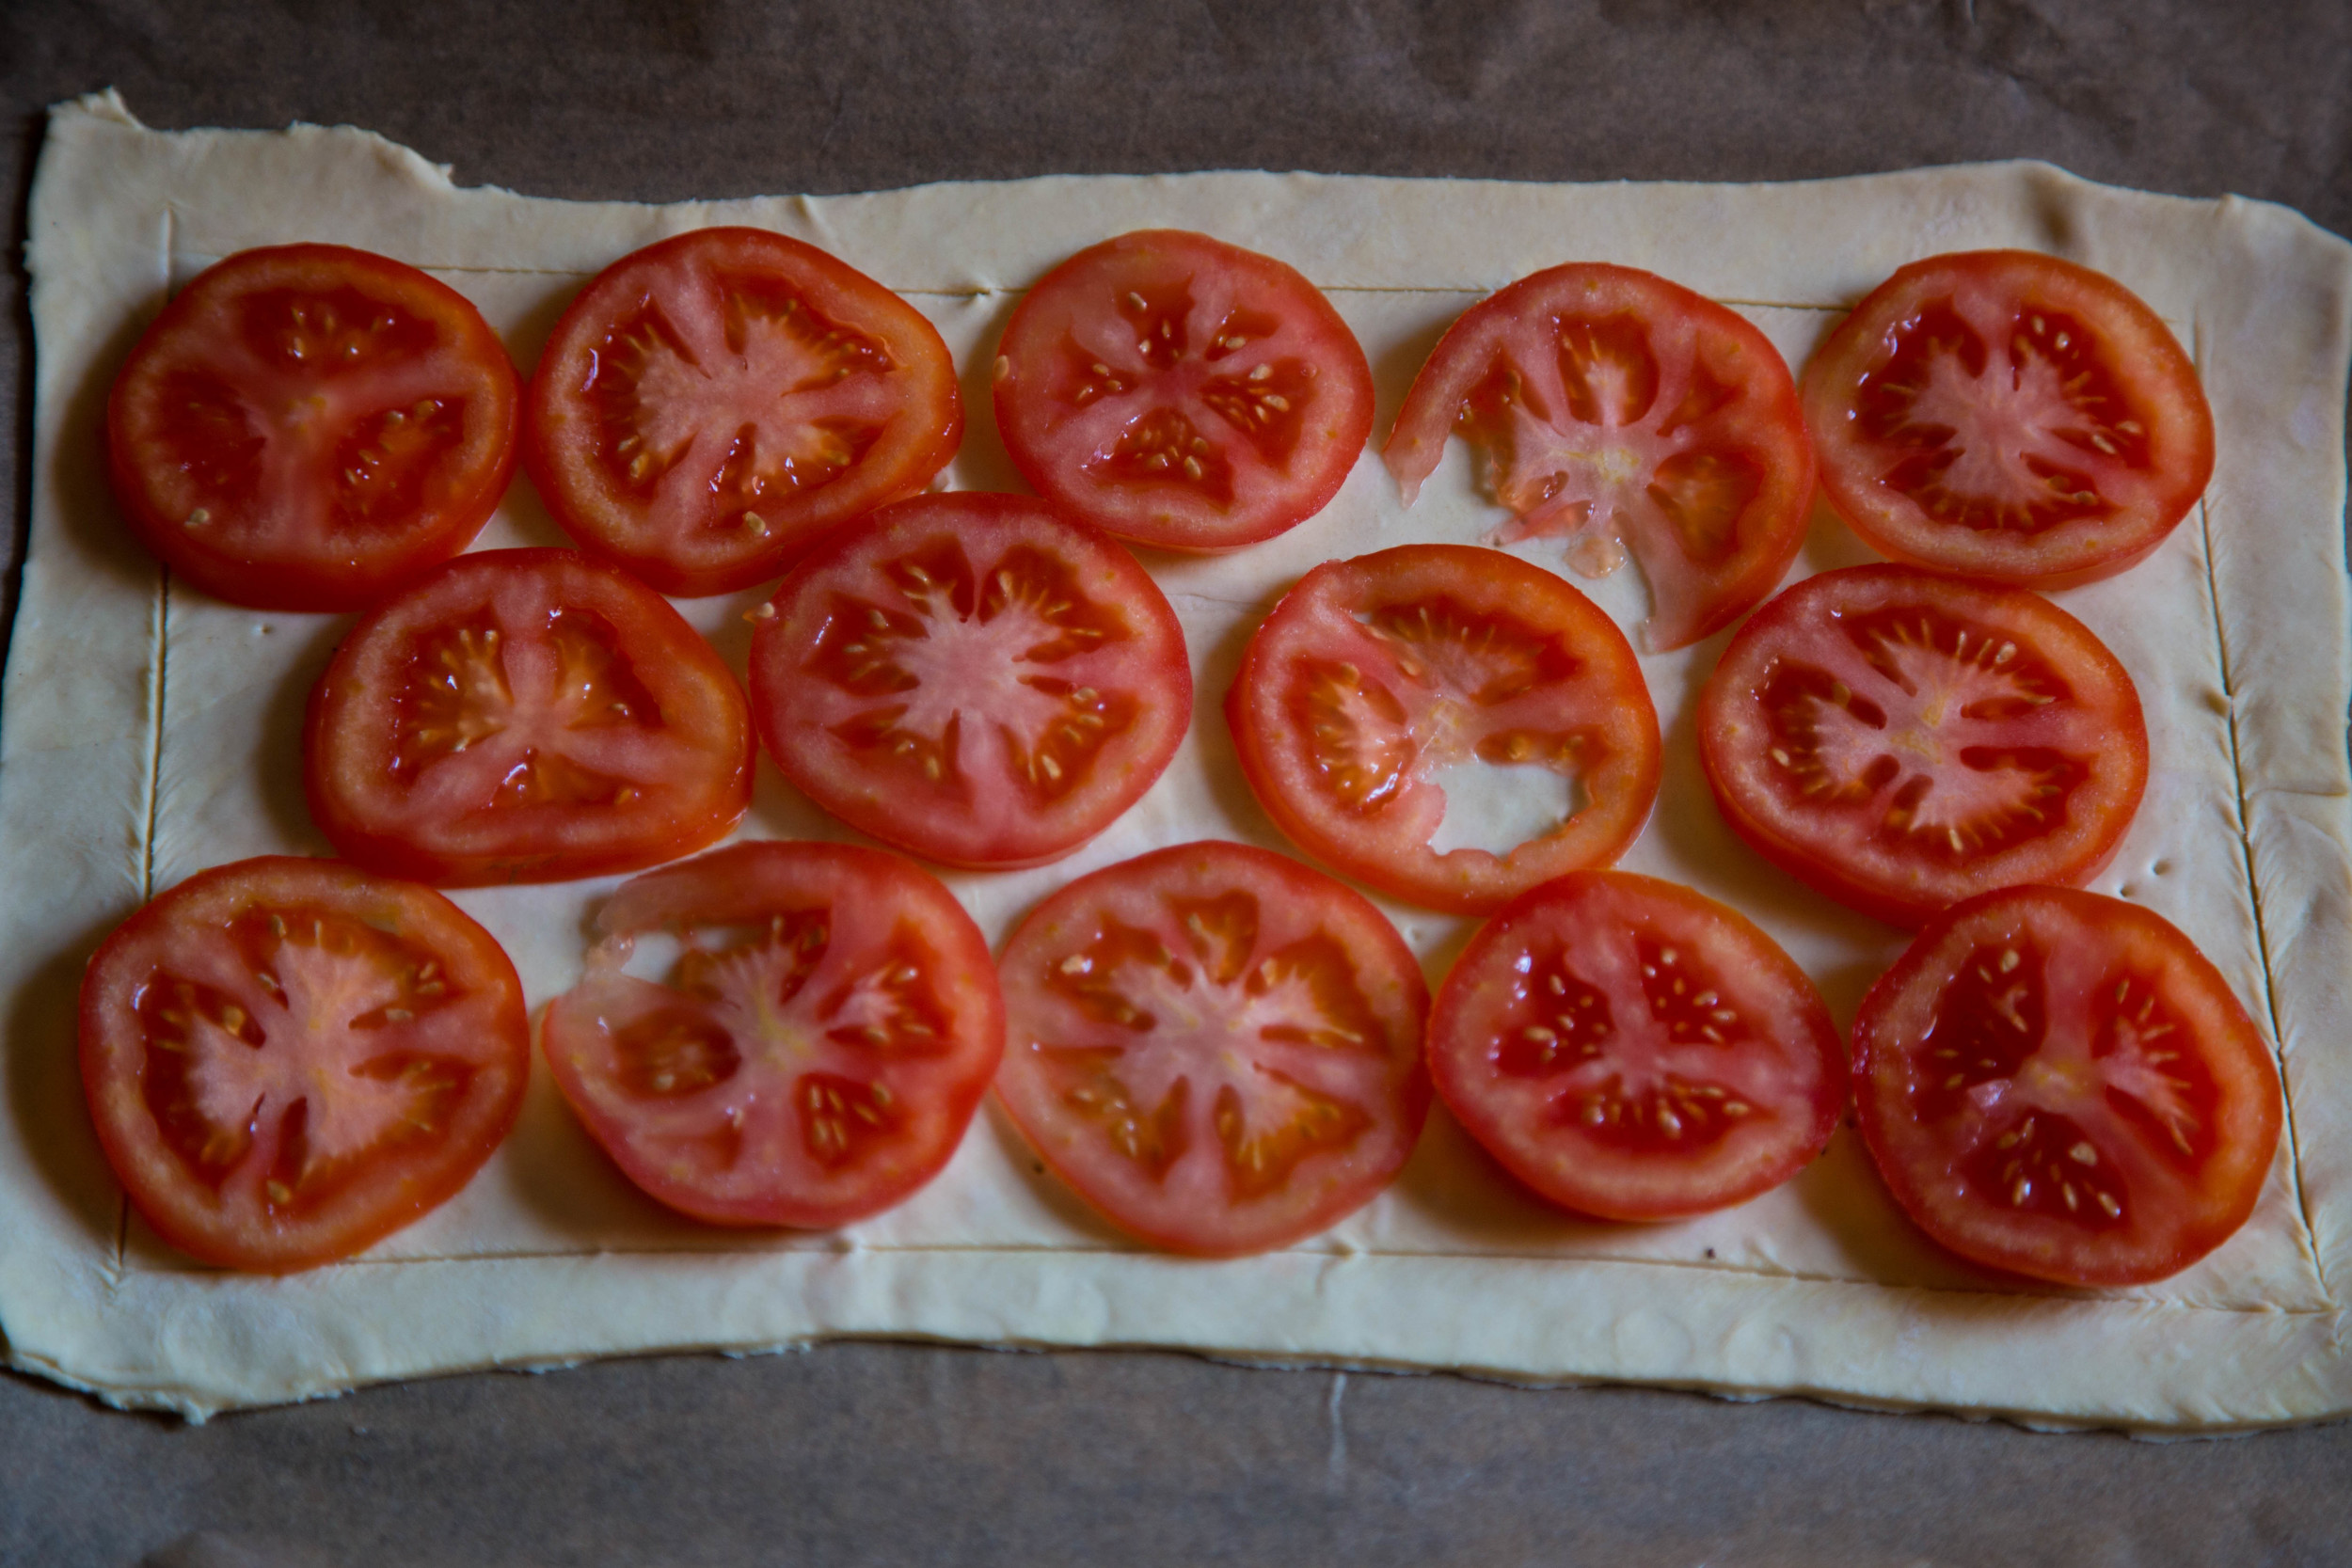
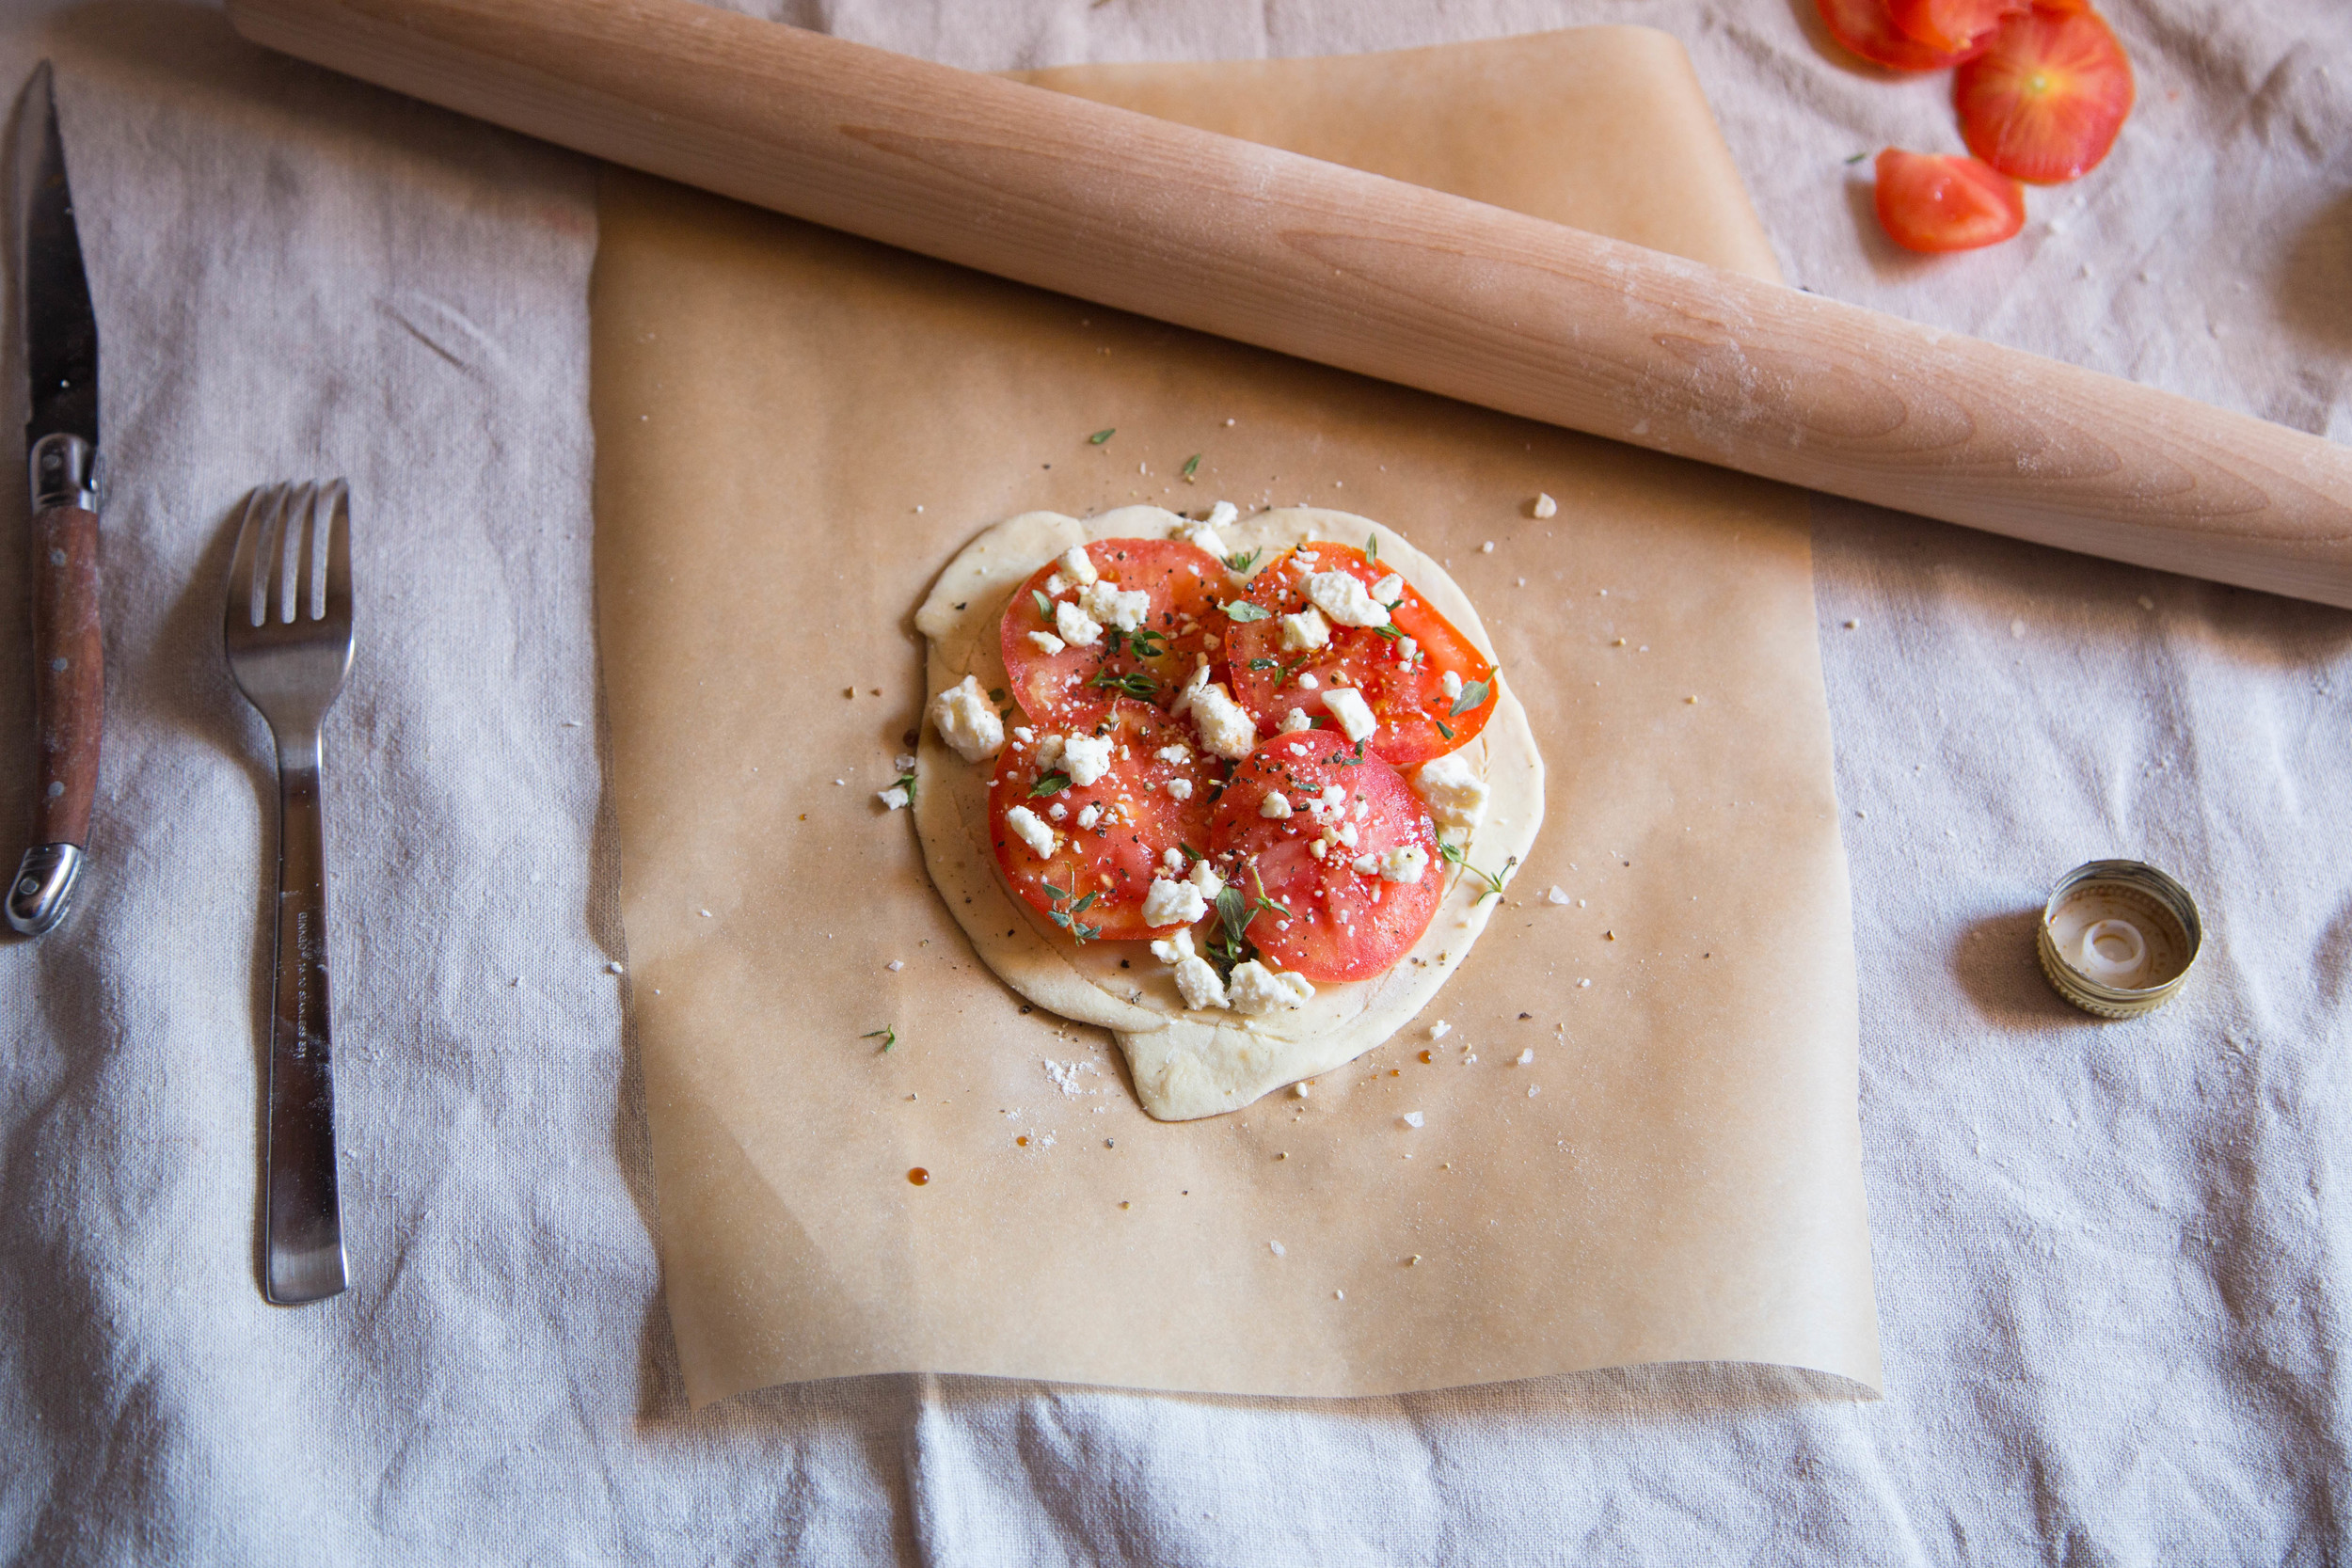
Preheat oven to 400F. Roll out puff pasty on a baking sheet lined with parchment and trim edges to form a neat rectangle (or not, whatever). With a sharp knife, score the pastry about 1/2 an inch from the edge on all sides. With a fork, prick the middle section of the pastry multiple times.
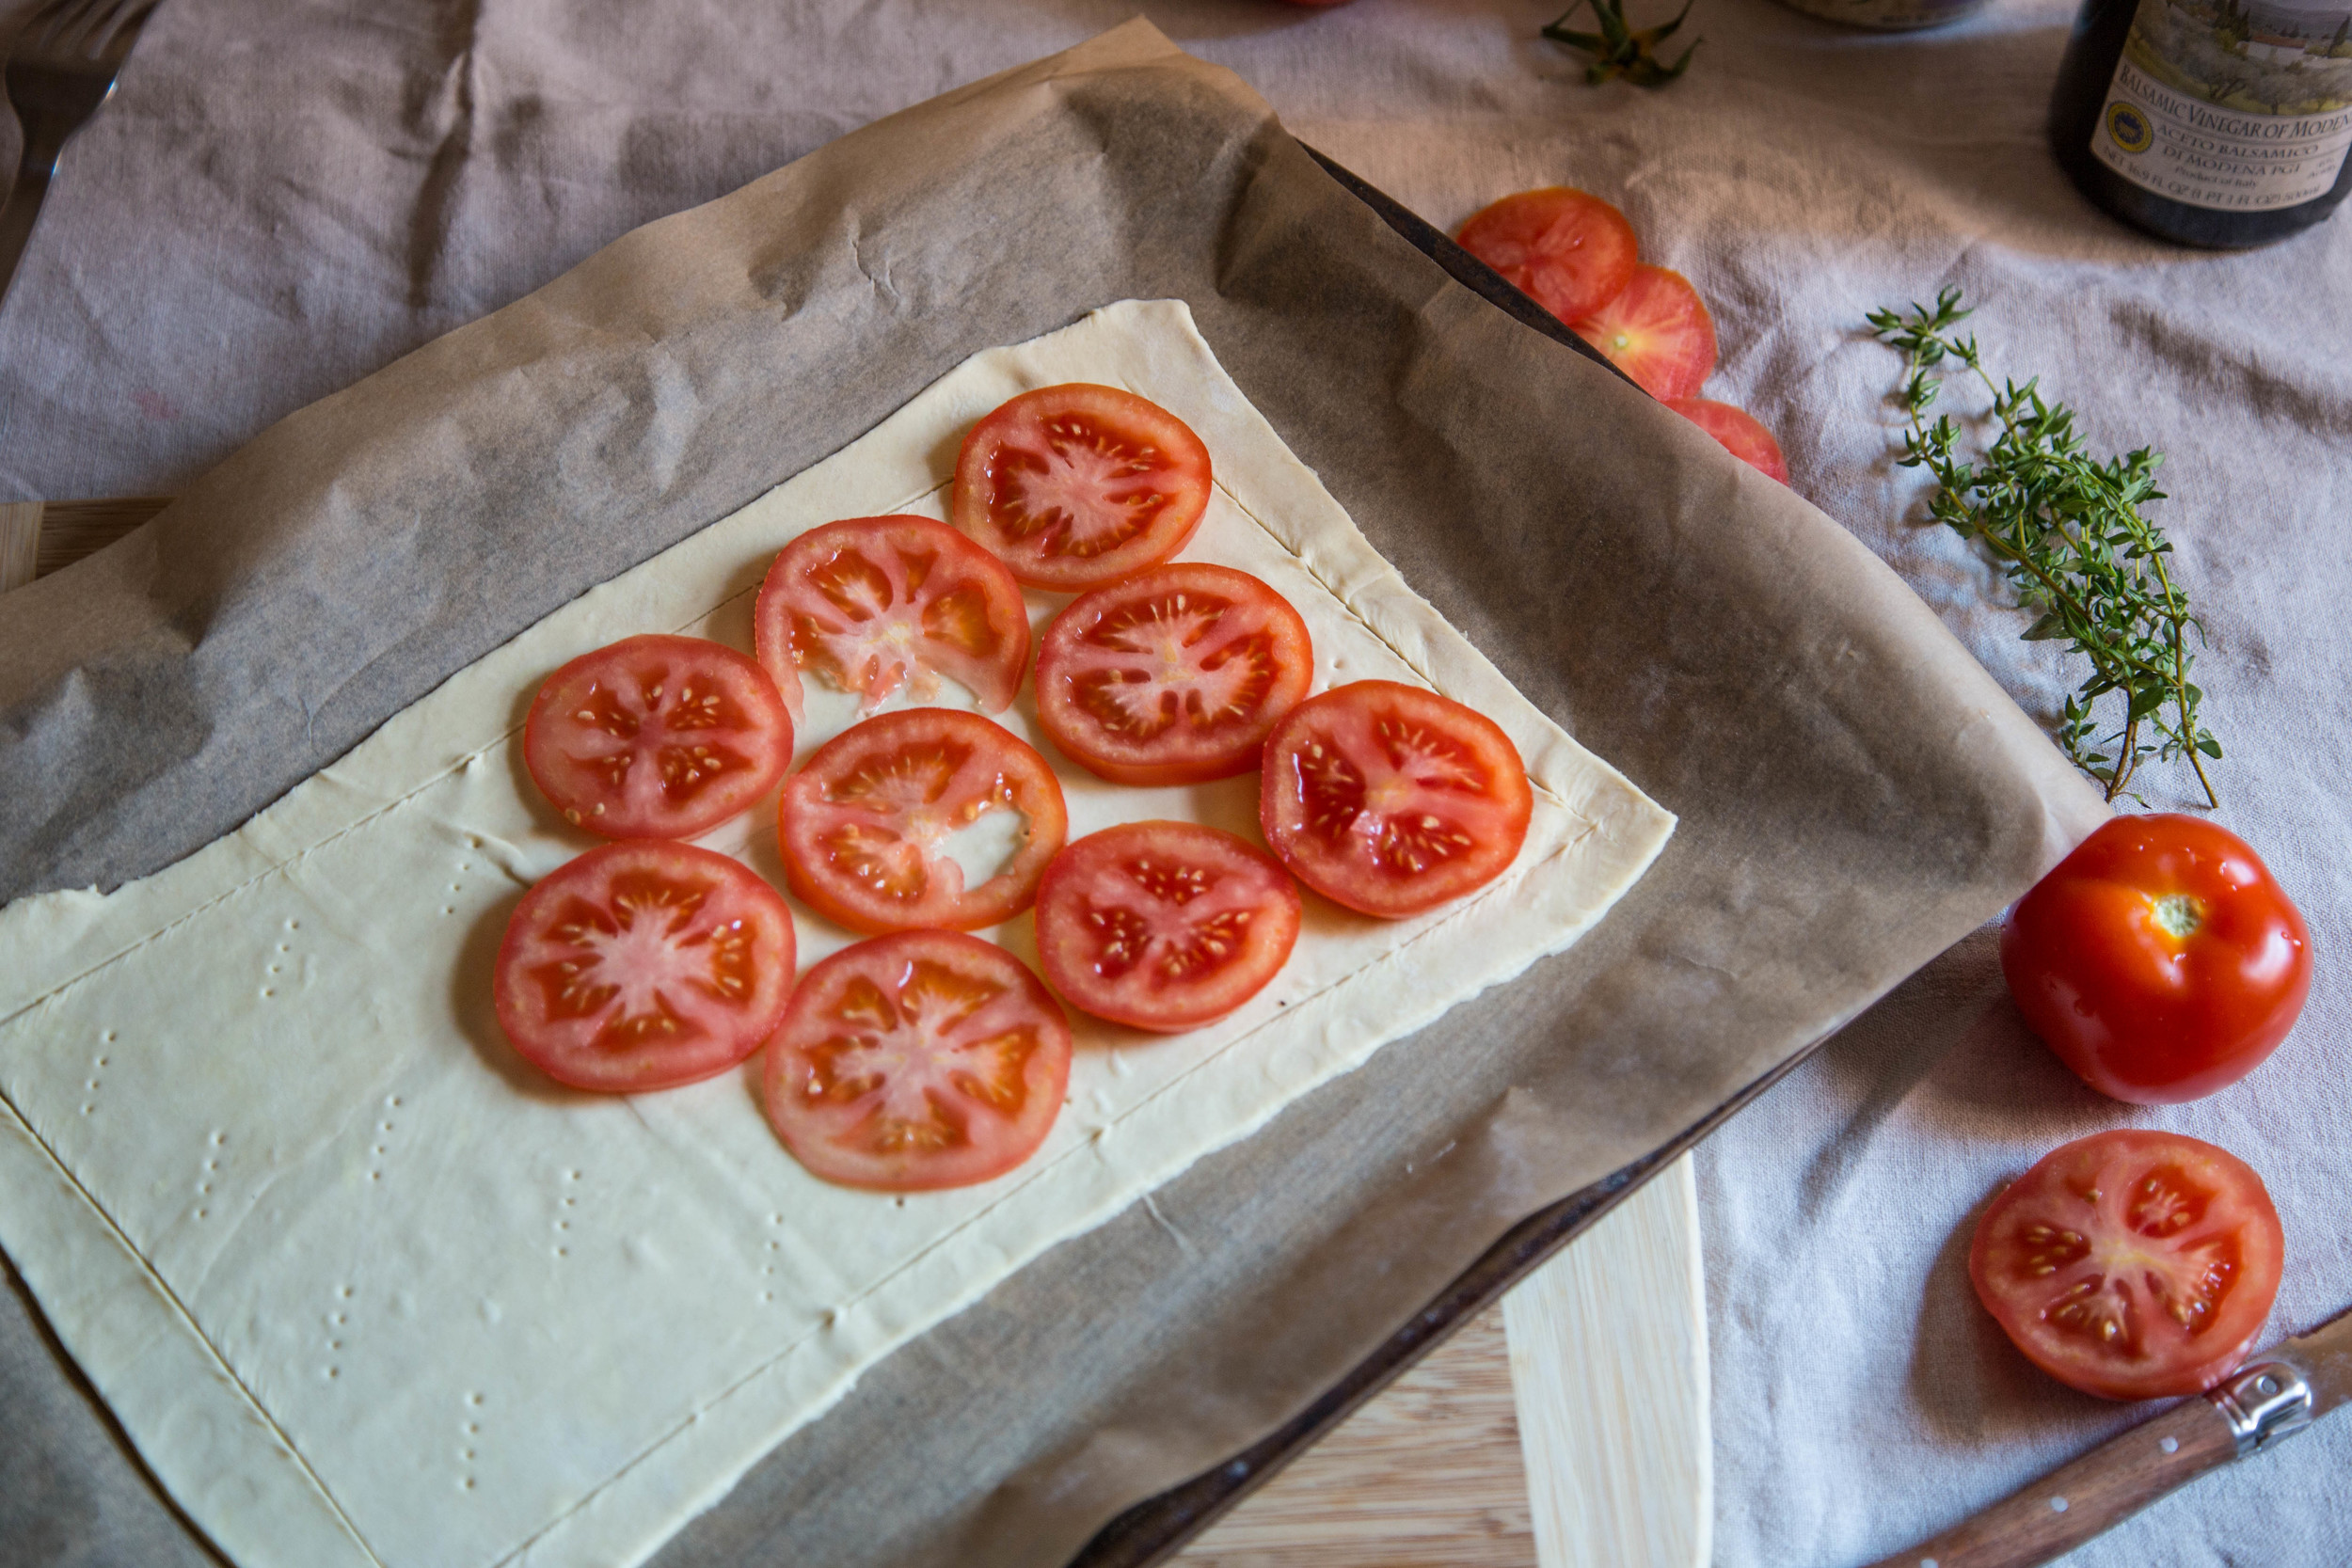
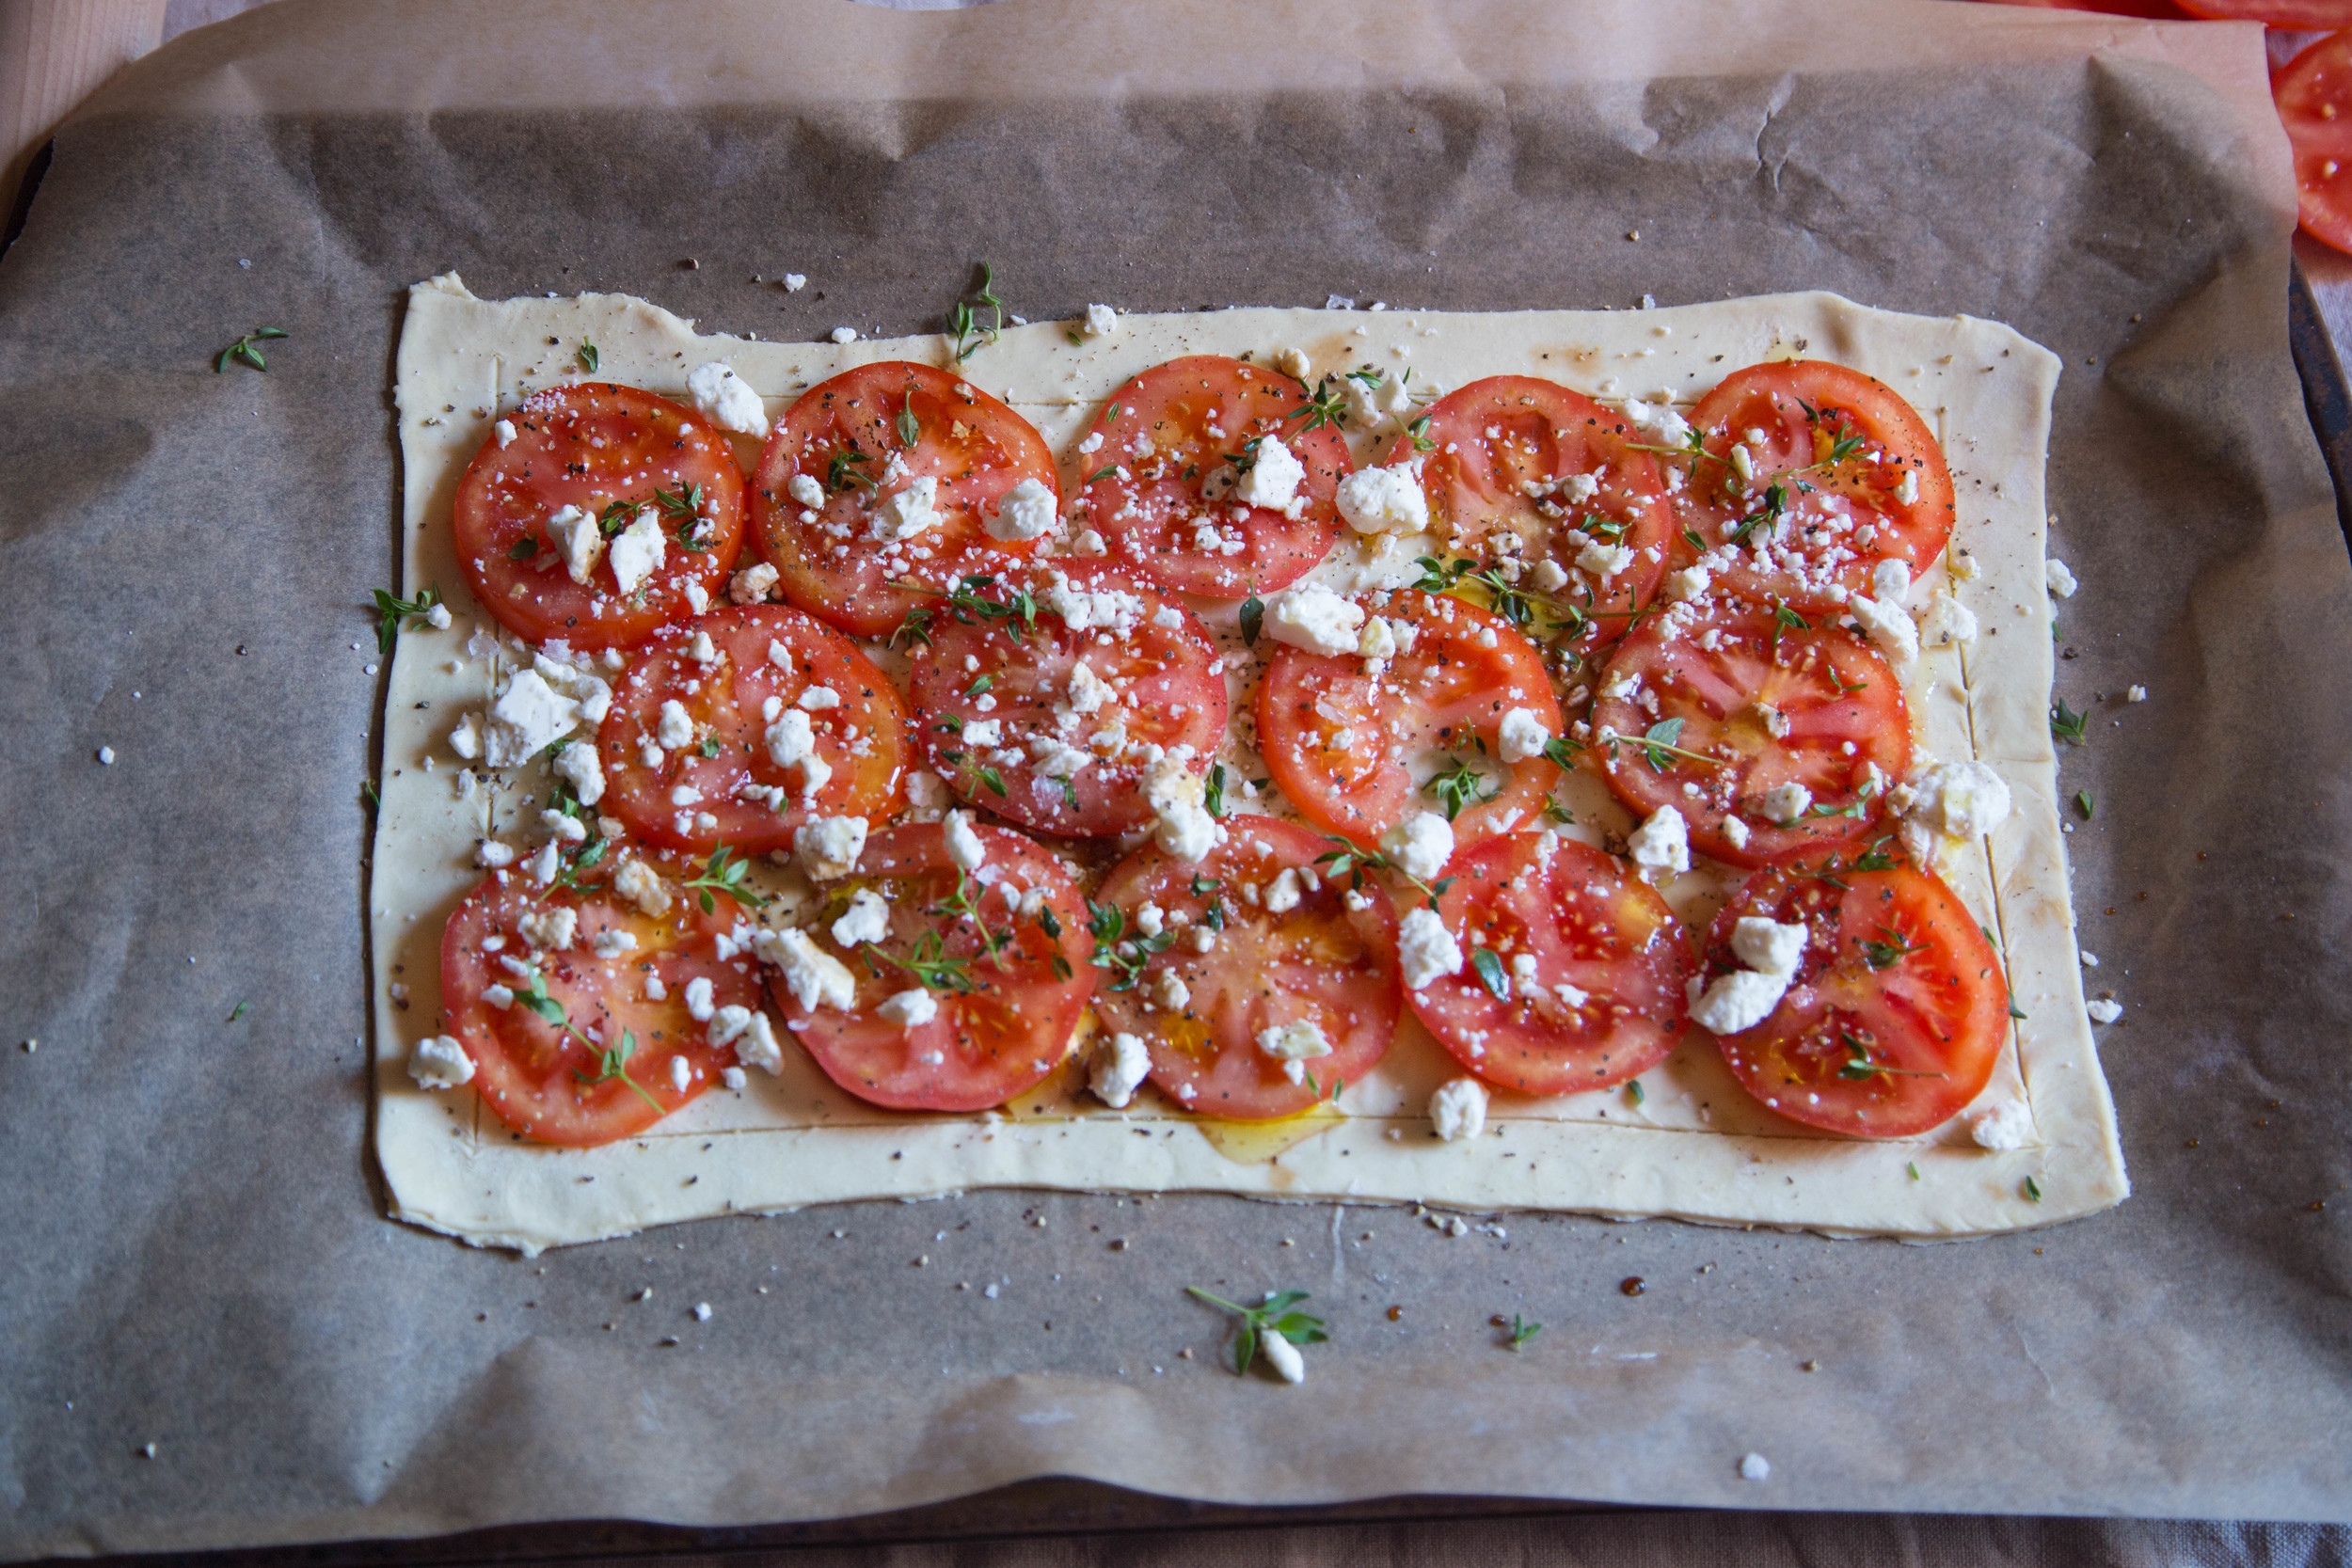
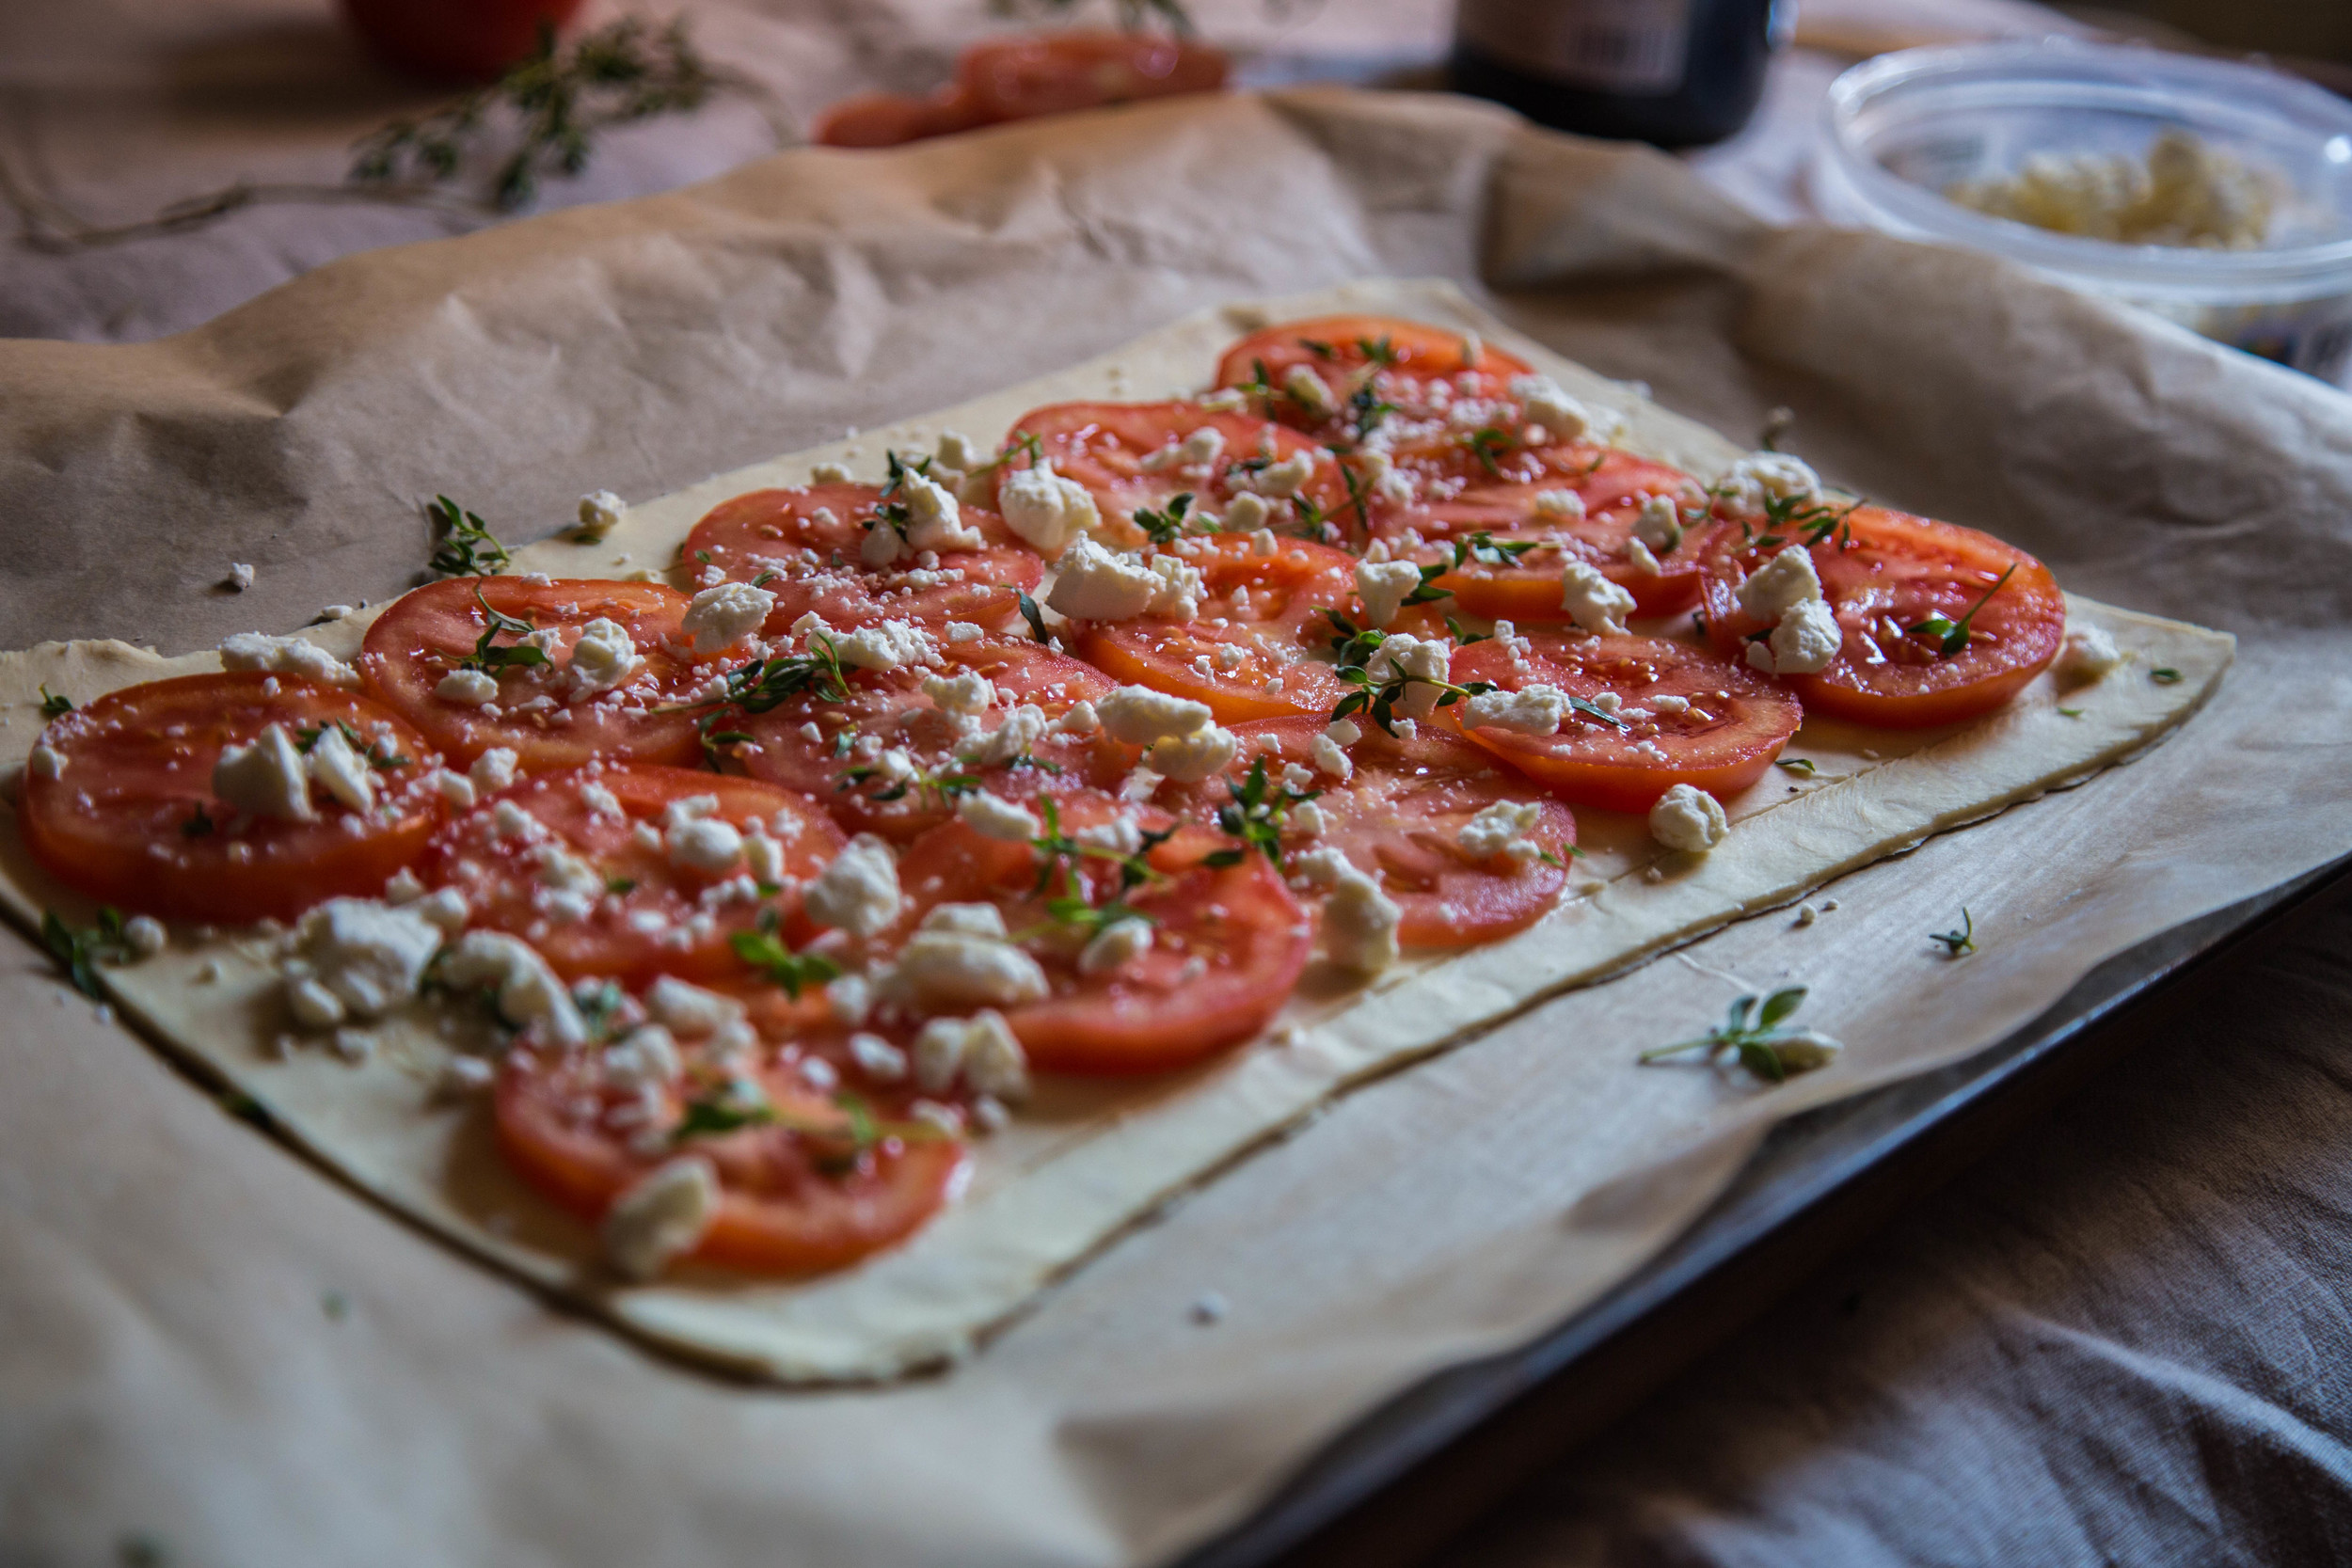
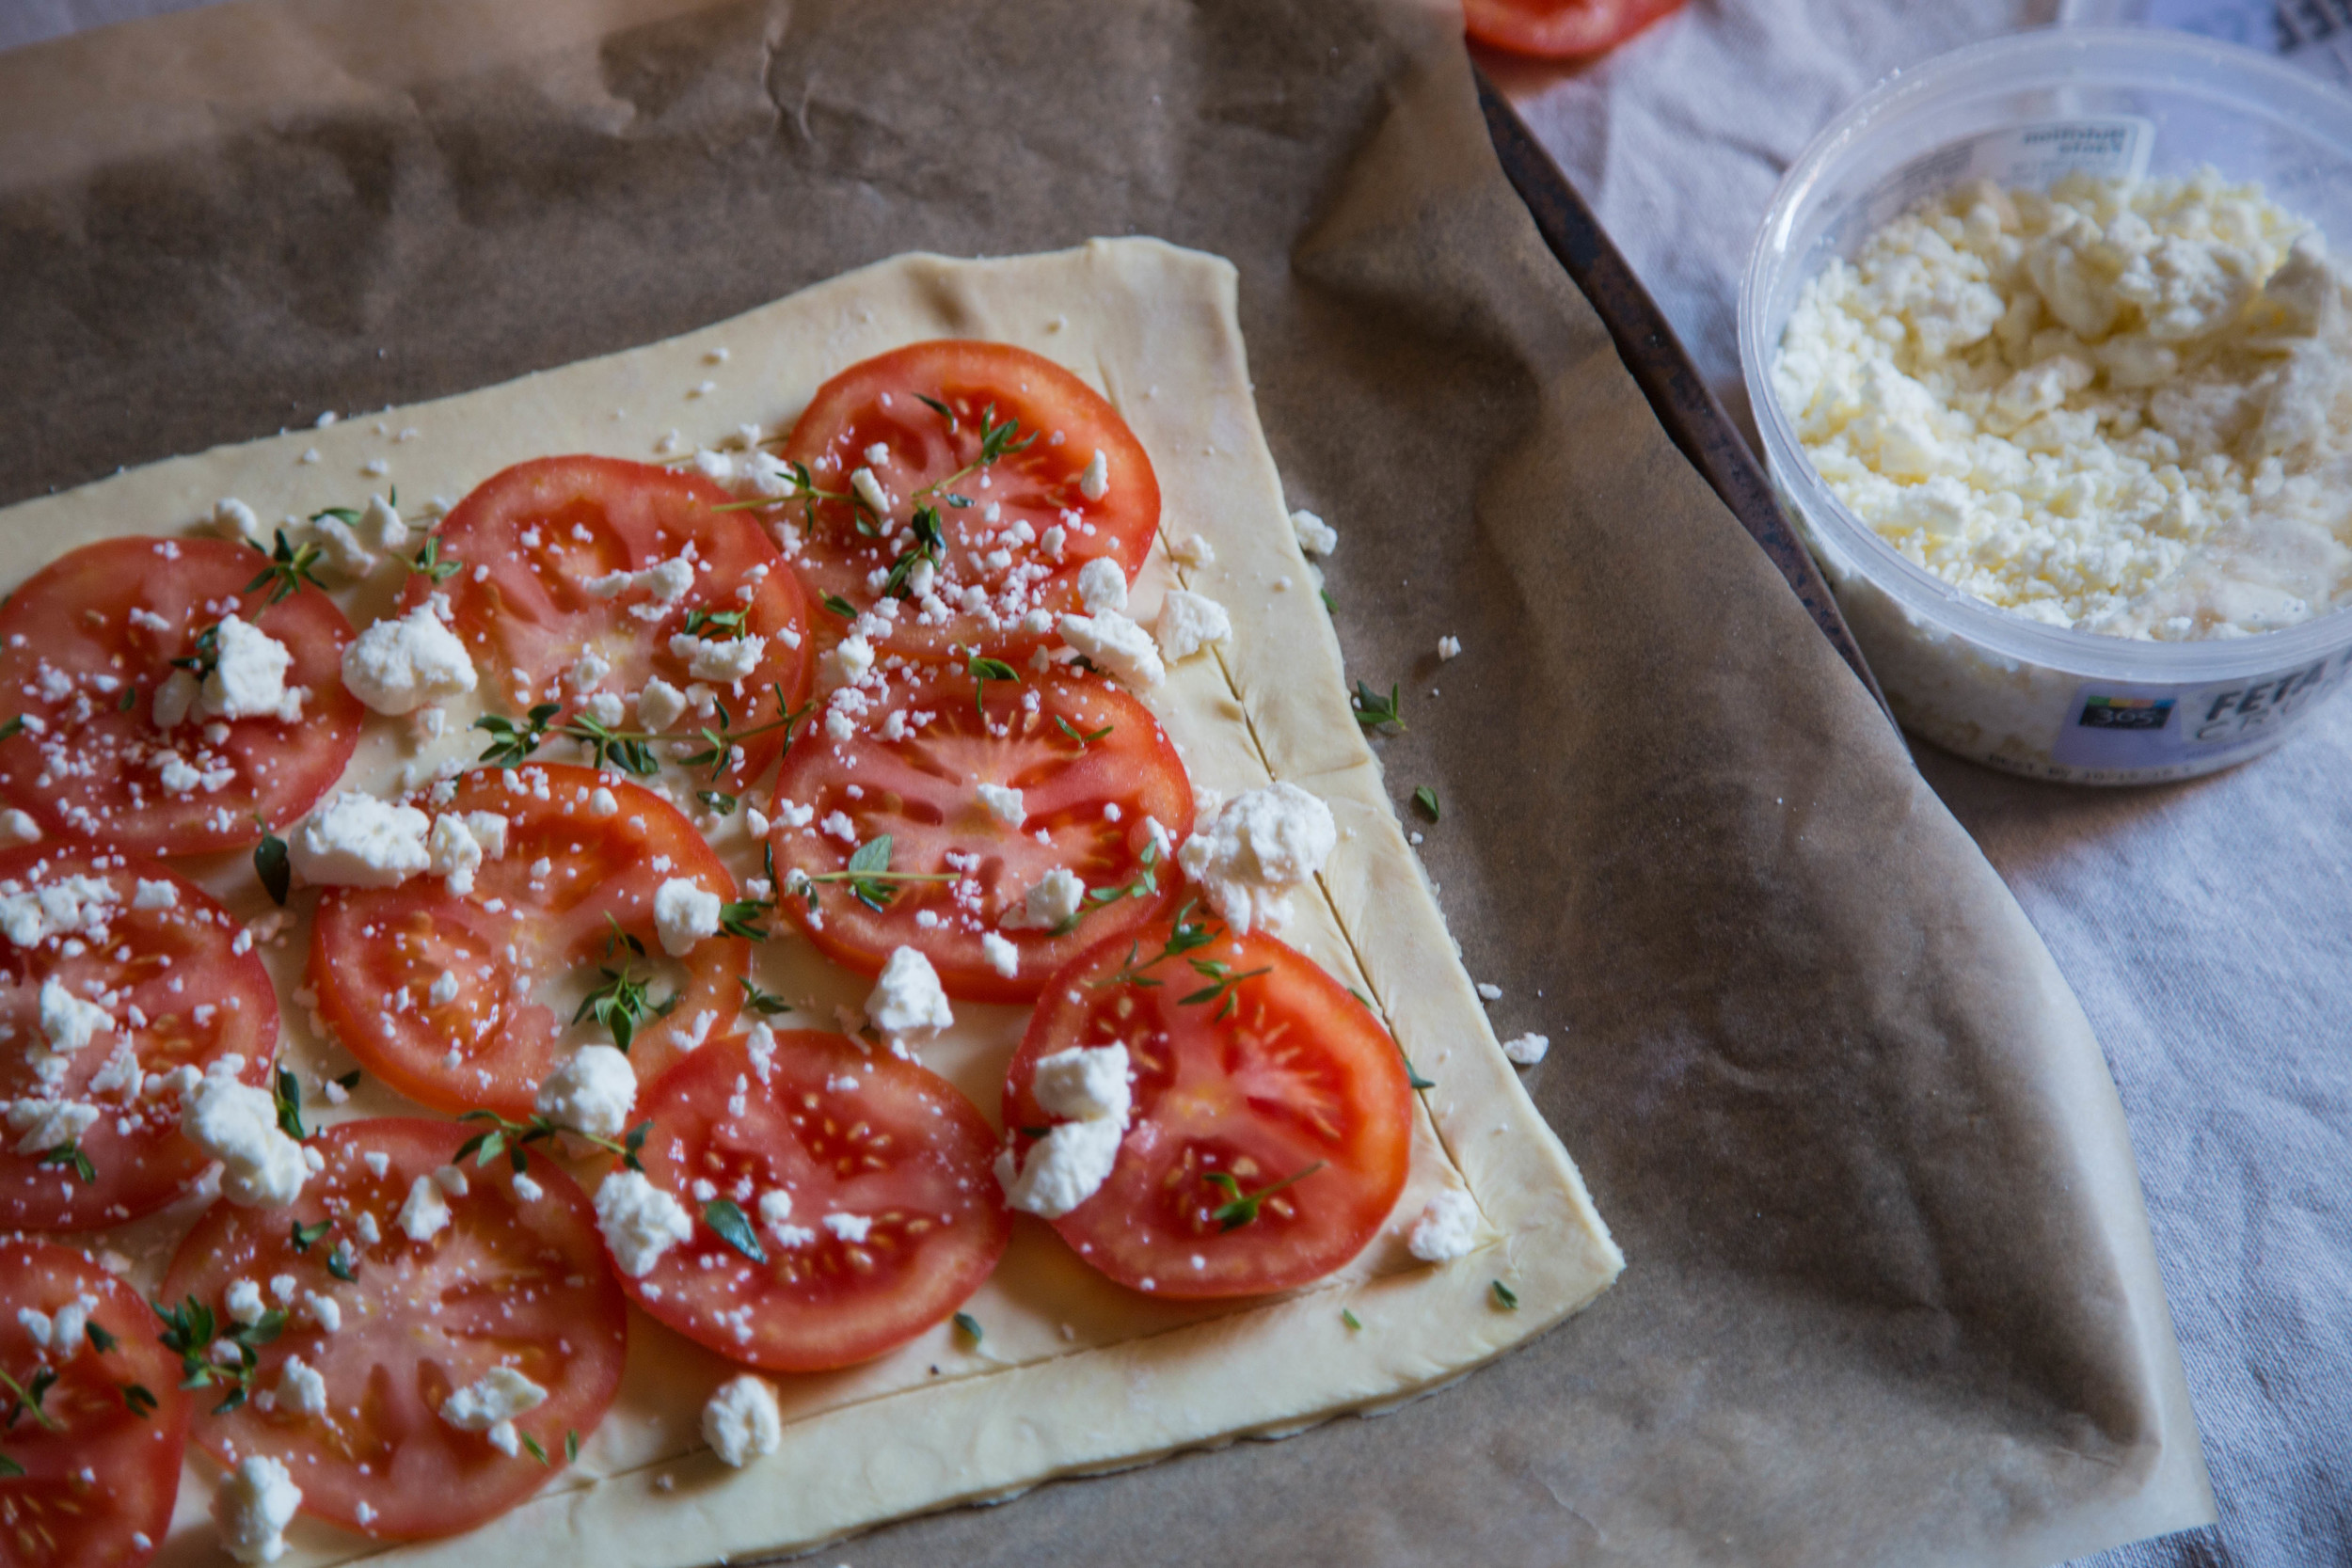
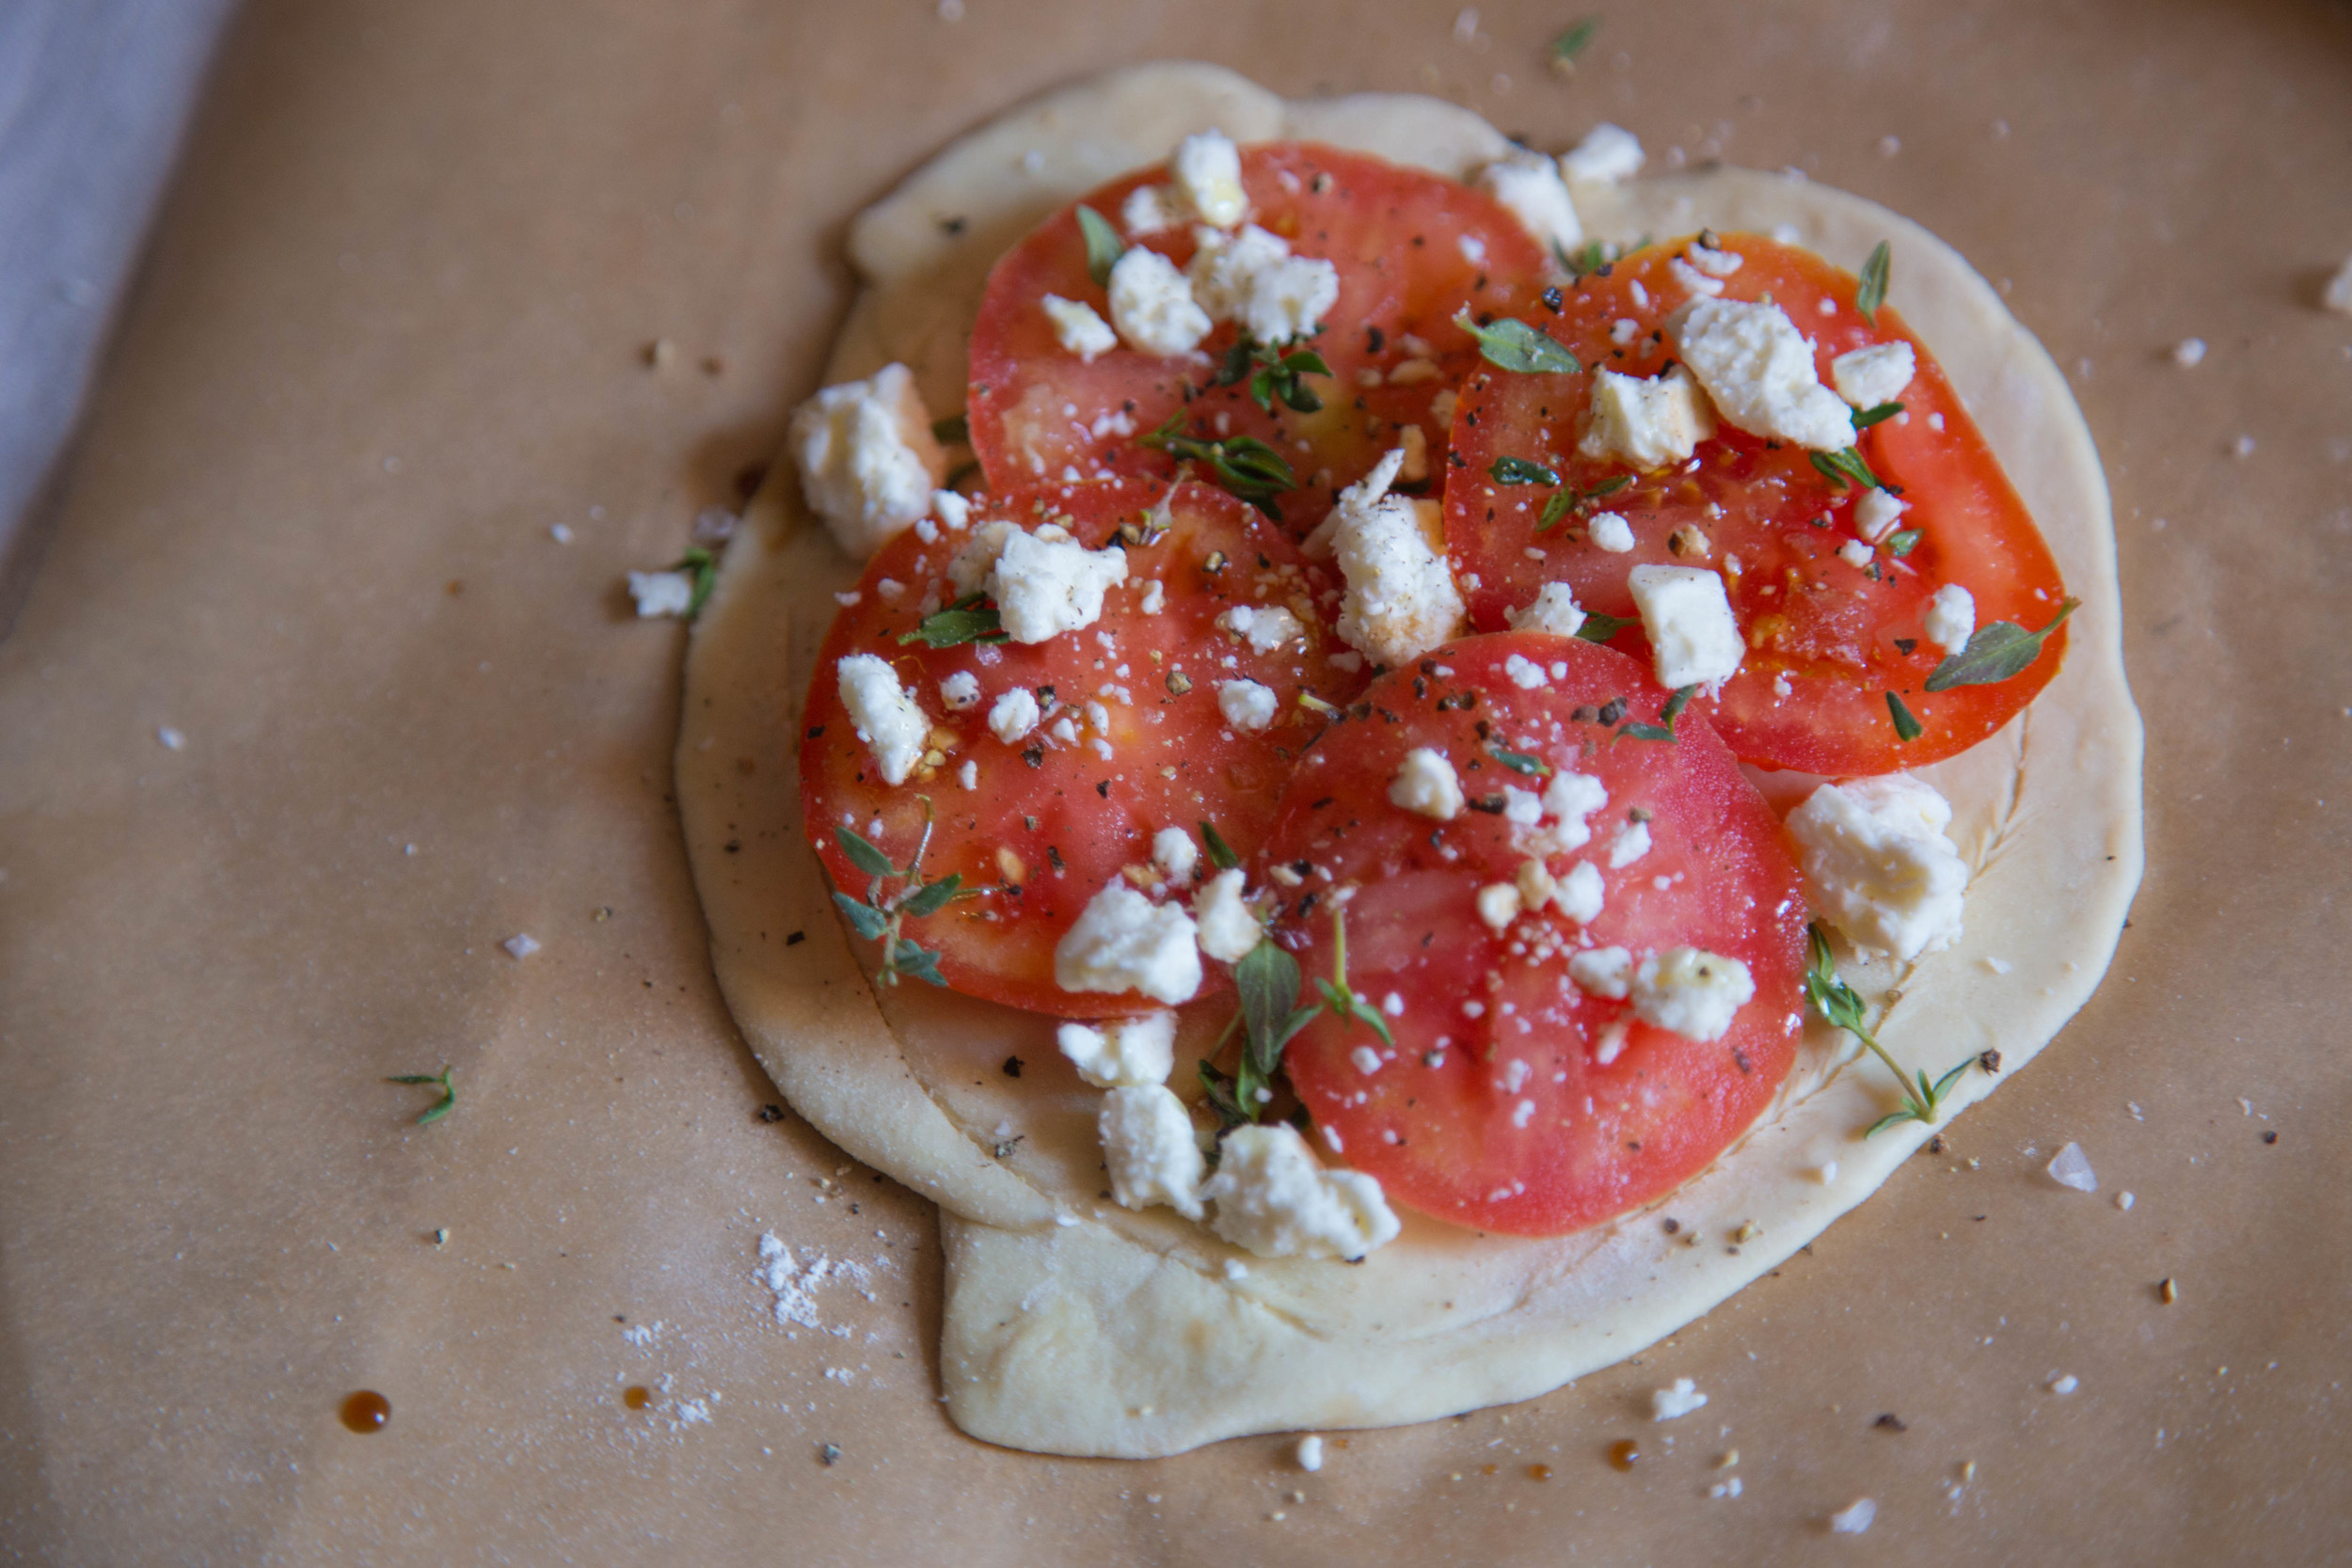
Thinly slice the tomatoes and arrange in the middle section of the pastry. Crumble and scatter the feta over the tomatoes. Remove thyme leaves from their stems and scatter over the tomatoes. Drizzle with balsamic vinegar and season with salt and pepper.
Bake in the oven for 25 minutes or until pasty is golden brown and crispy. Remove from oven and place on cooling rack before cutting into slices.
P.S. If you've got left over puff pasty and tomatoes you can make a mini one that's not for sharing...
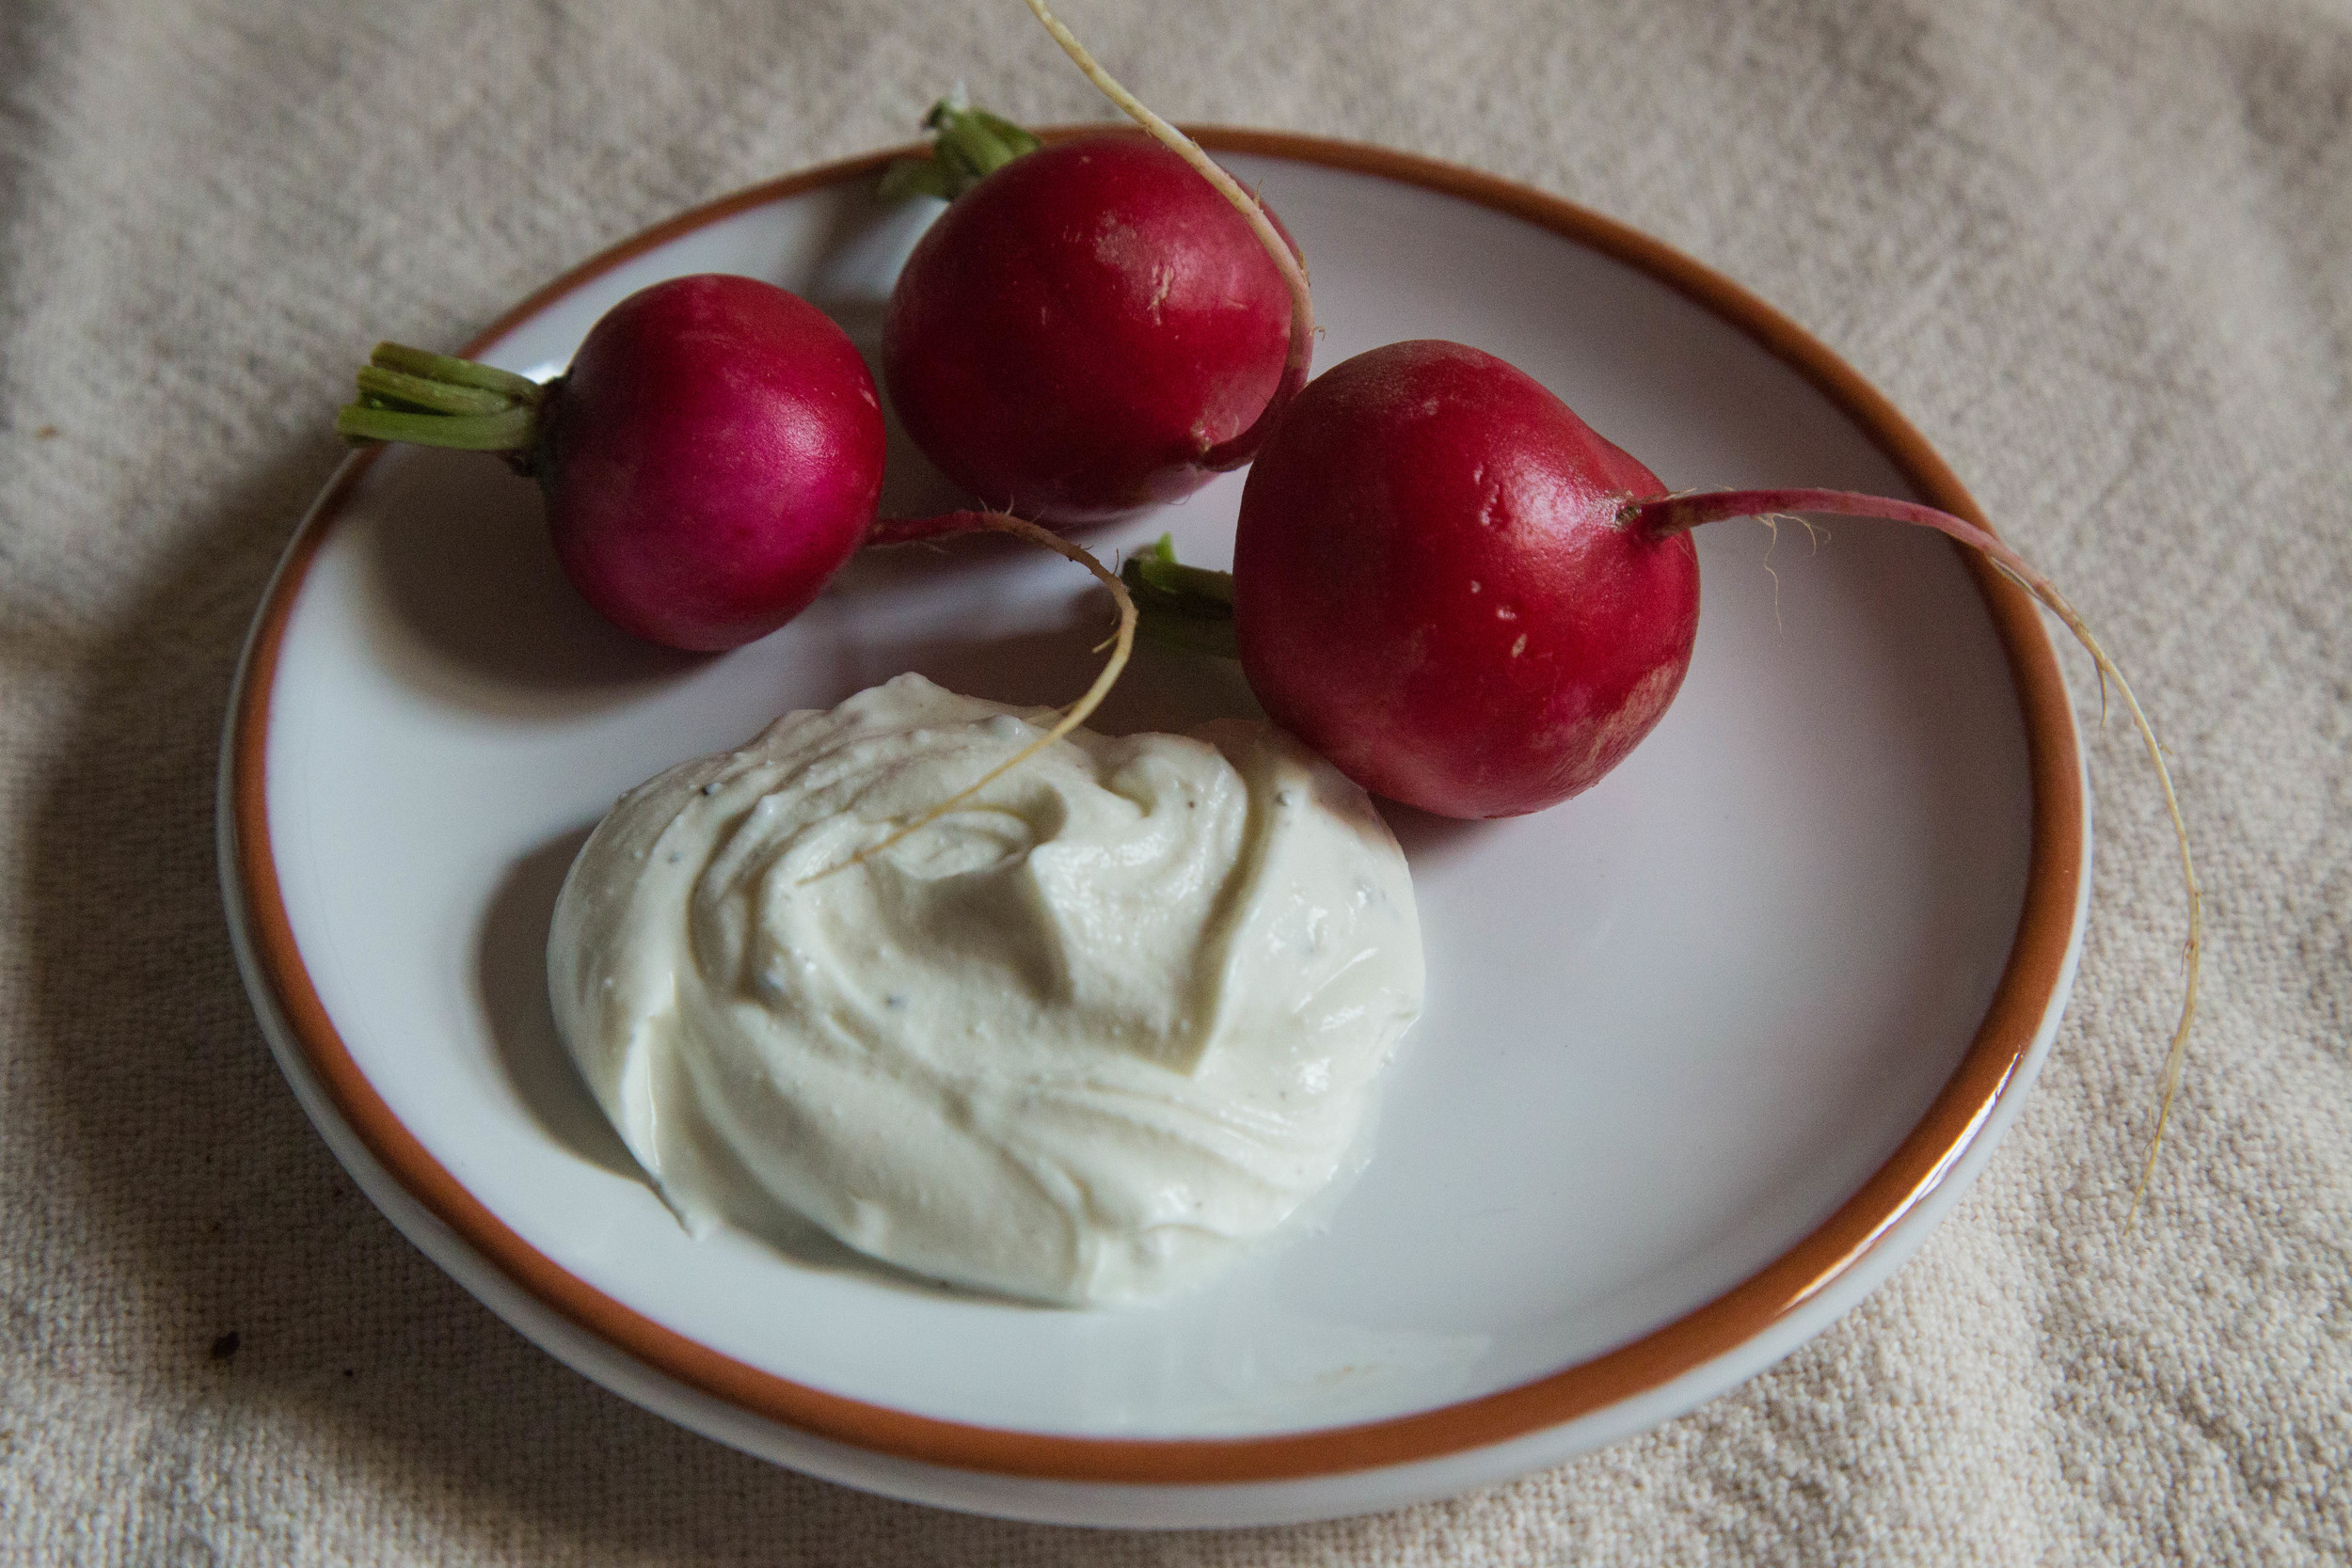
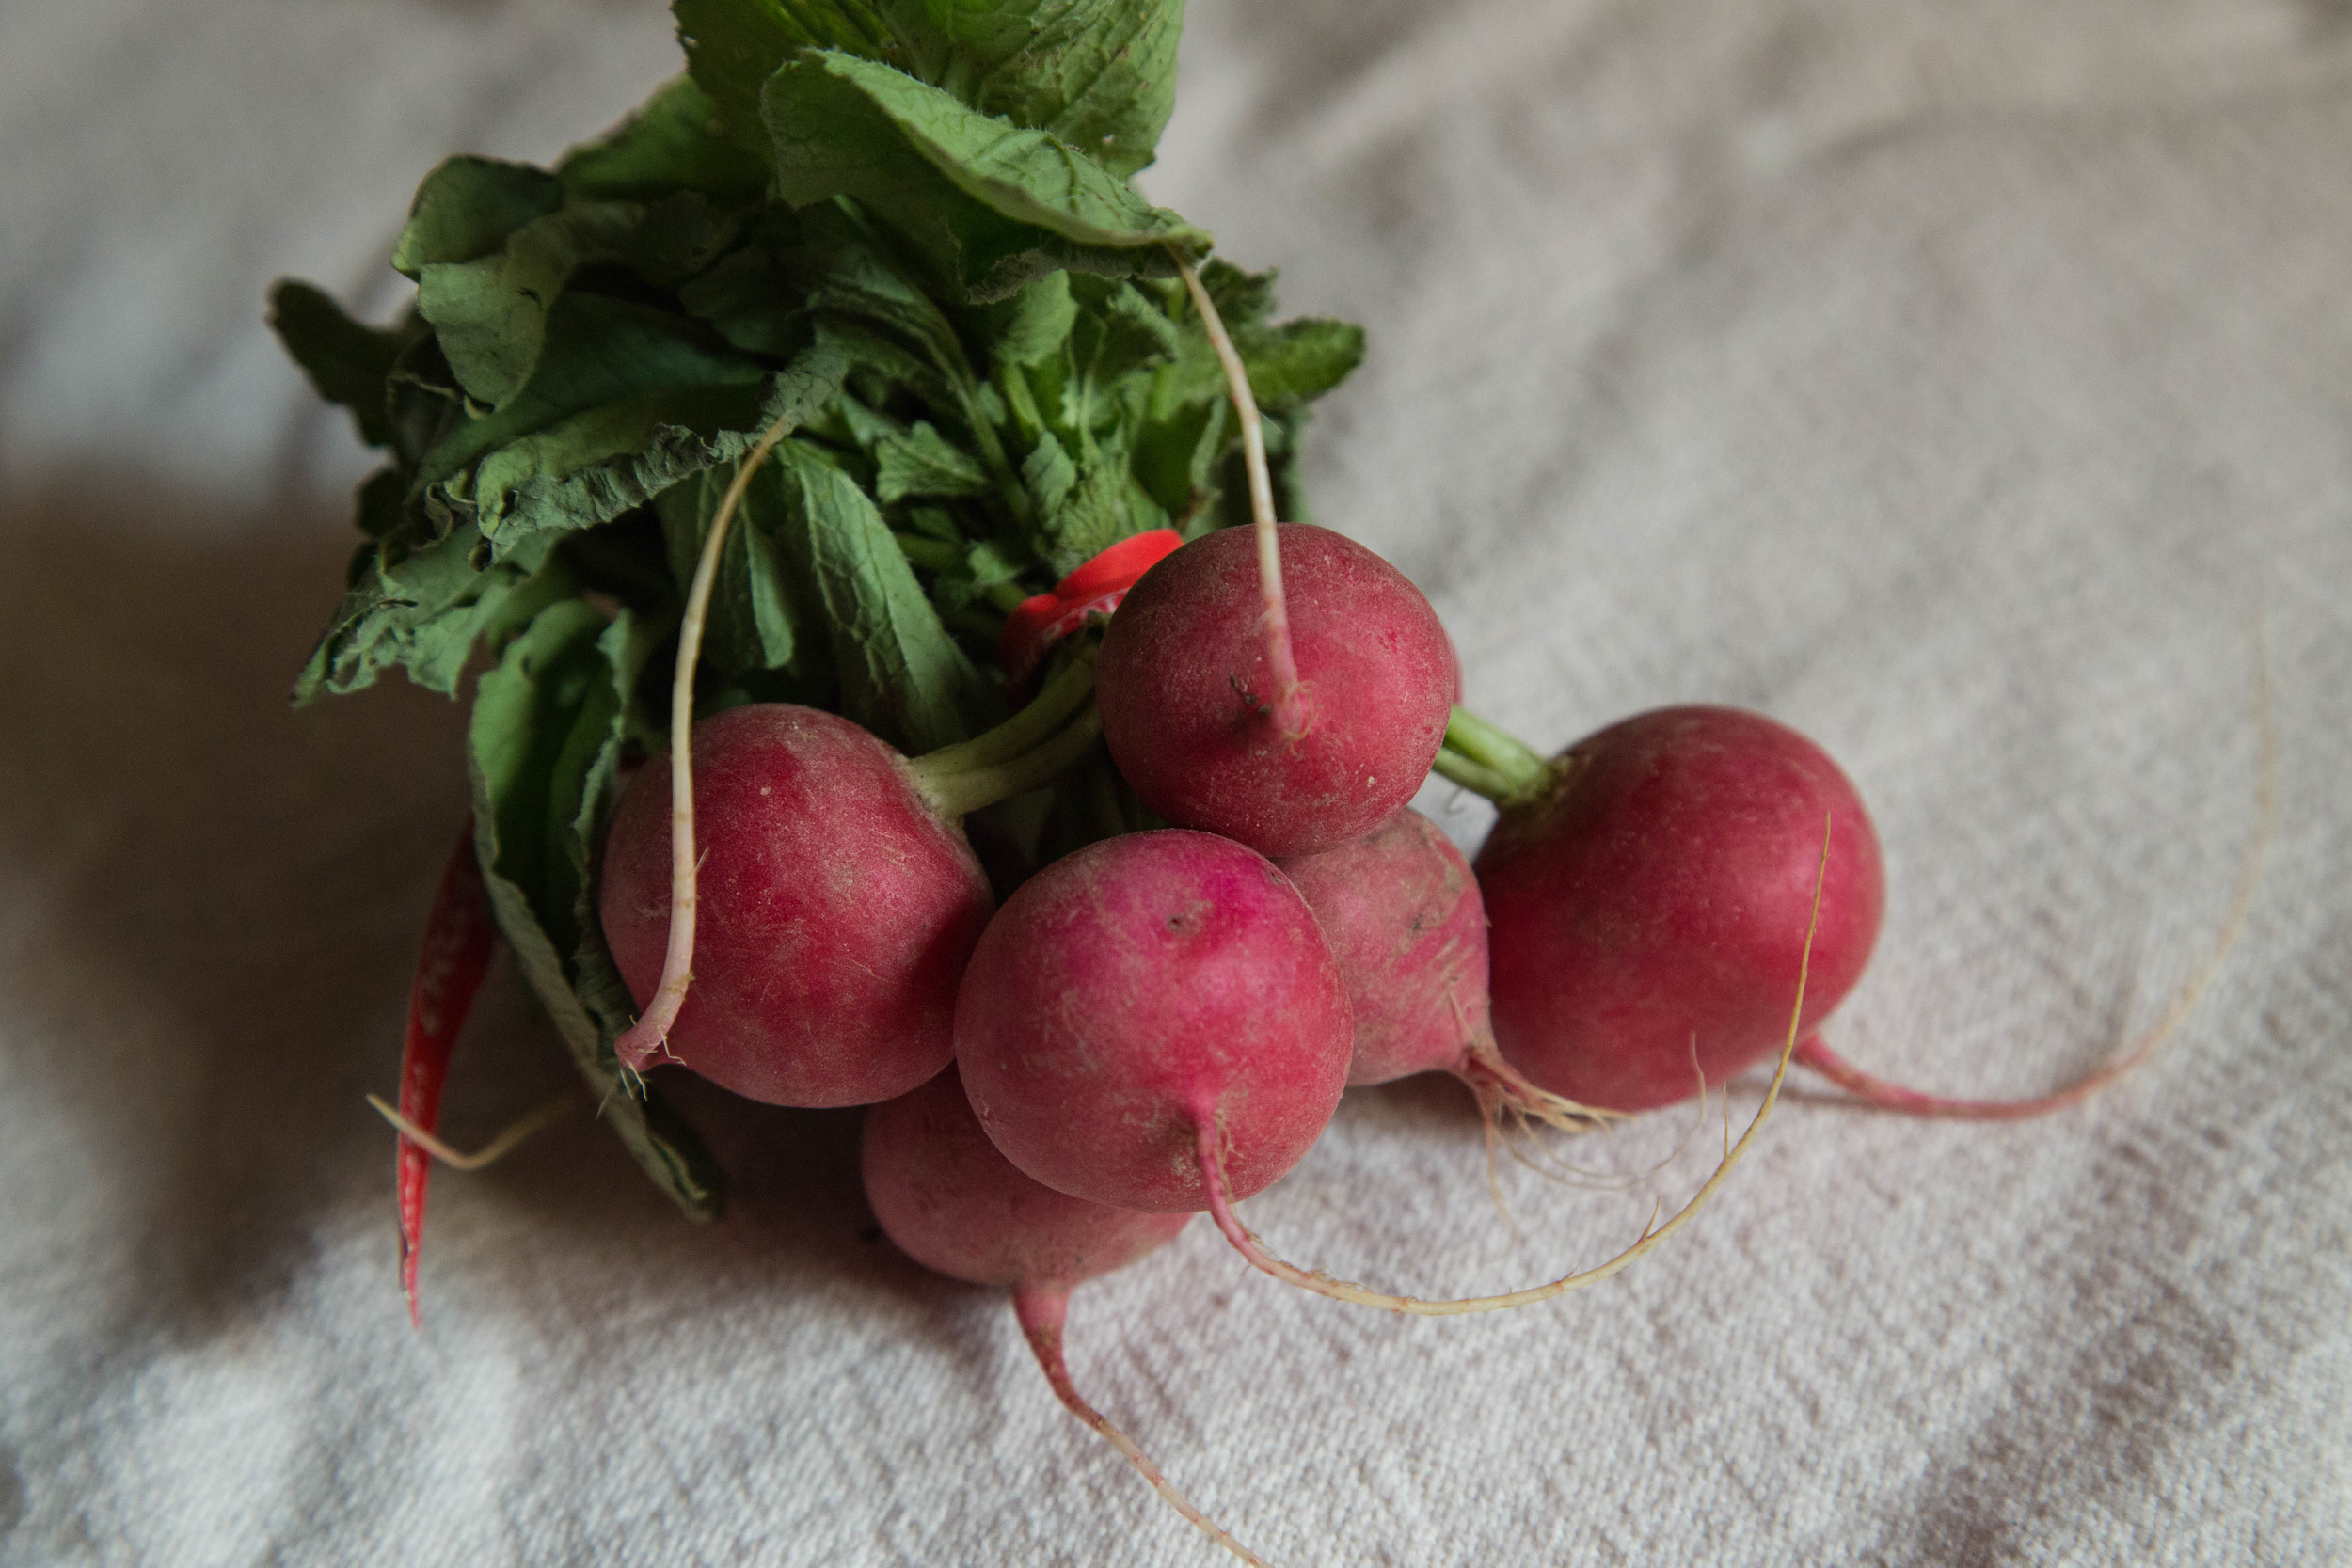
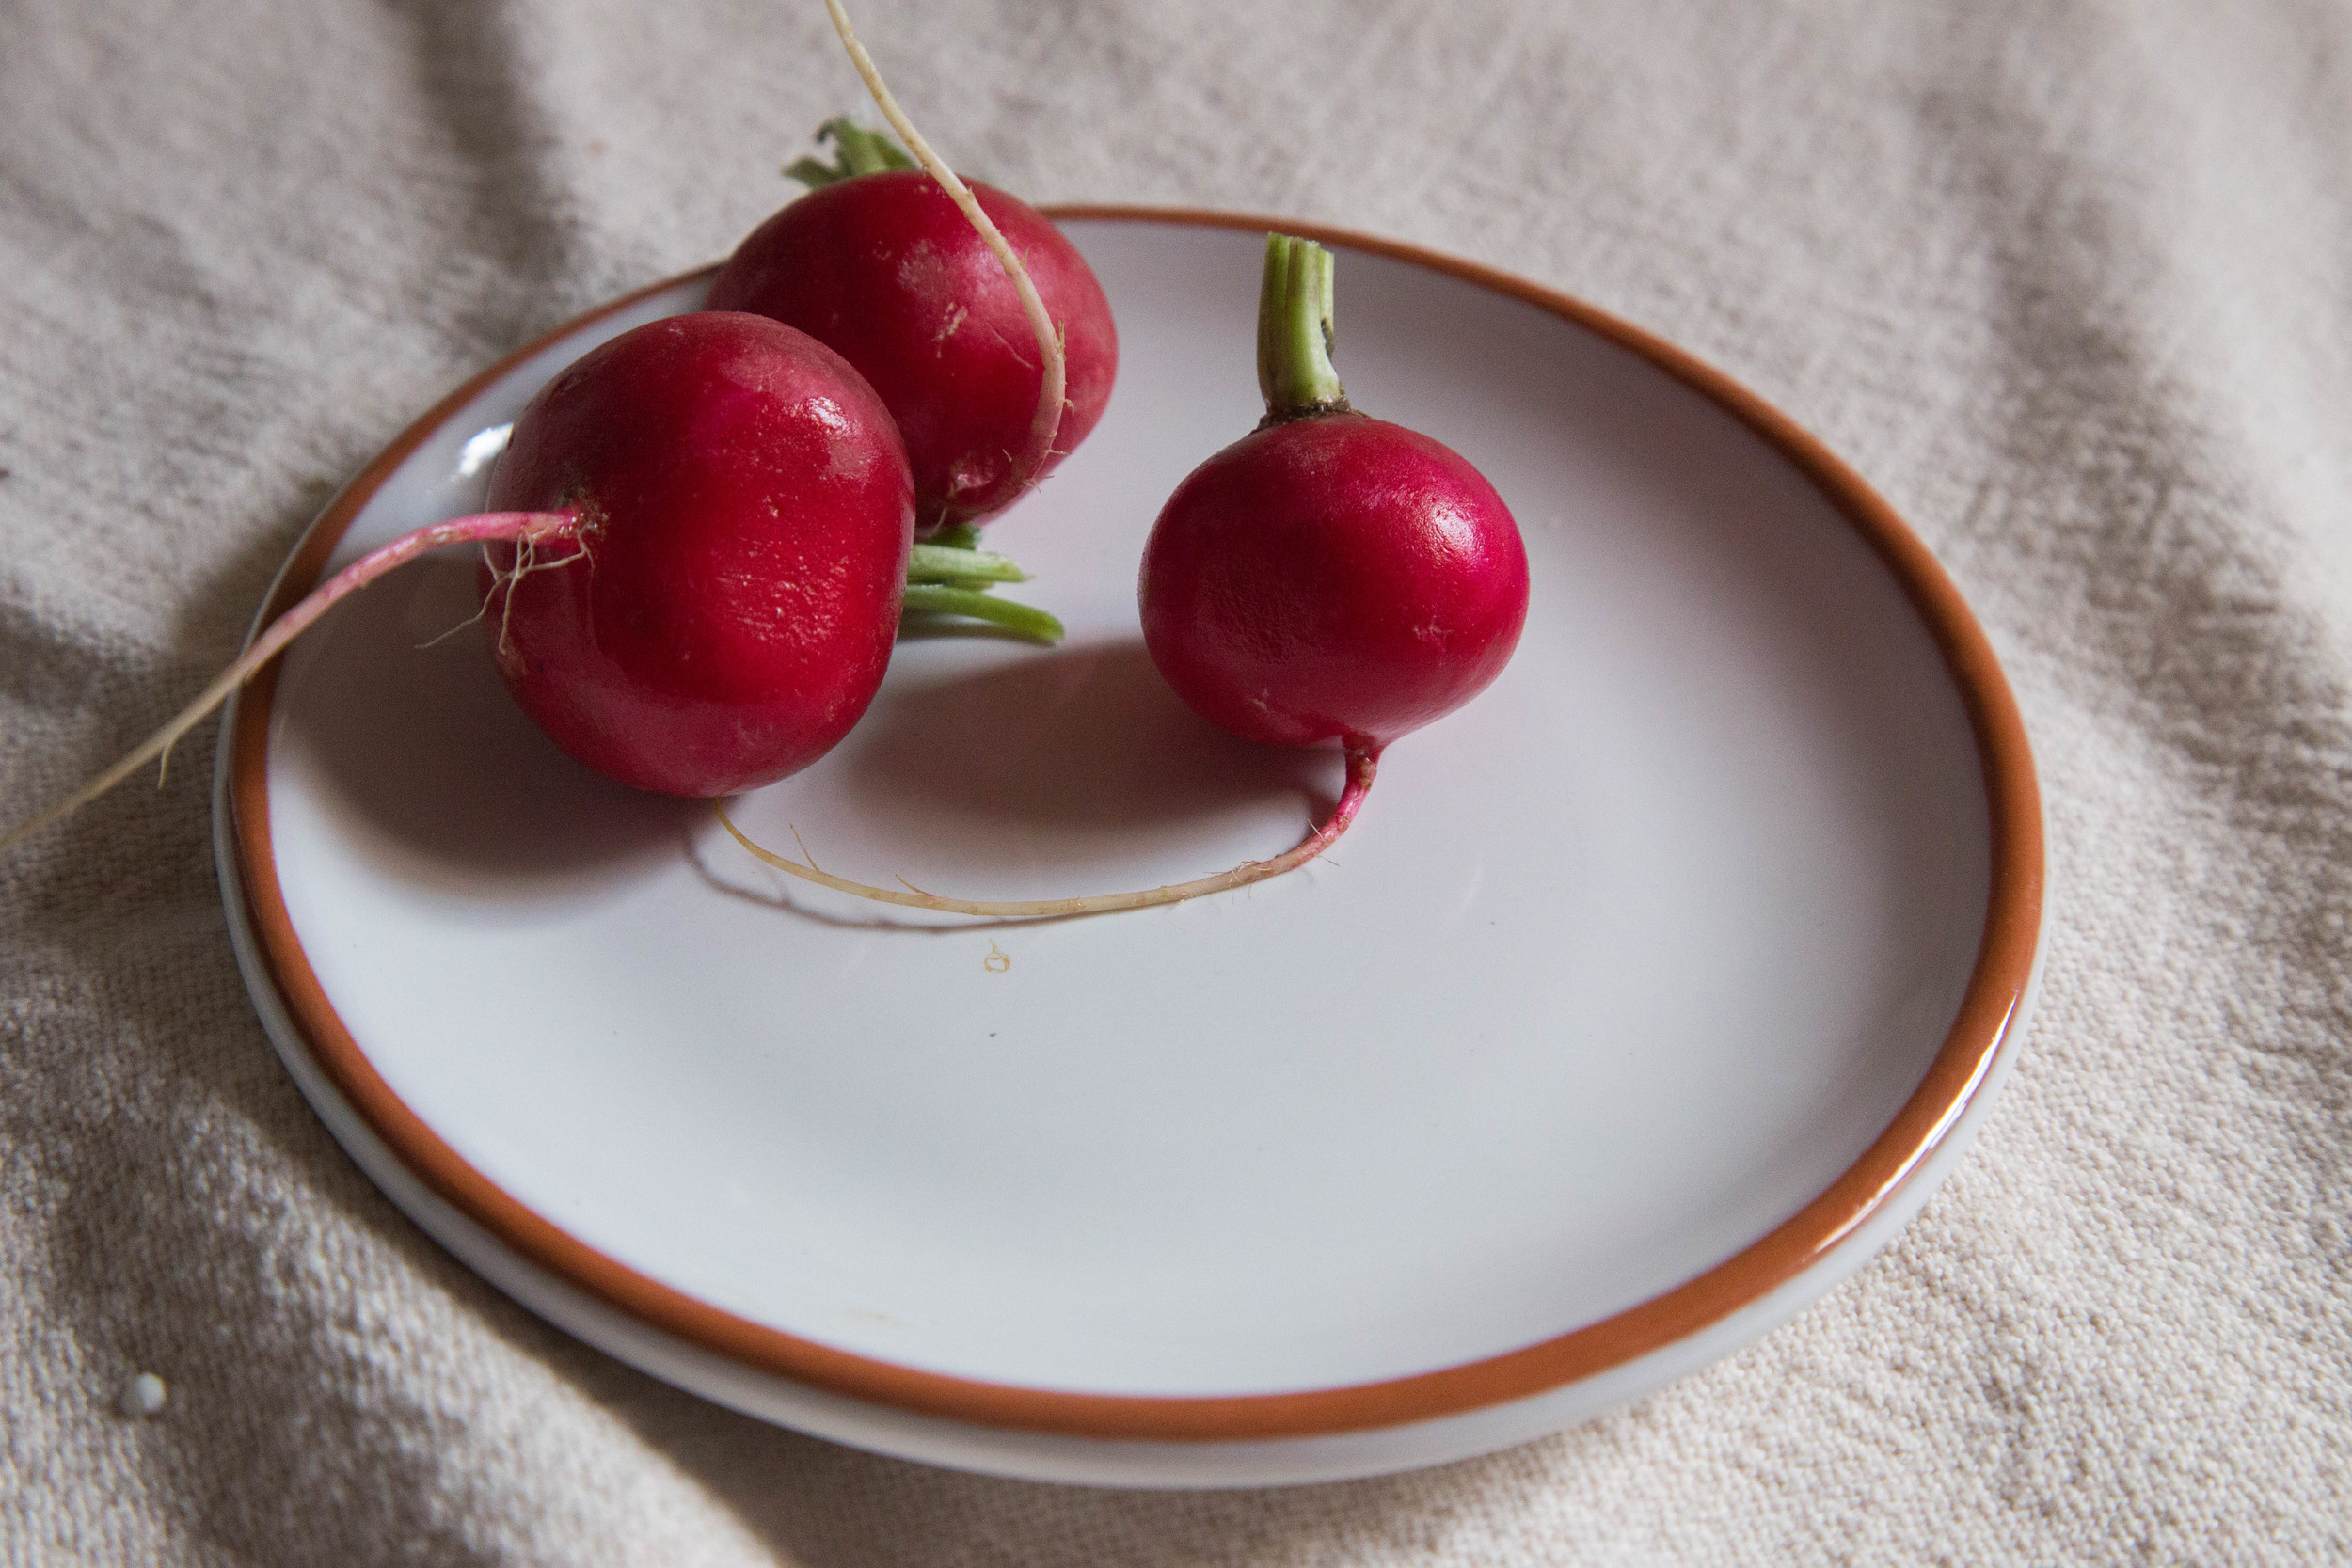
Spring has arrived and I know this because there are super cute radishes in my CSA. I'll roast, slice, and pickle these little cuties but my favorite way to eat them is just as they are with butter and maldon salt or with some whipped goat cheese and black pepper. Few things make me happier right now than sitting outside with a beer after work and chowing down on some radishes. I highly recommend you try it.
It really doesn't get any easier than this. Let the ingredients speak for themselves and you won't be disappointed. If you're not super into goat cheese (sorry, this blog will be a huge disappointment) then I recommend mascarpone or maybe even some backed ricotta?
Stuff
radishes
goat cheese
dash of milk
black pepper
Steps
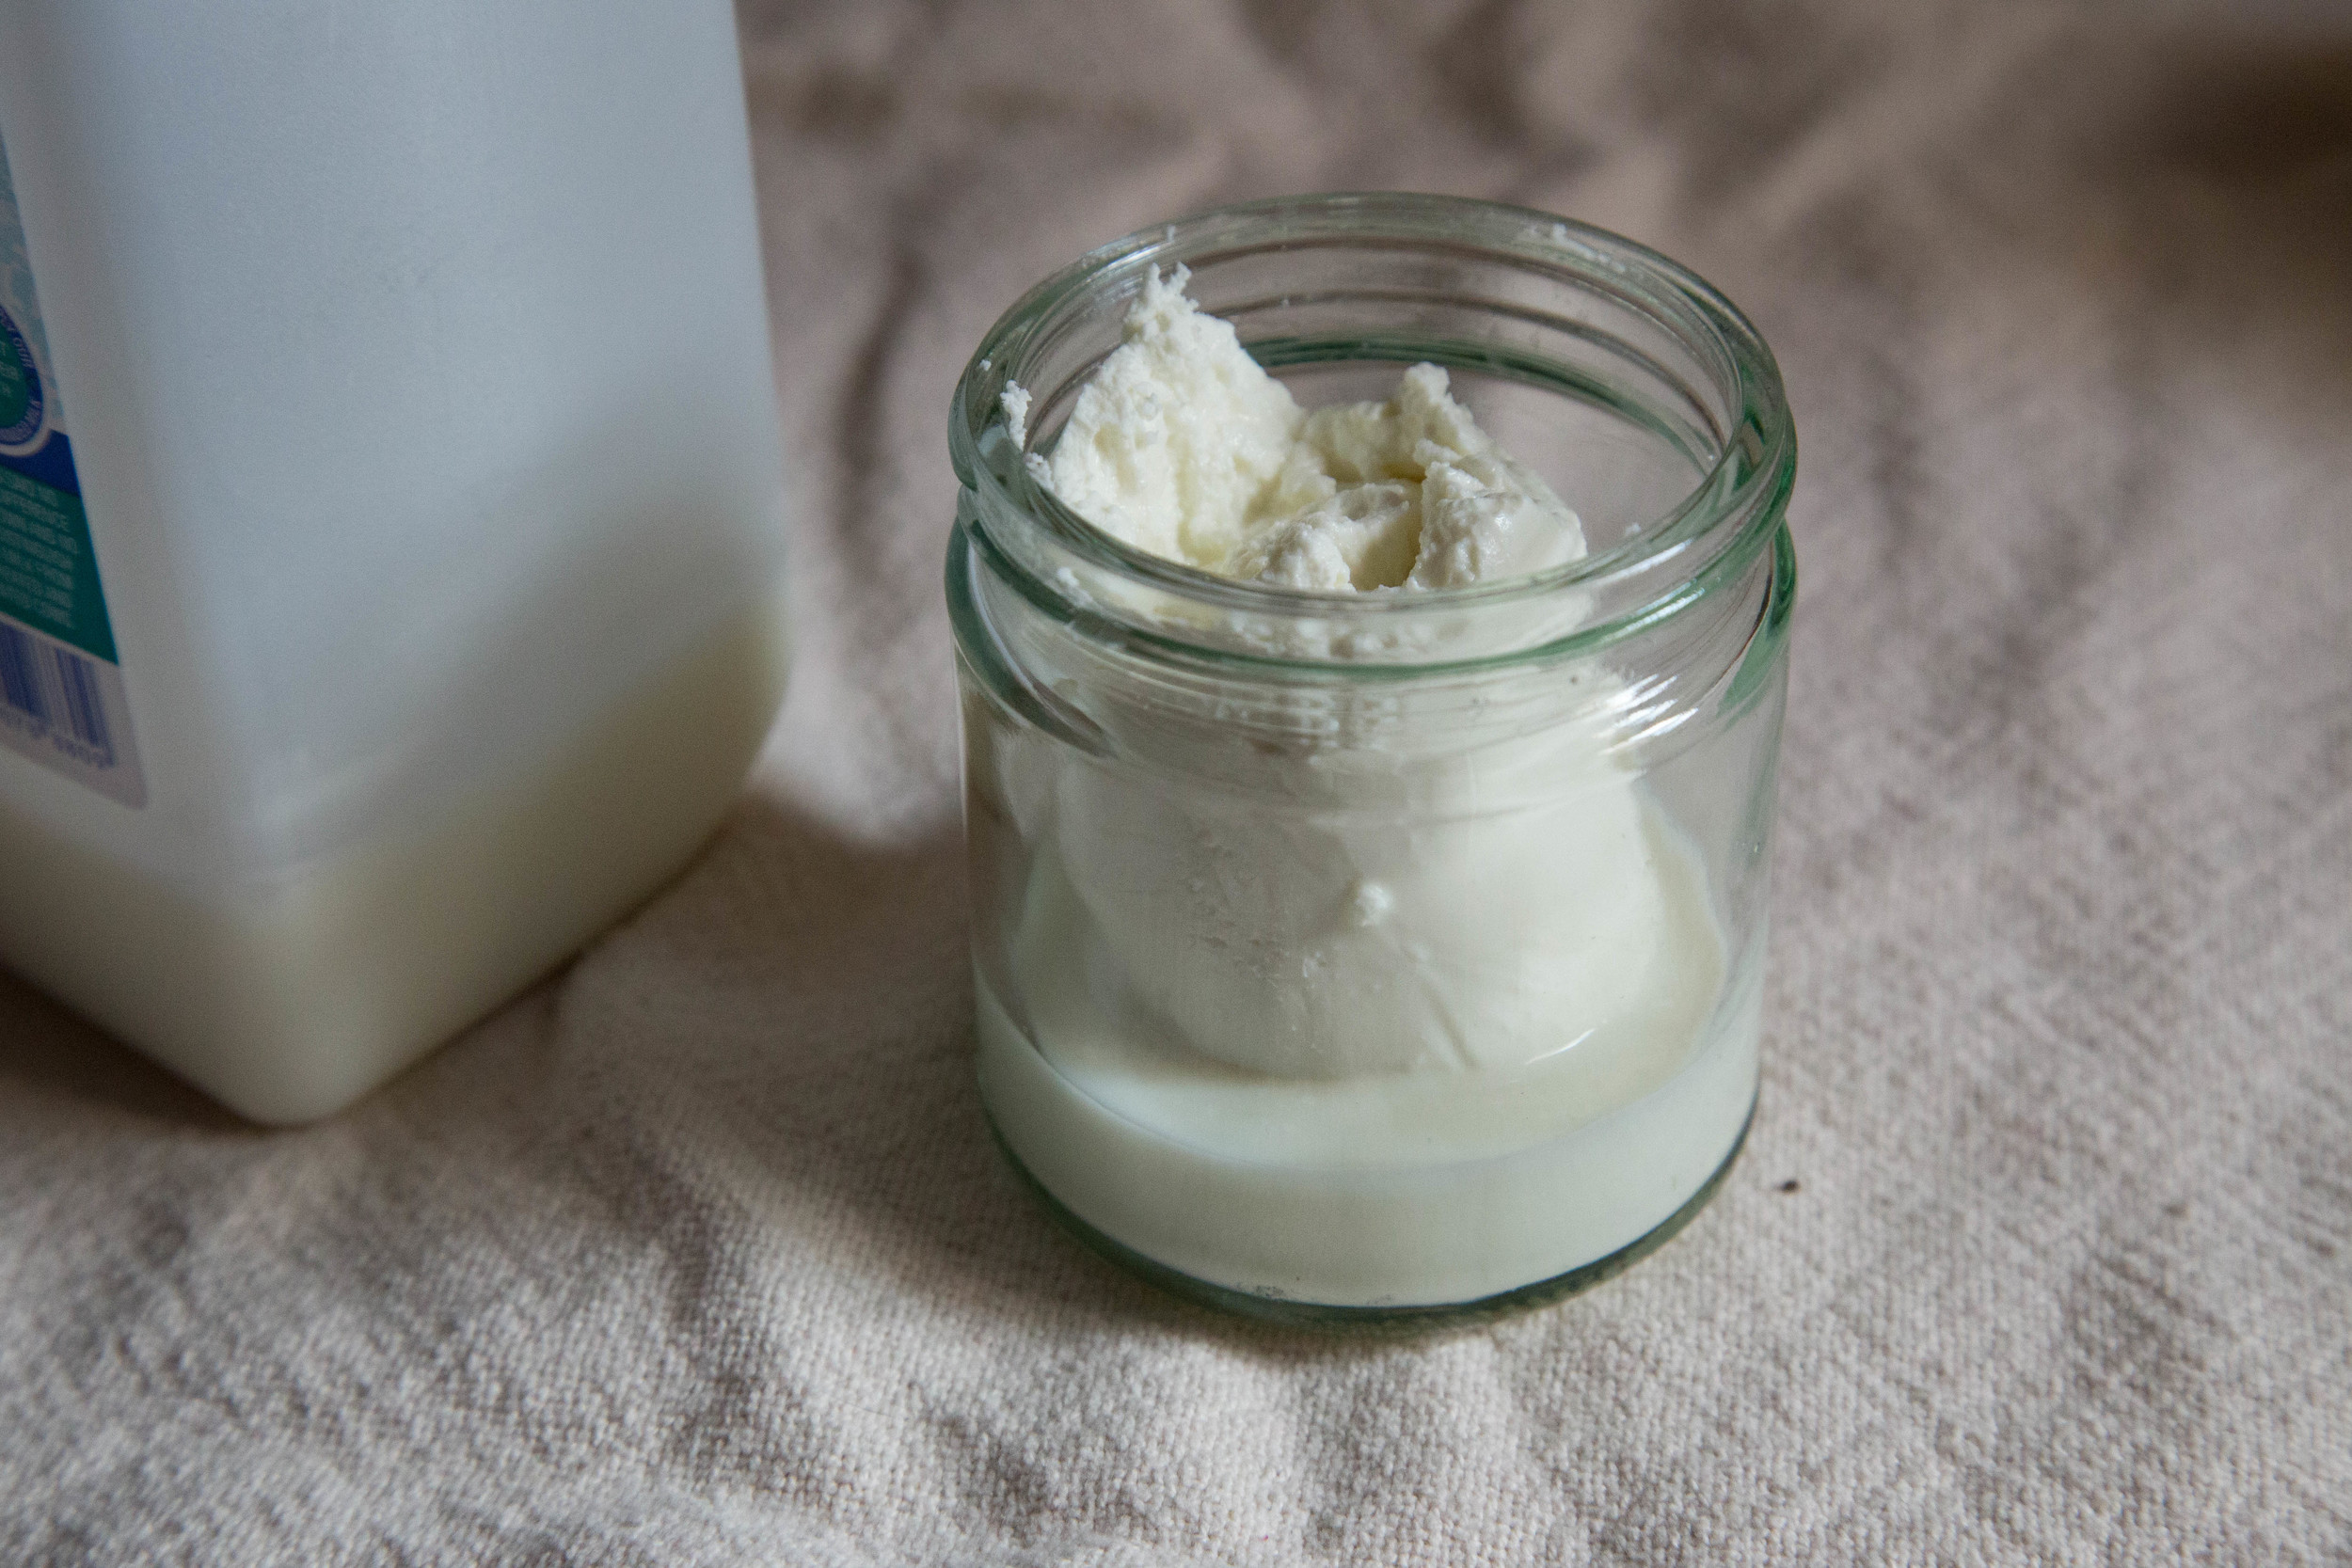
Mix the goat cheese with the milk and black pepper until you get yogurt like consistency. Wash the radishes and enjoy your simple spring snack.
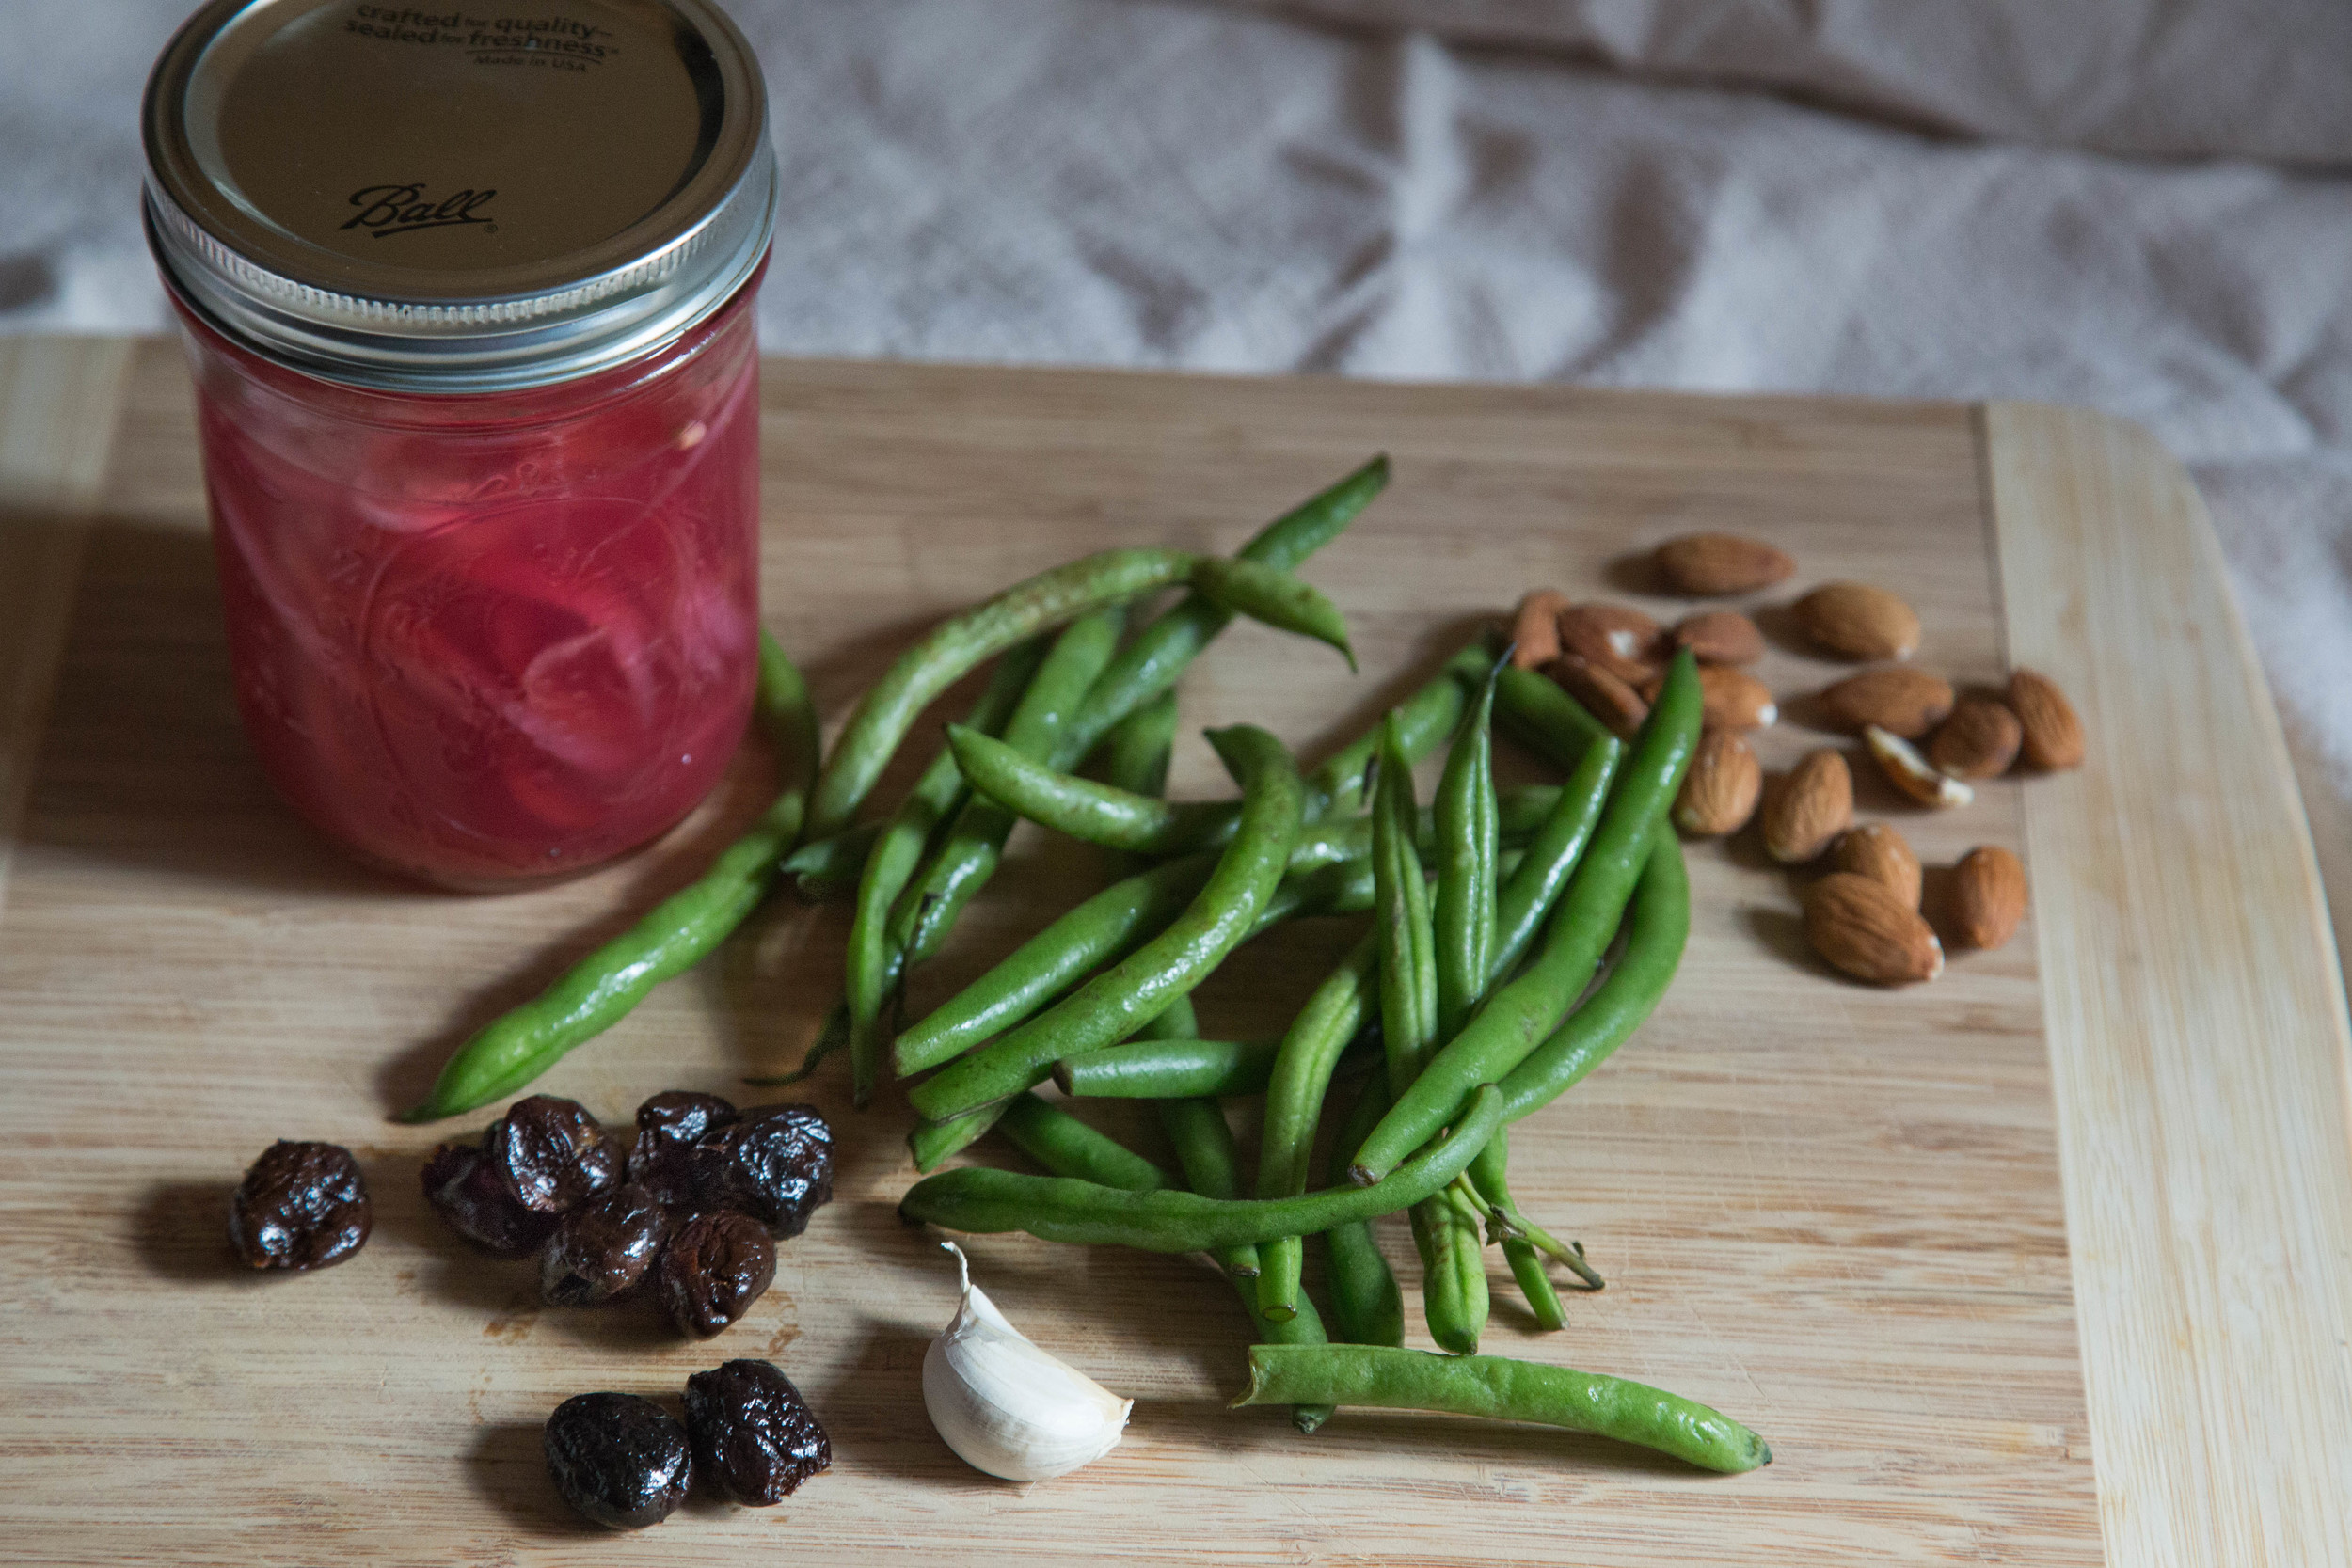
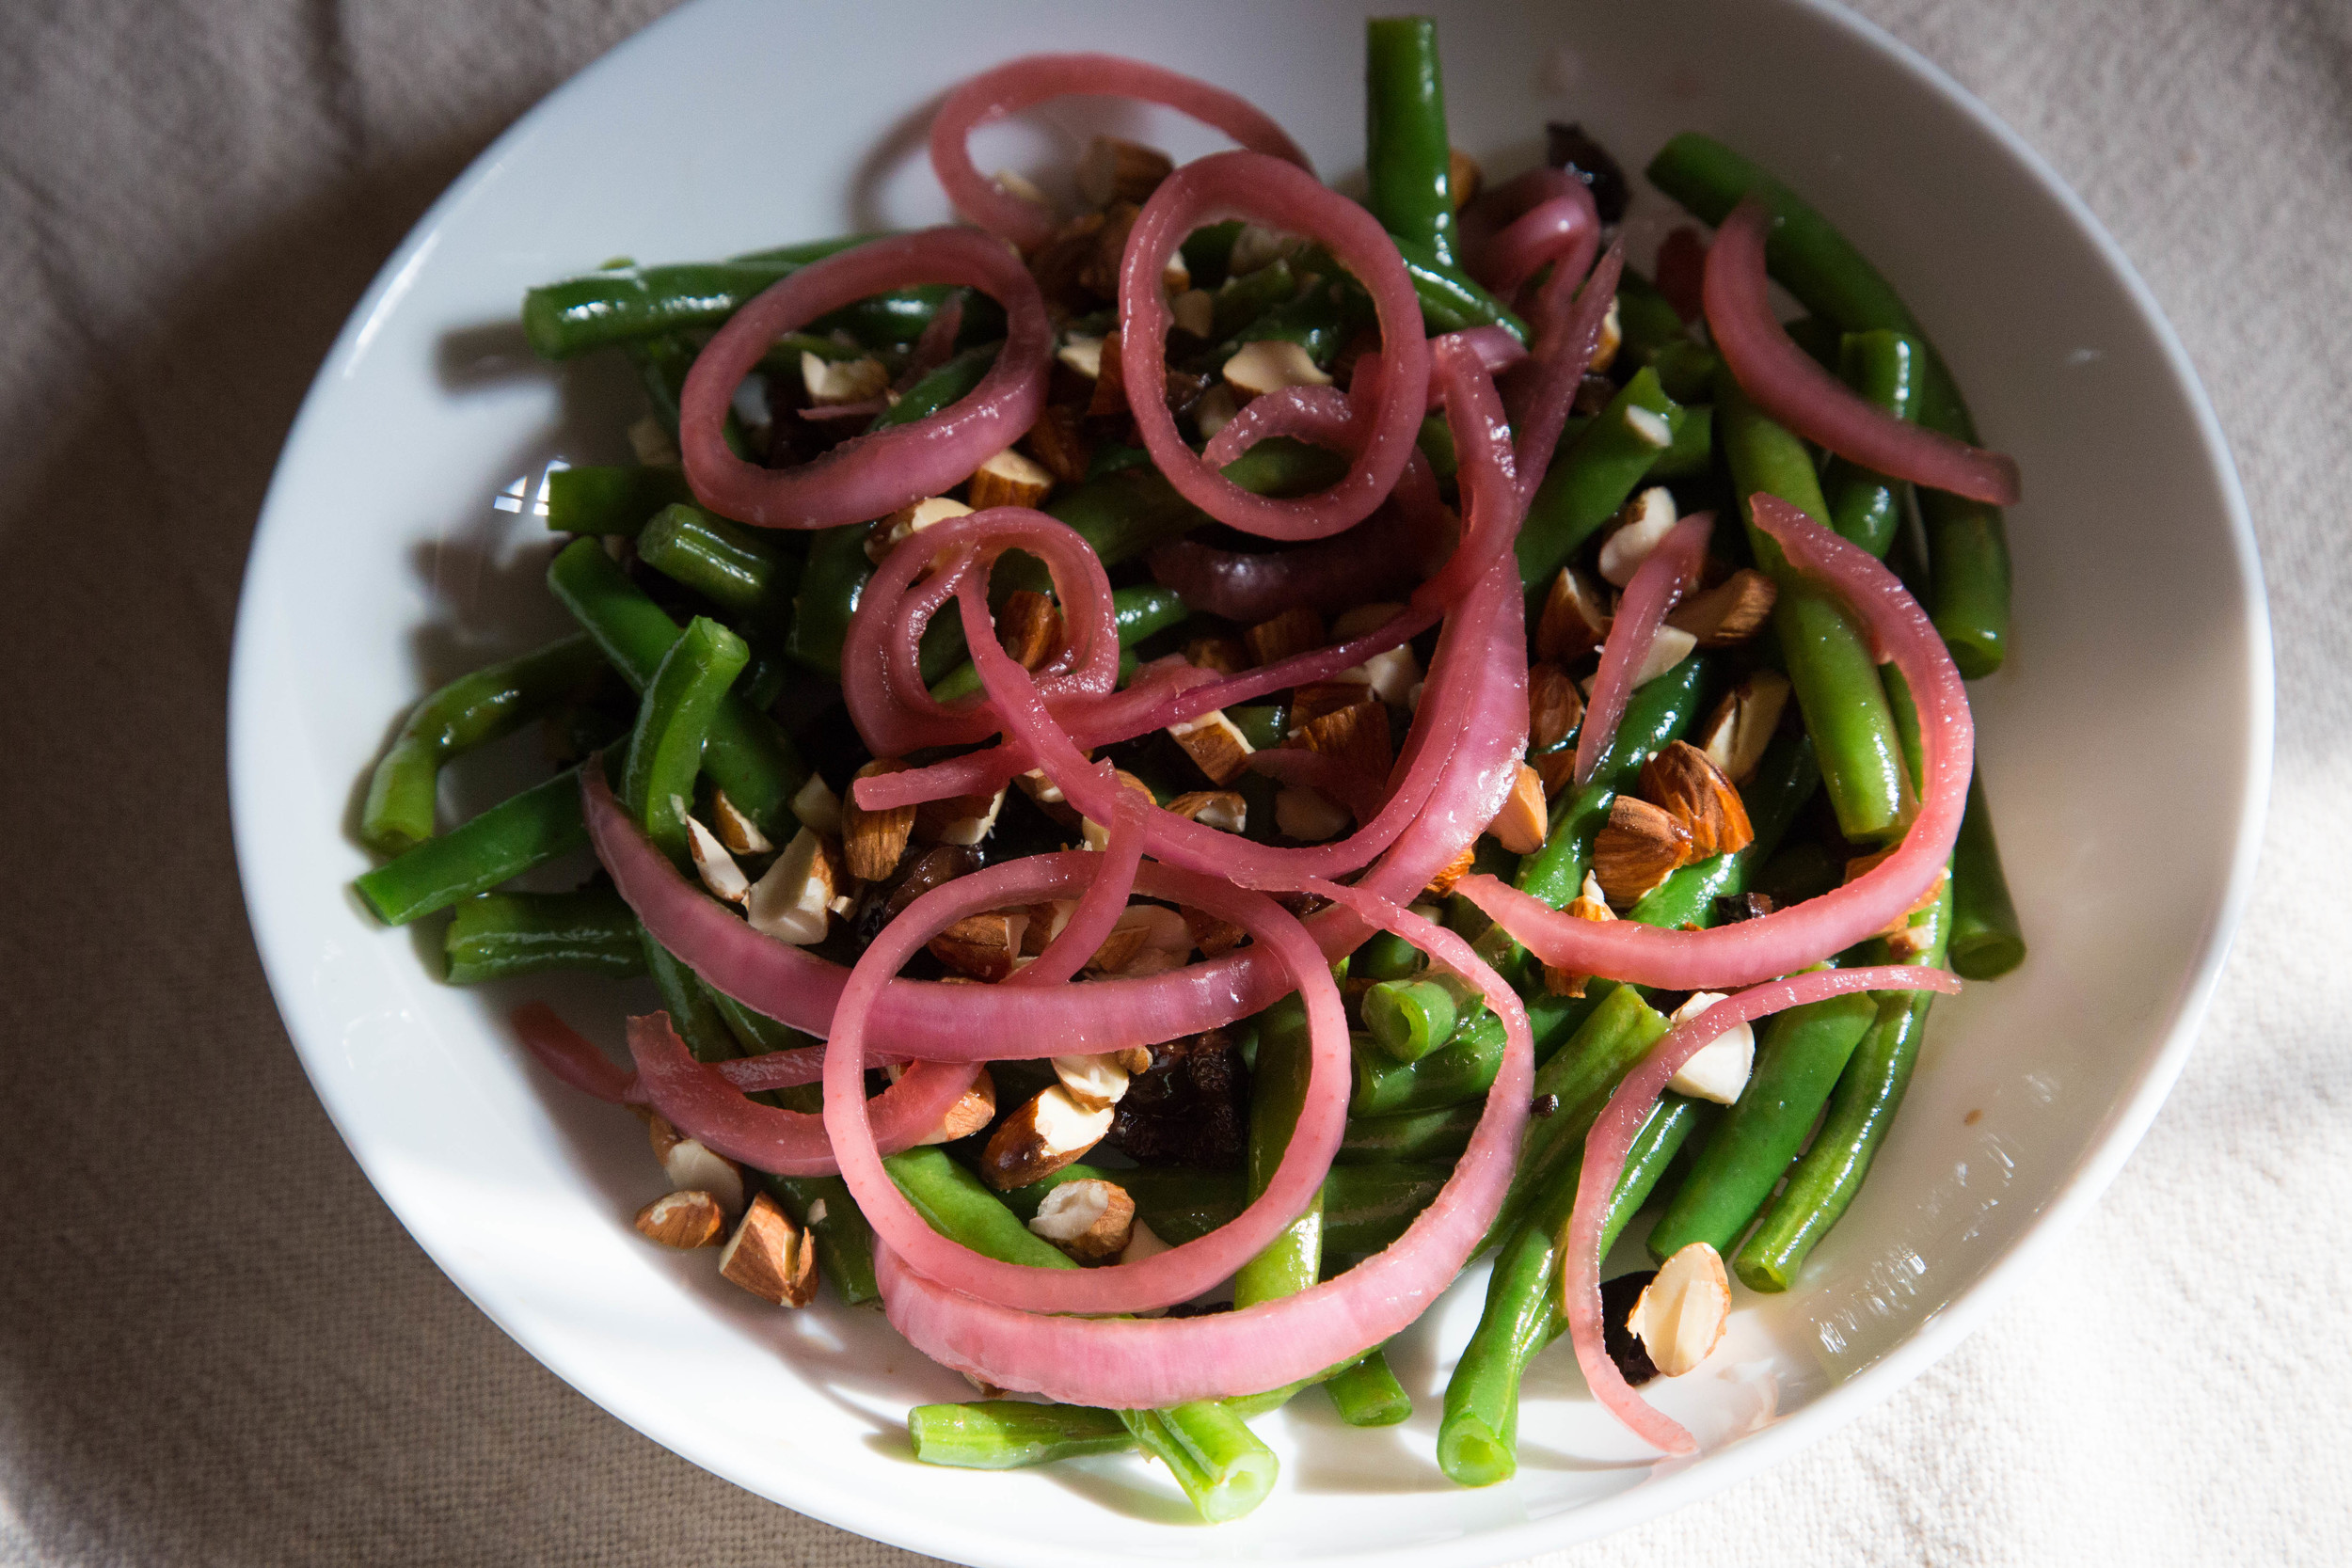
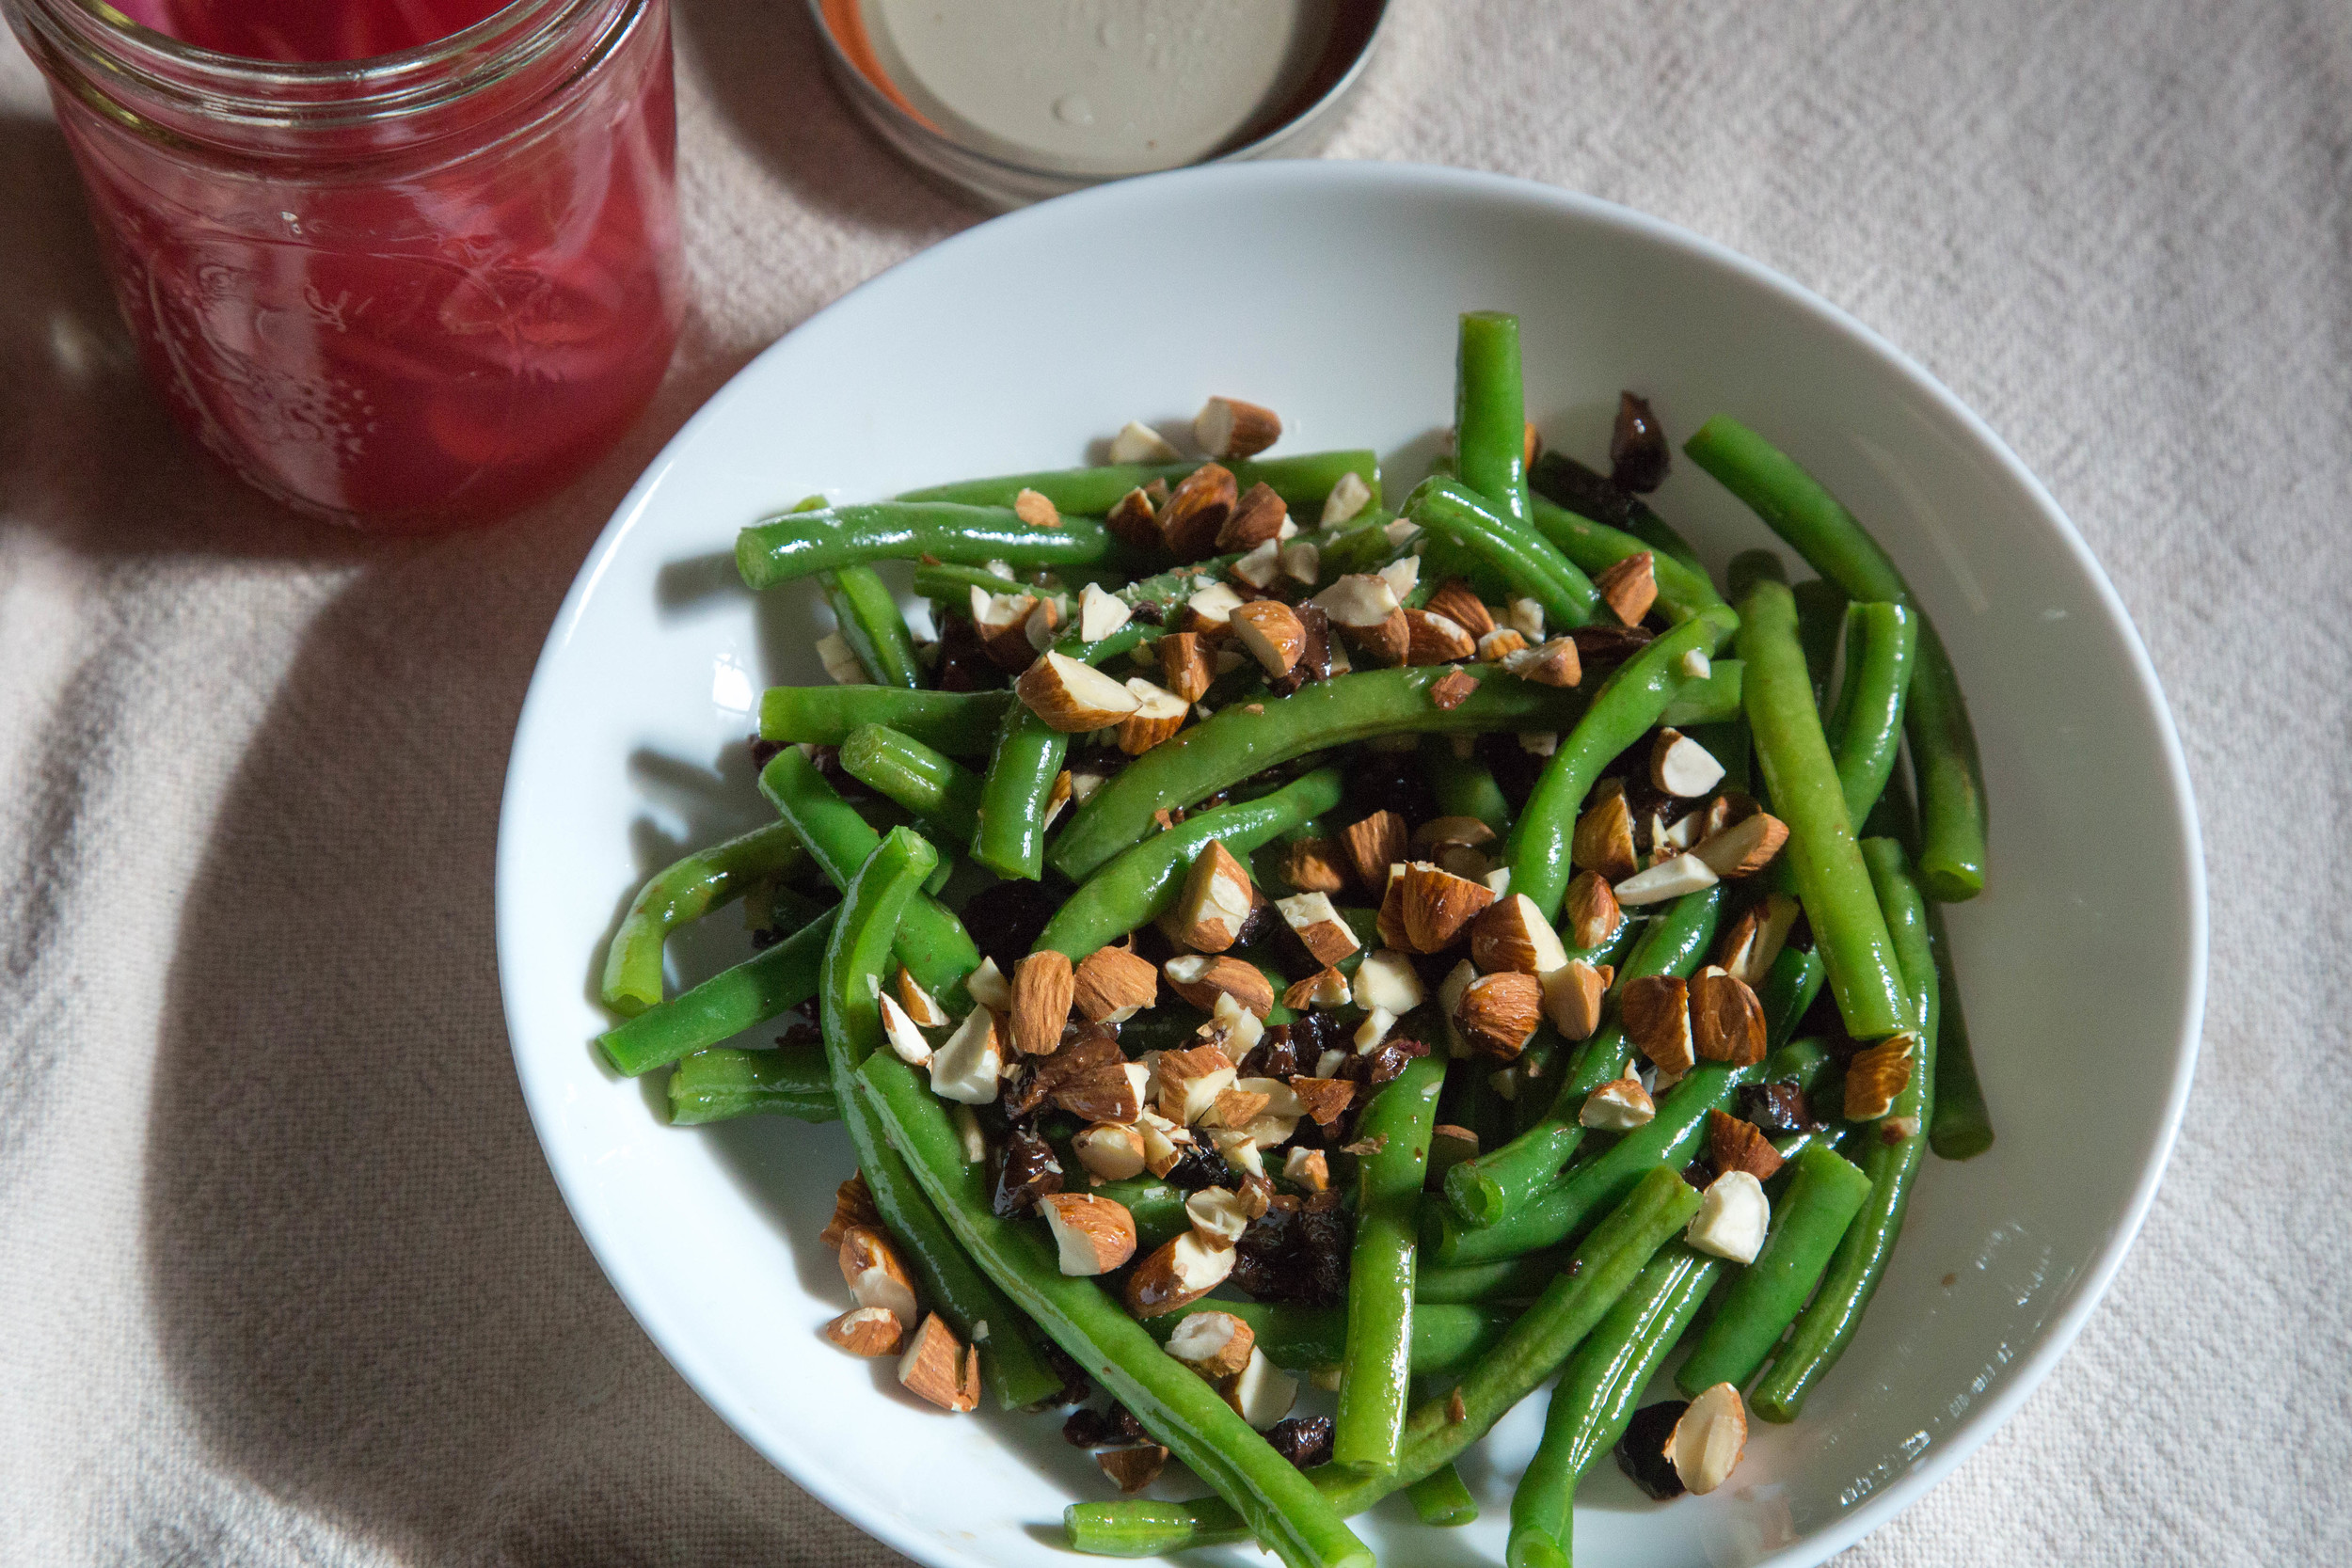
Here's the thing. I don't love green beans. They're fine, but if they didn't appear in my CSA or cross my path at Thanksgiving, I'd probably never touch the things. It's not that I actively dislike them, I'm just very "meh" on them. When they do show up in my CSA (hi SPRING), I usually end up throwing them in a pasta dish or a curry or covering them with cheese and pesto so they just taste like, well, cheese and pesto.
But this time I was determined to find a way to eat them that was a little bit more adventurous but still really easy. So I do what I always do when I'm looking for inspiration... ask myself WWDMD (what would Deborah Madison do). After looking over the green bean recipes in Vegetable Literacy, I discovered I kept almost all the ingredients for the last recipe on hand at all times (olives, onions, garlic...) so I was set. The recipe did not disappoint and it is now my go to for green beans. The strong flavors of the onion and olive balance out the blandness of the beans. It's a perfect lunch or light dinner and with all the different colors, it always looks delightful.
Madison's original recipe uses shallots in apple cider vinegar instead of red onions in red wine vinegar and tomatoes instead of almonds (but I wanted some crunch). I usually have red onions kicking about and I adore them, but I can't eat them raw without some considerable stomach upset, so I've started pickling them for salads. It's pretty simple and can be done anytime from 30 minutes to 1 week in advance. I simply slice the onions, put them in a bowl or jar, cover them with 50% red wine vinegar and 50% hot water, and add a pinch of sugar.
Steps
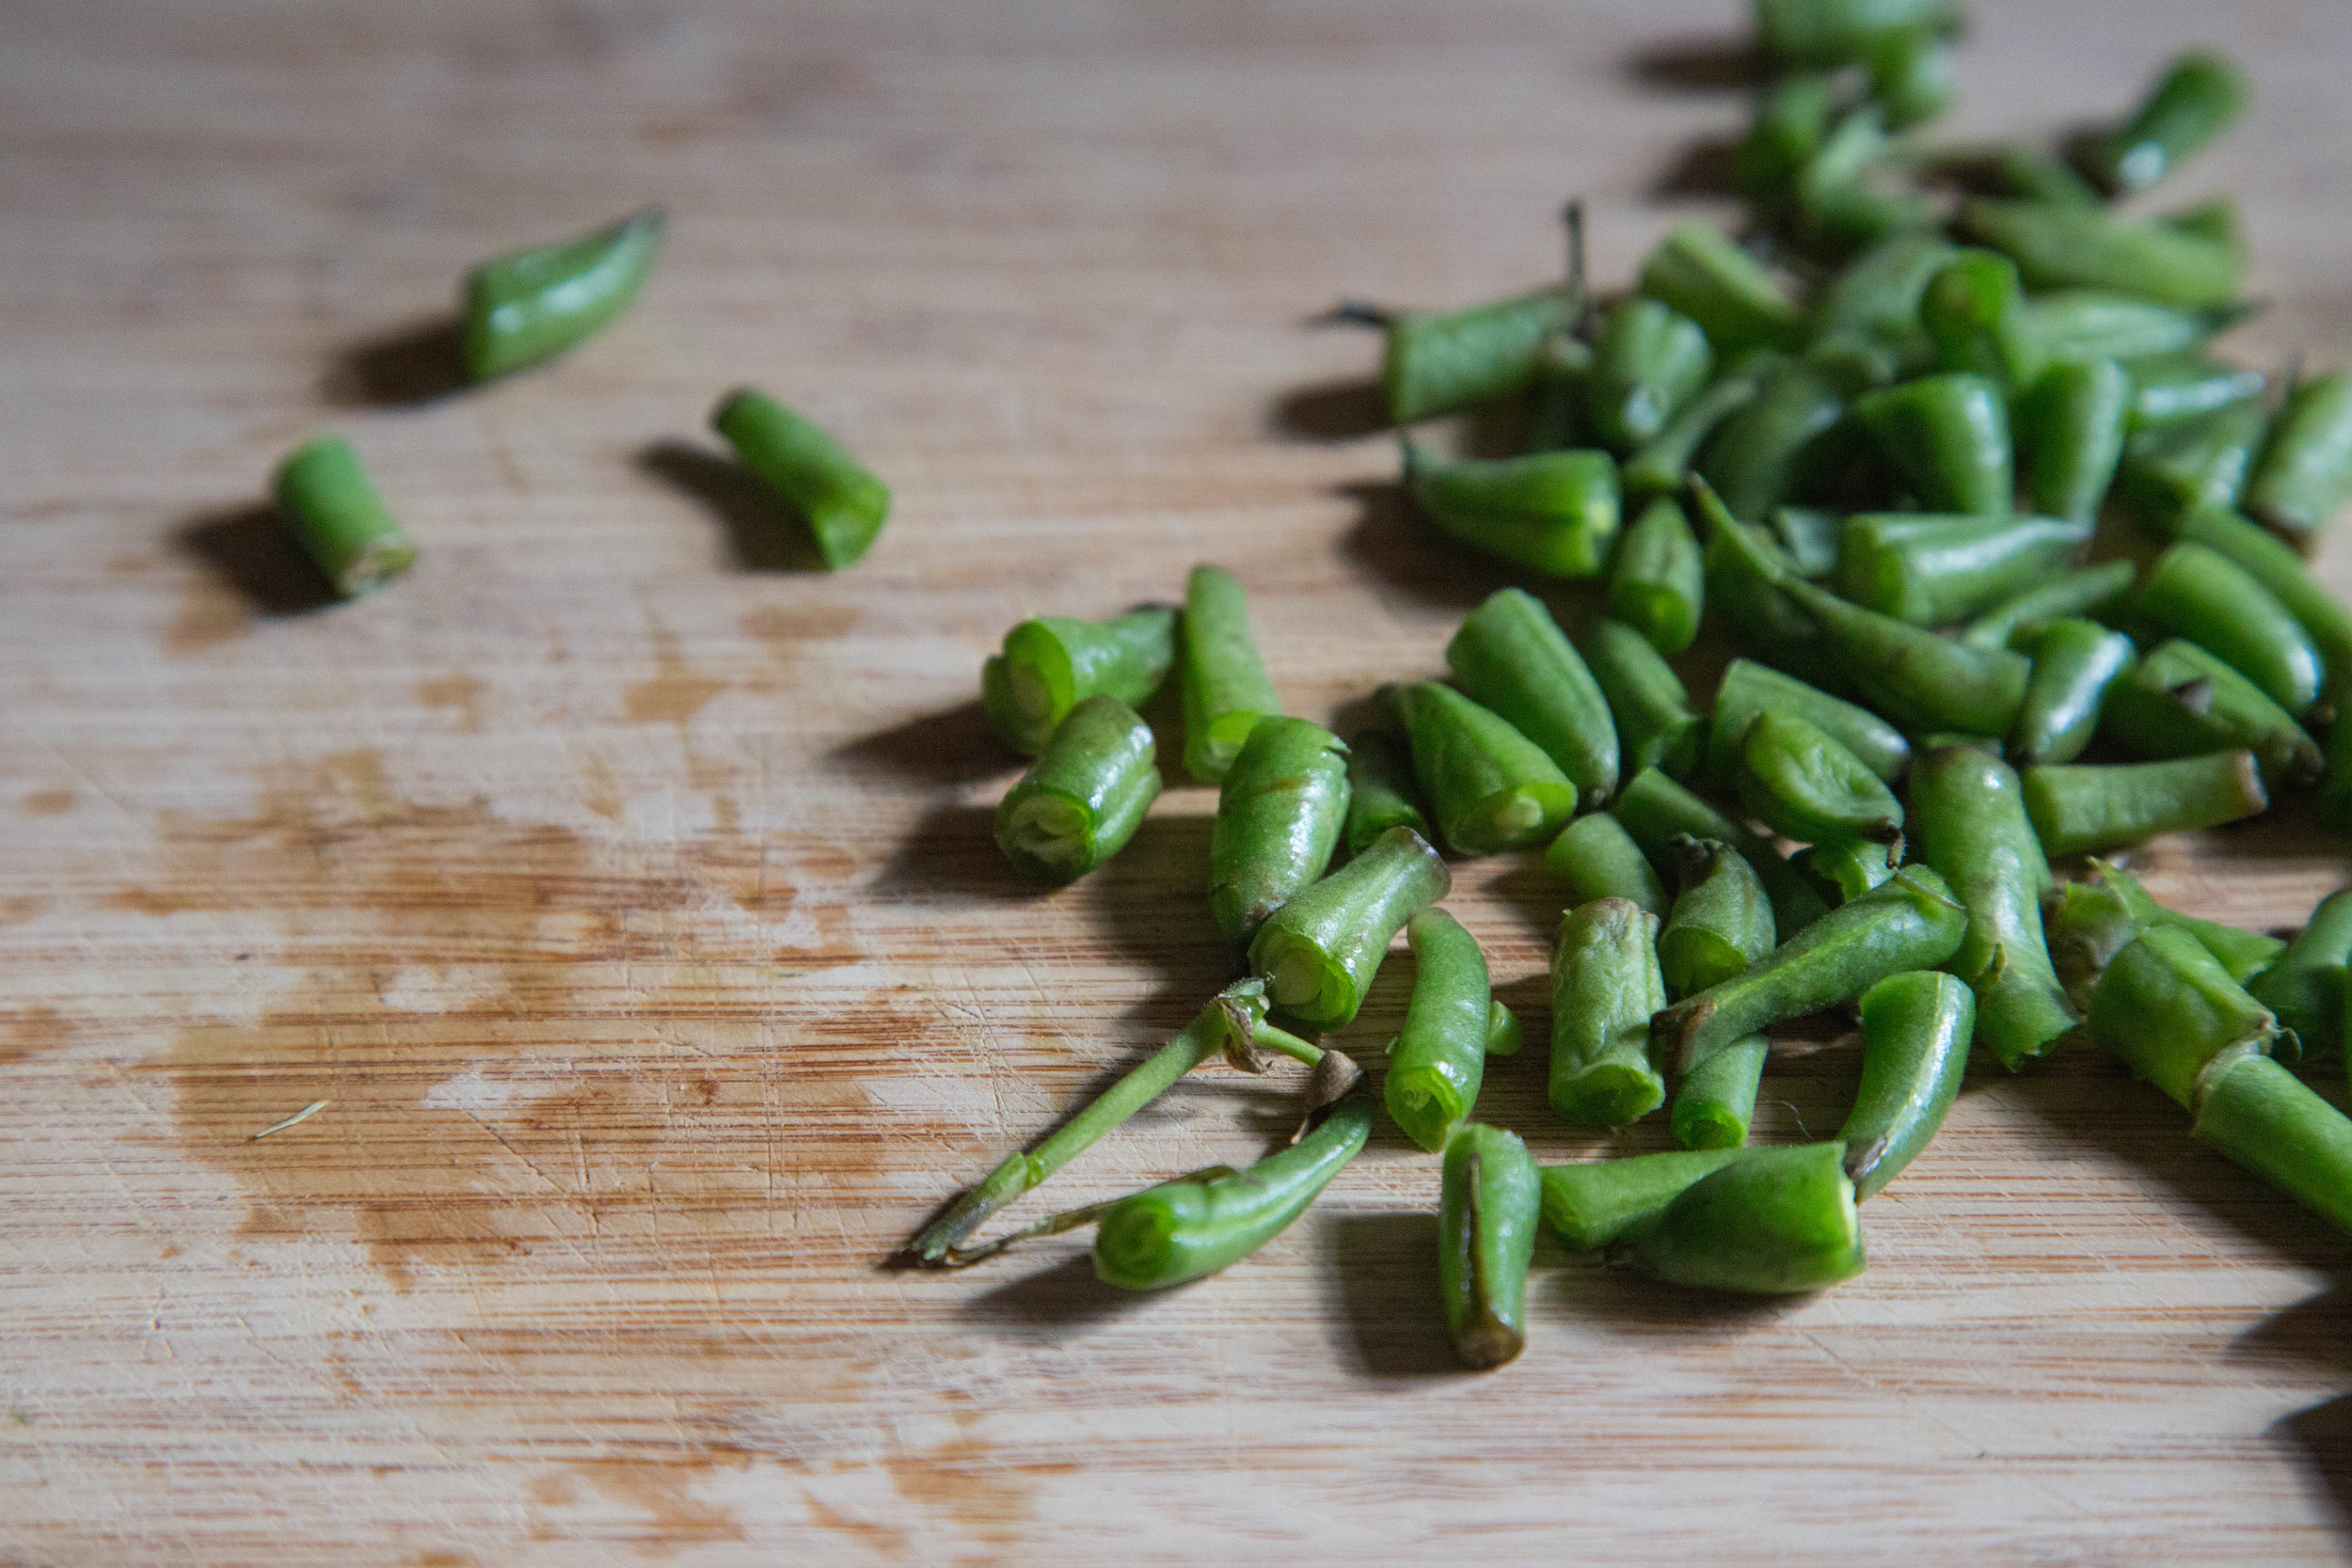
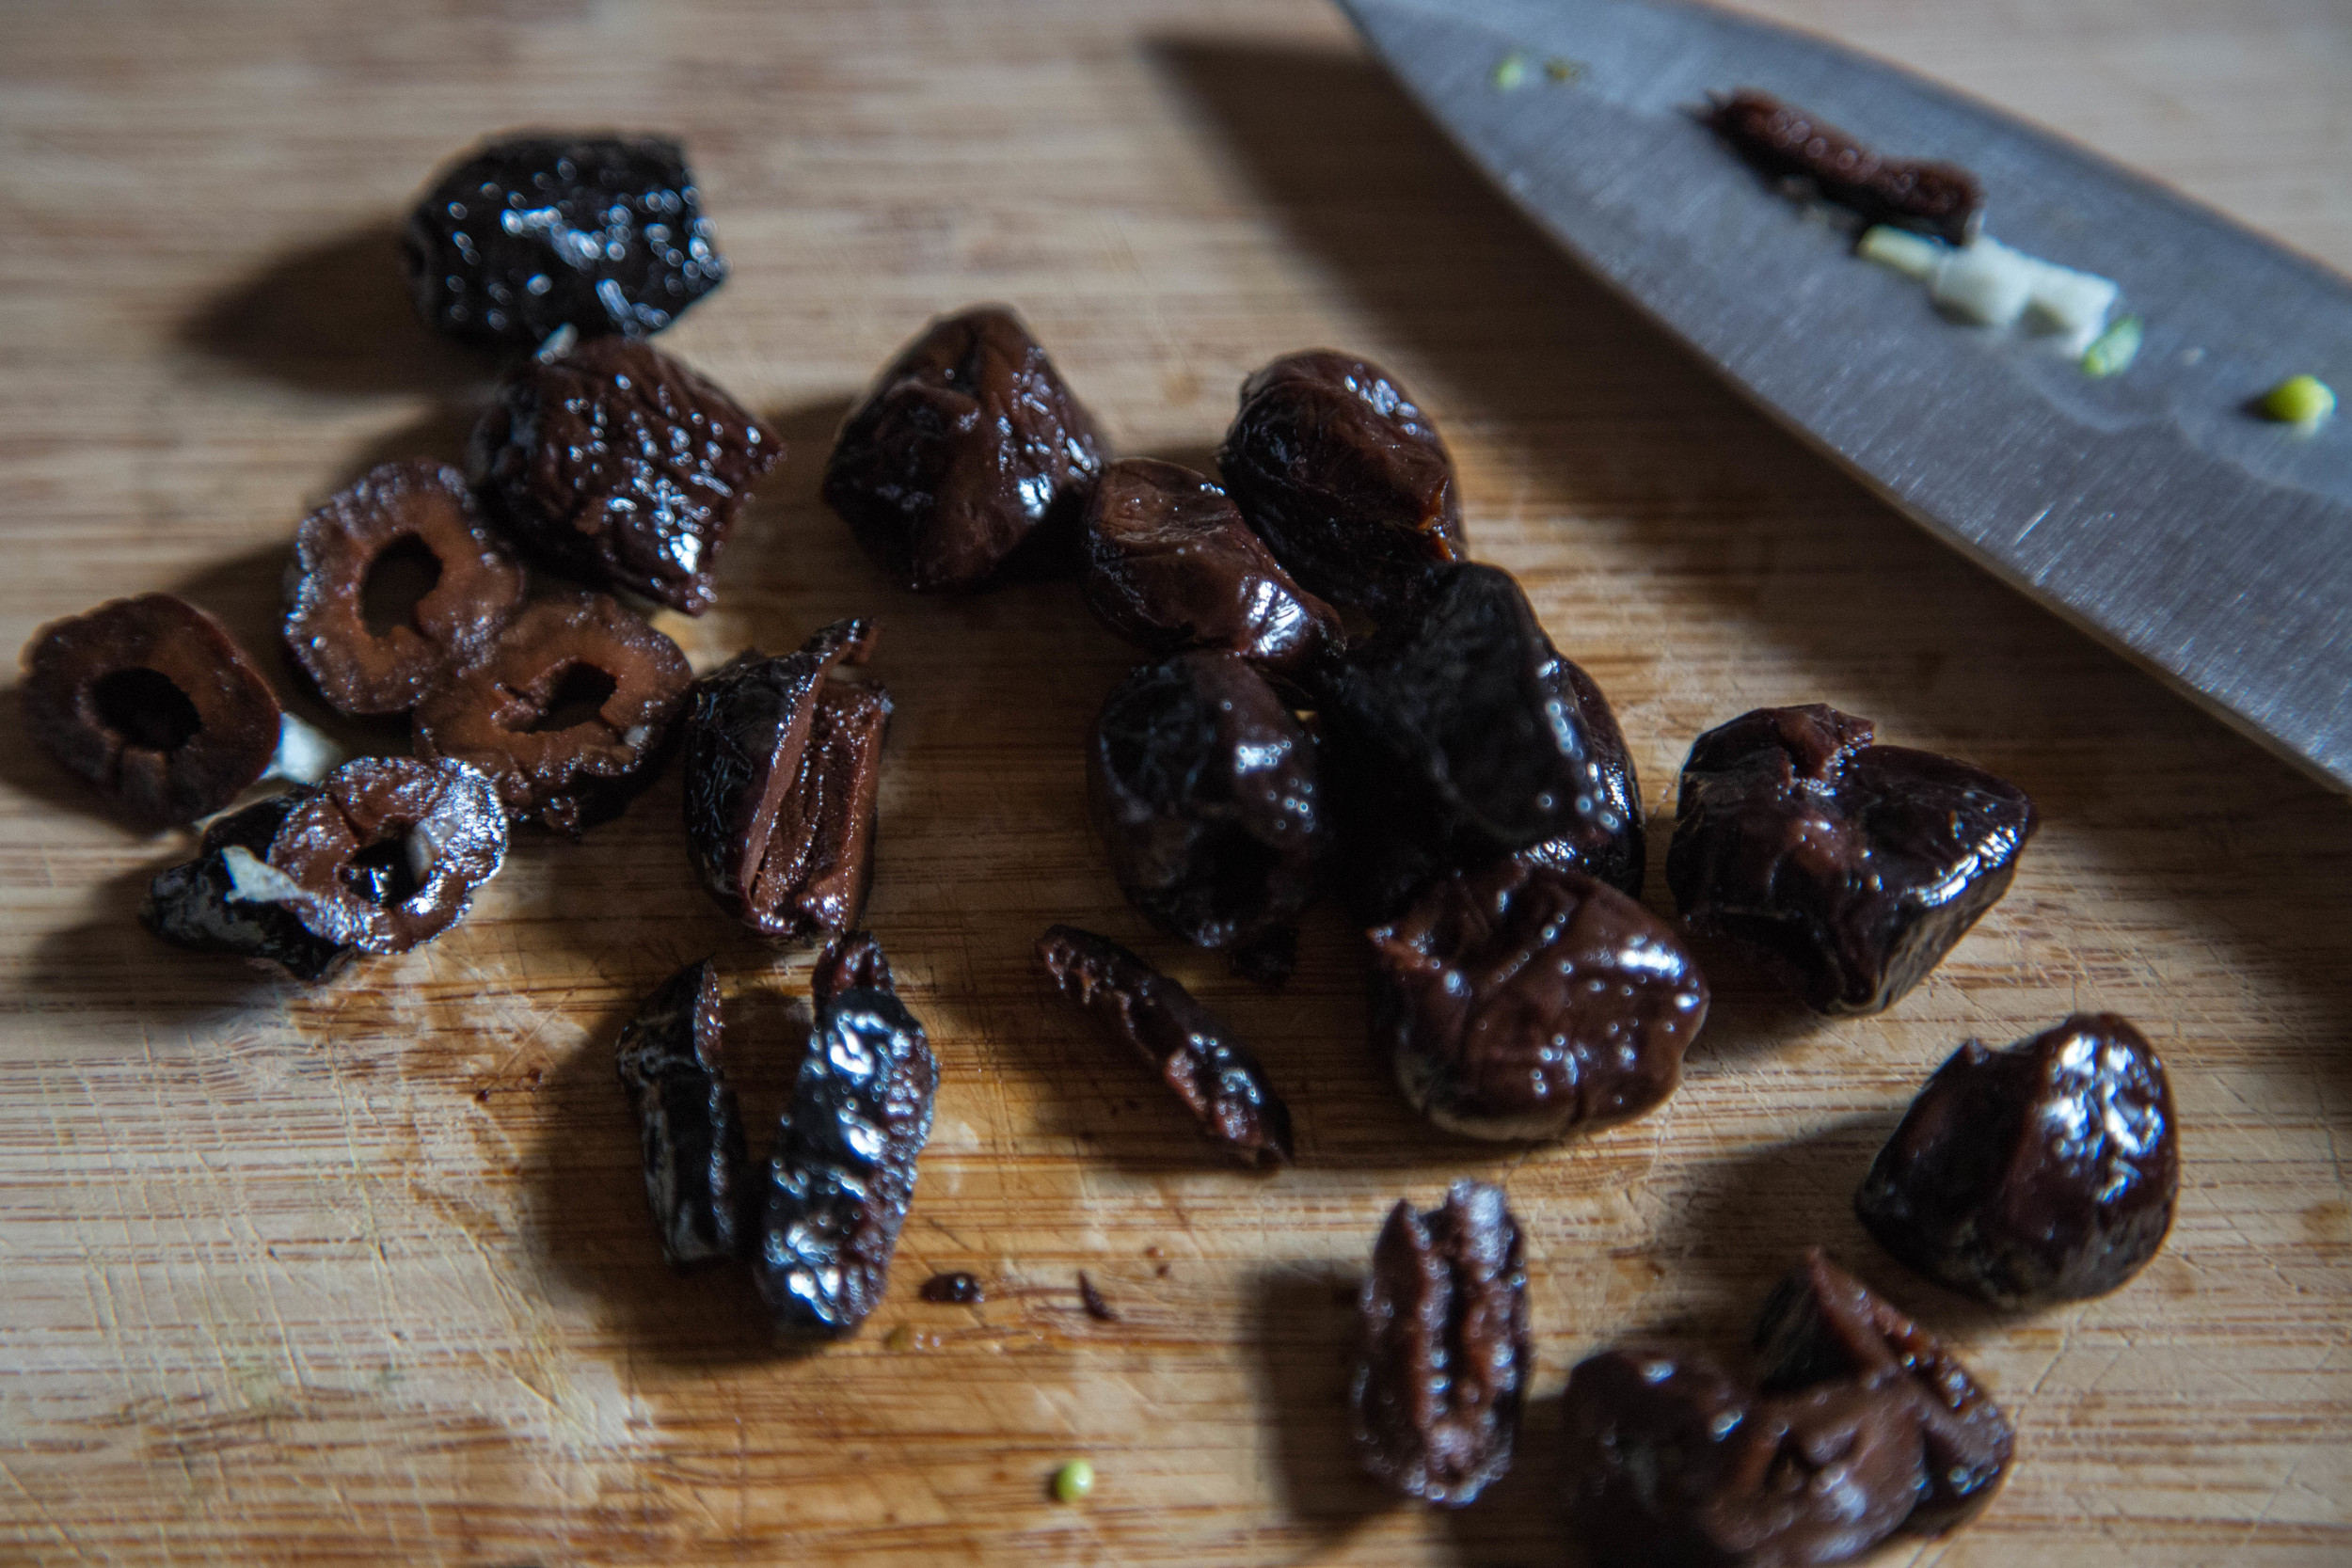
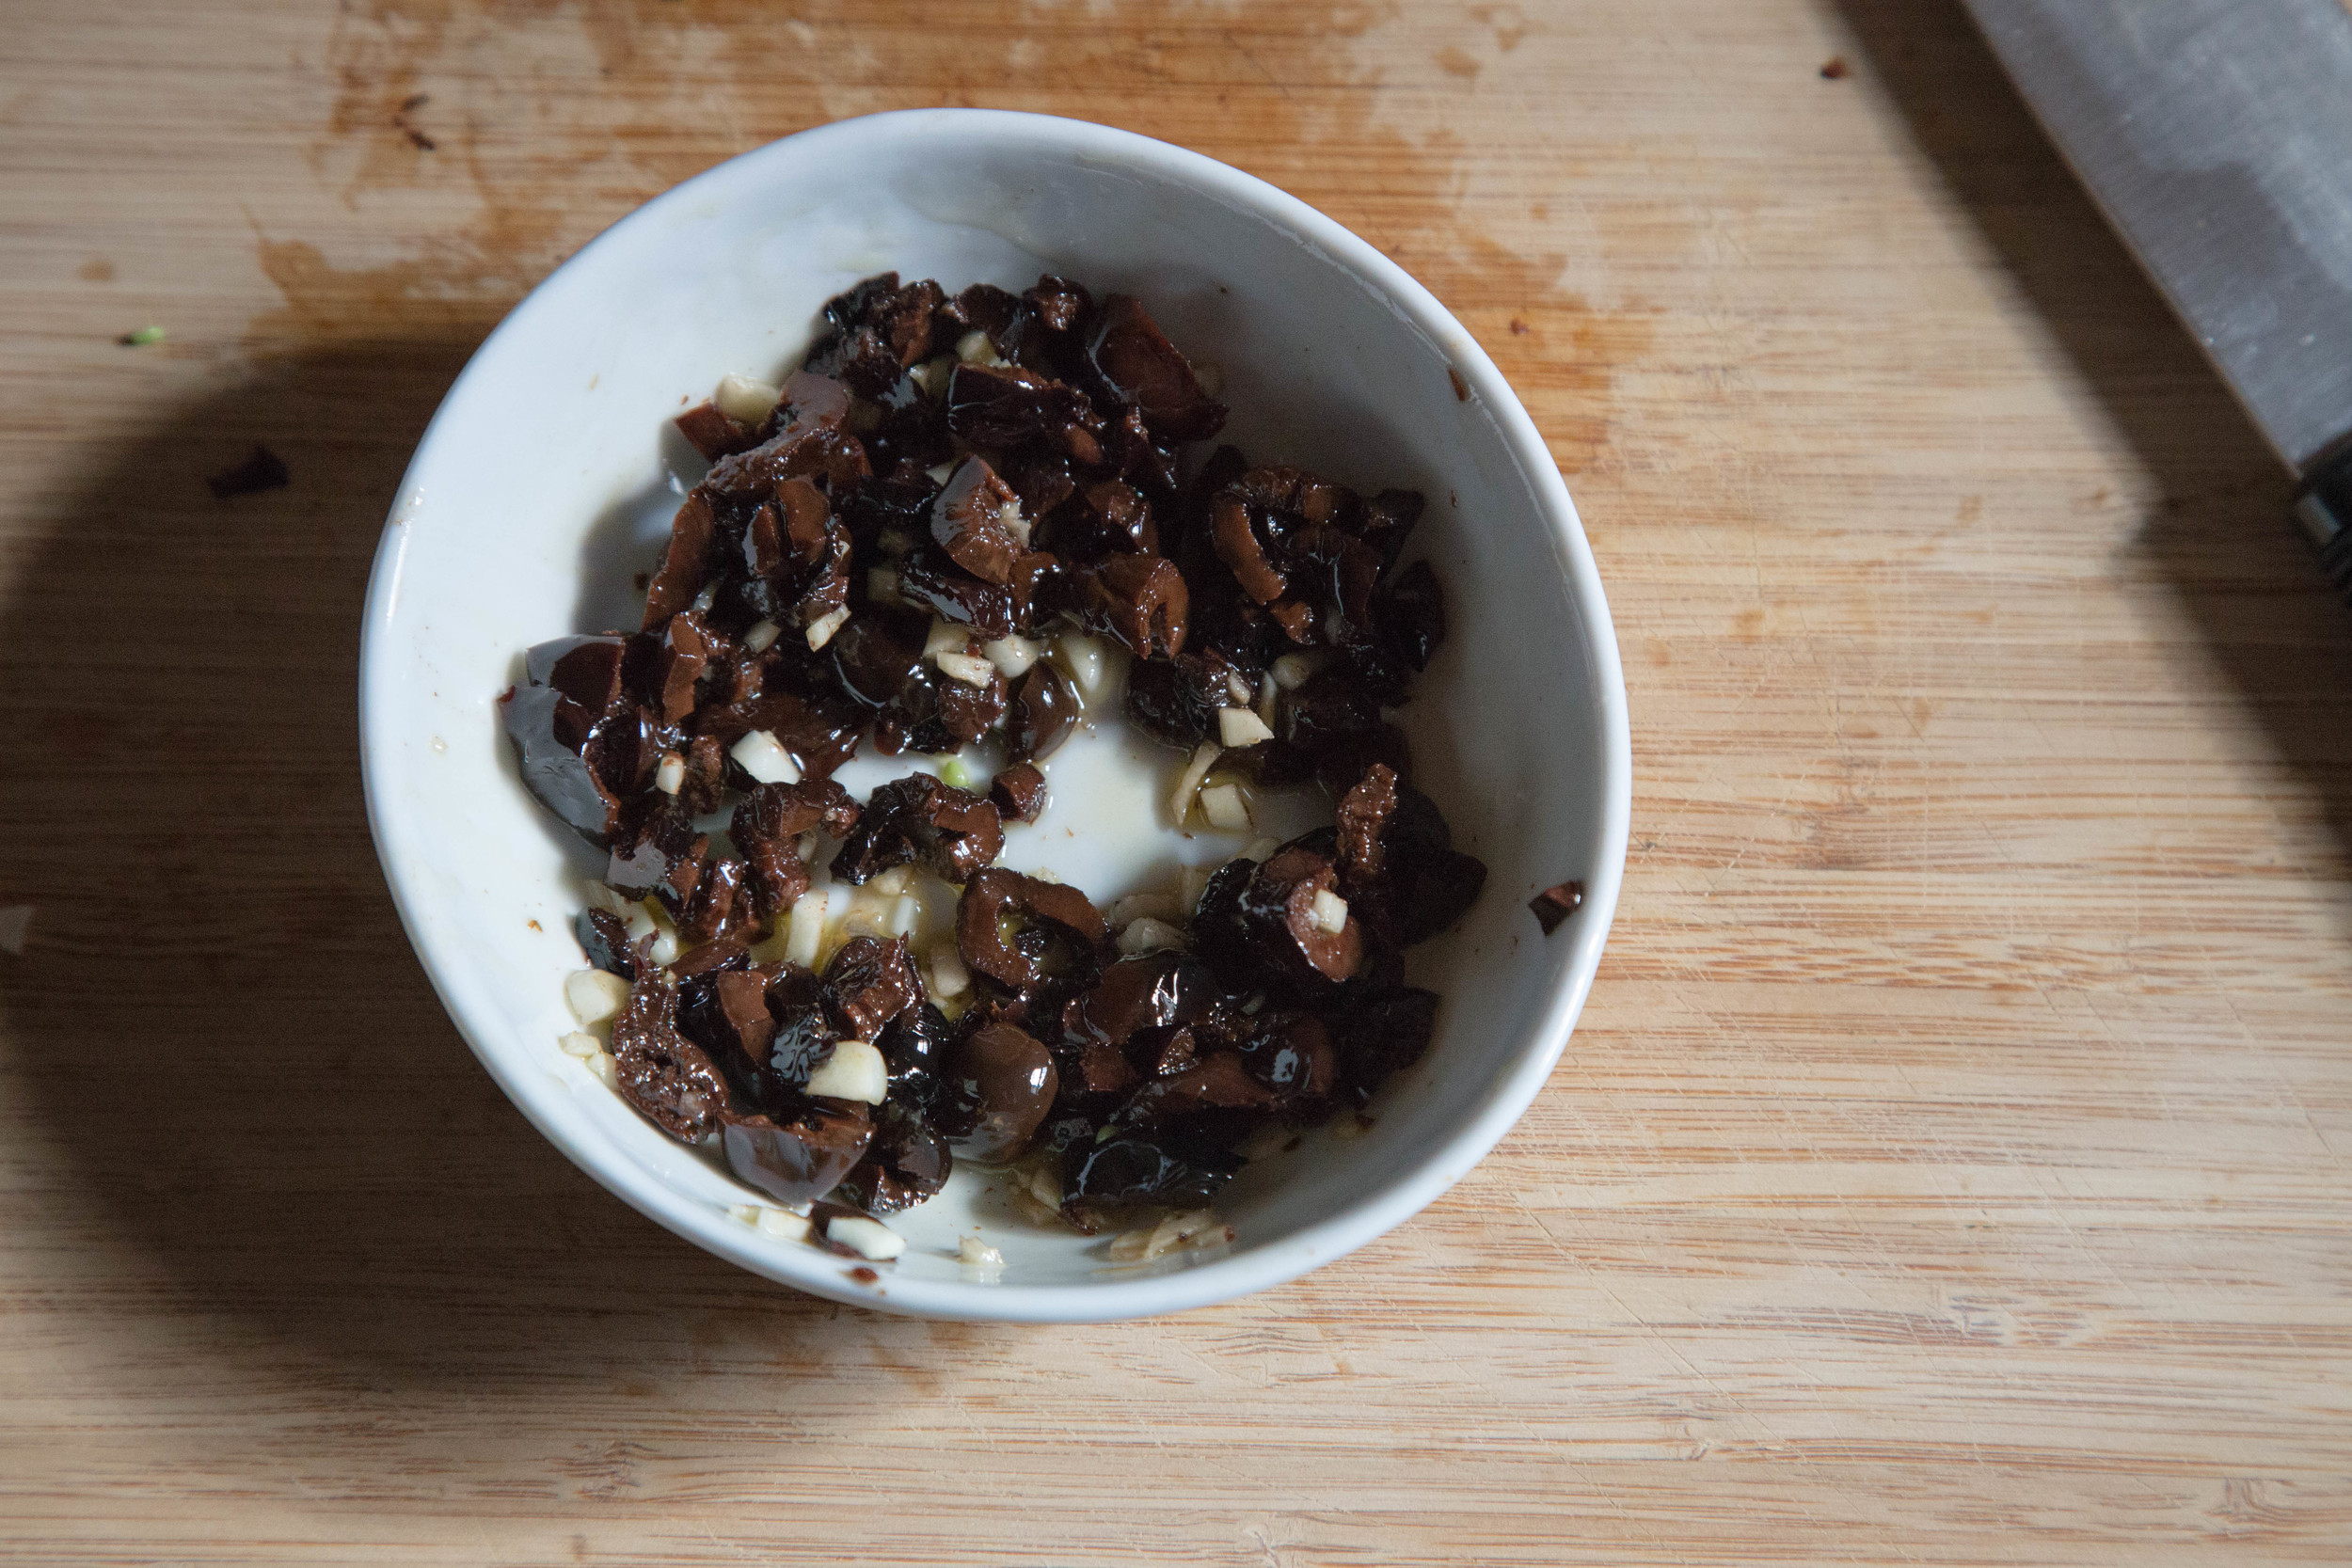
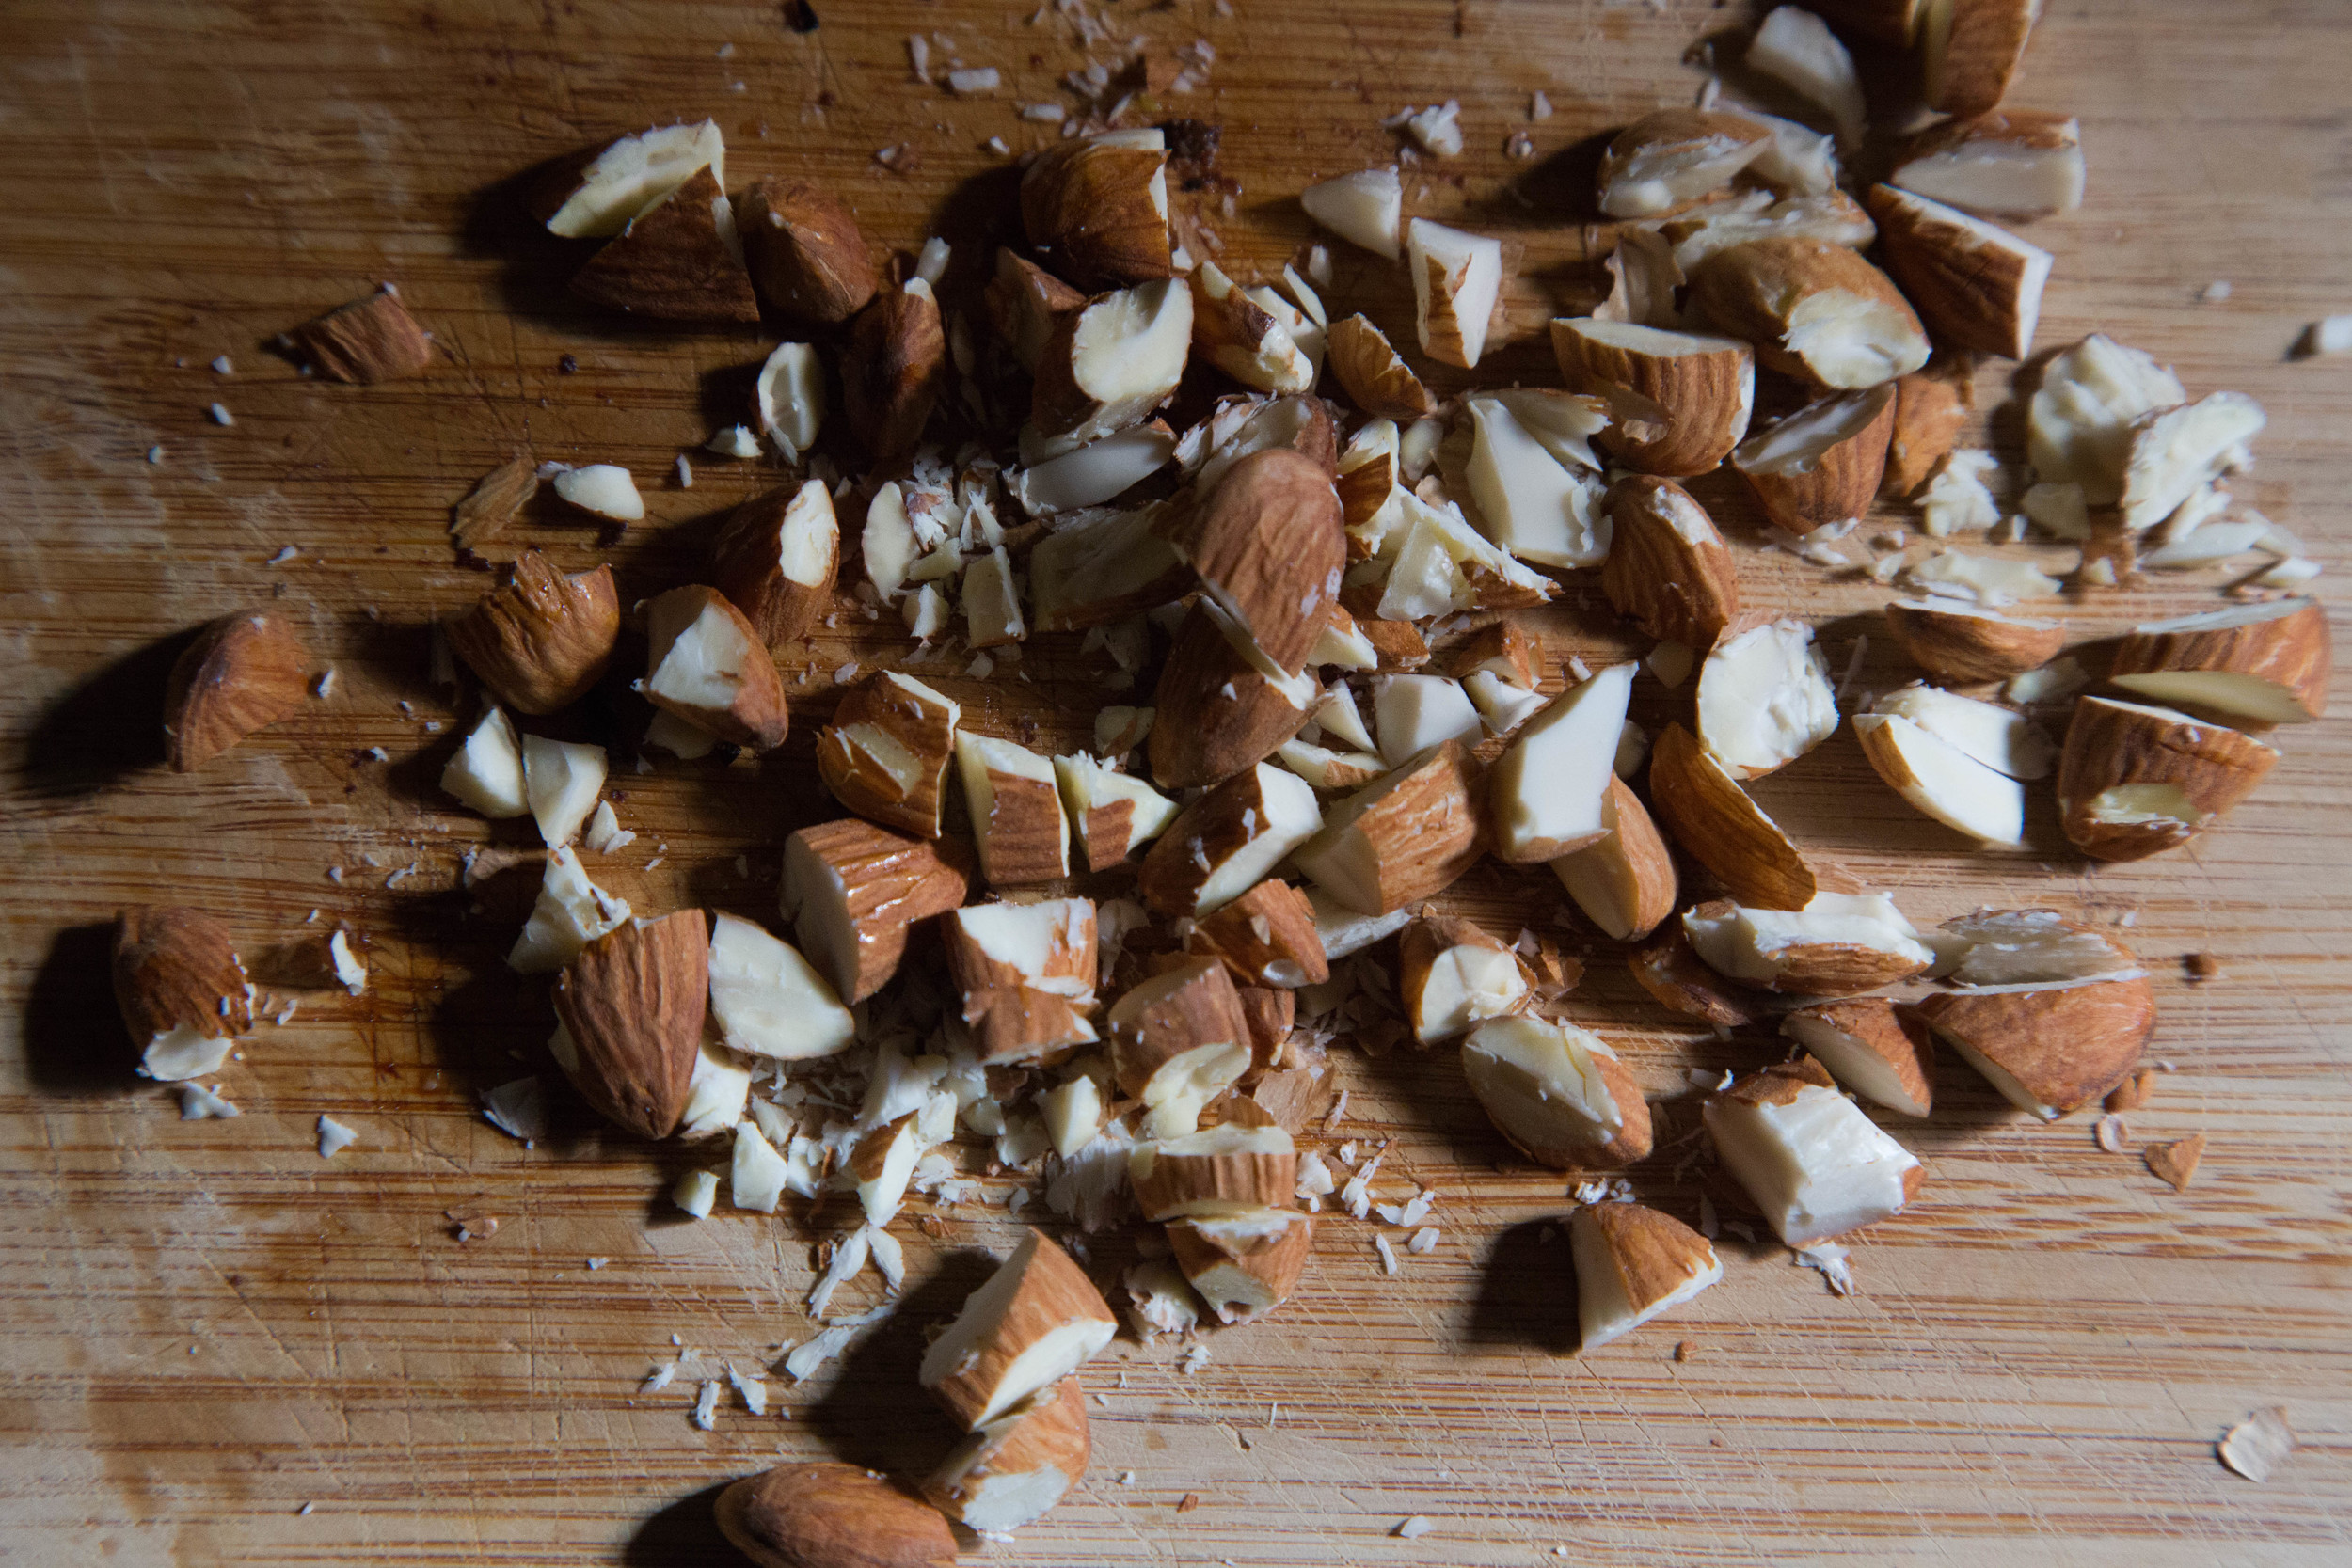
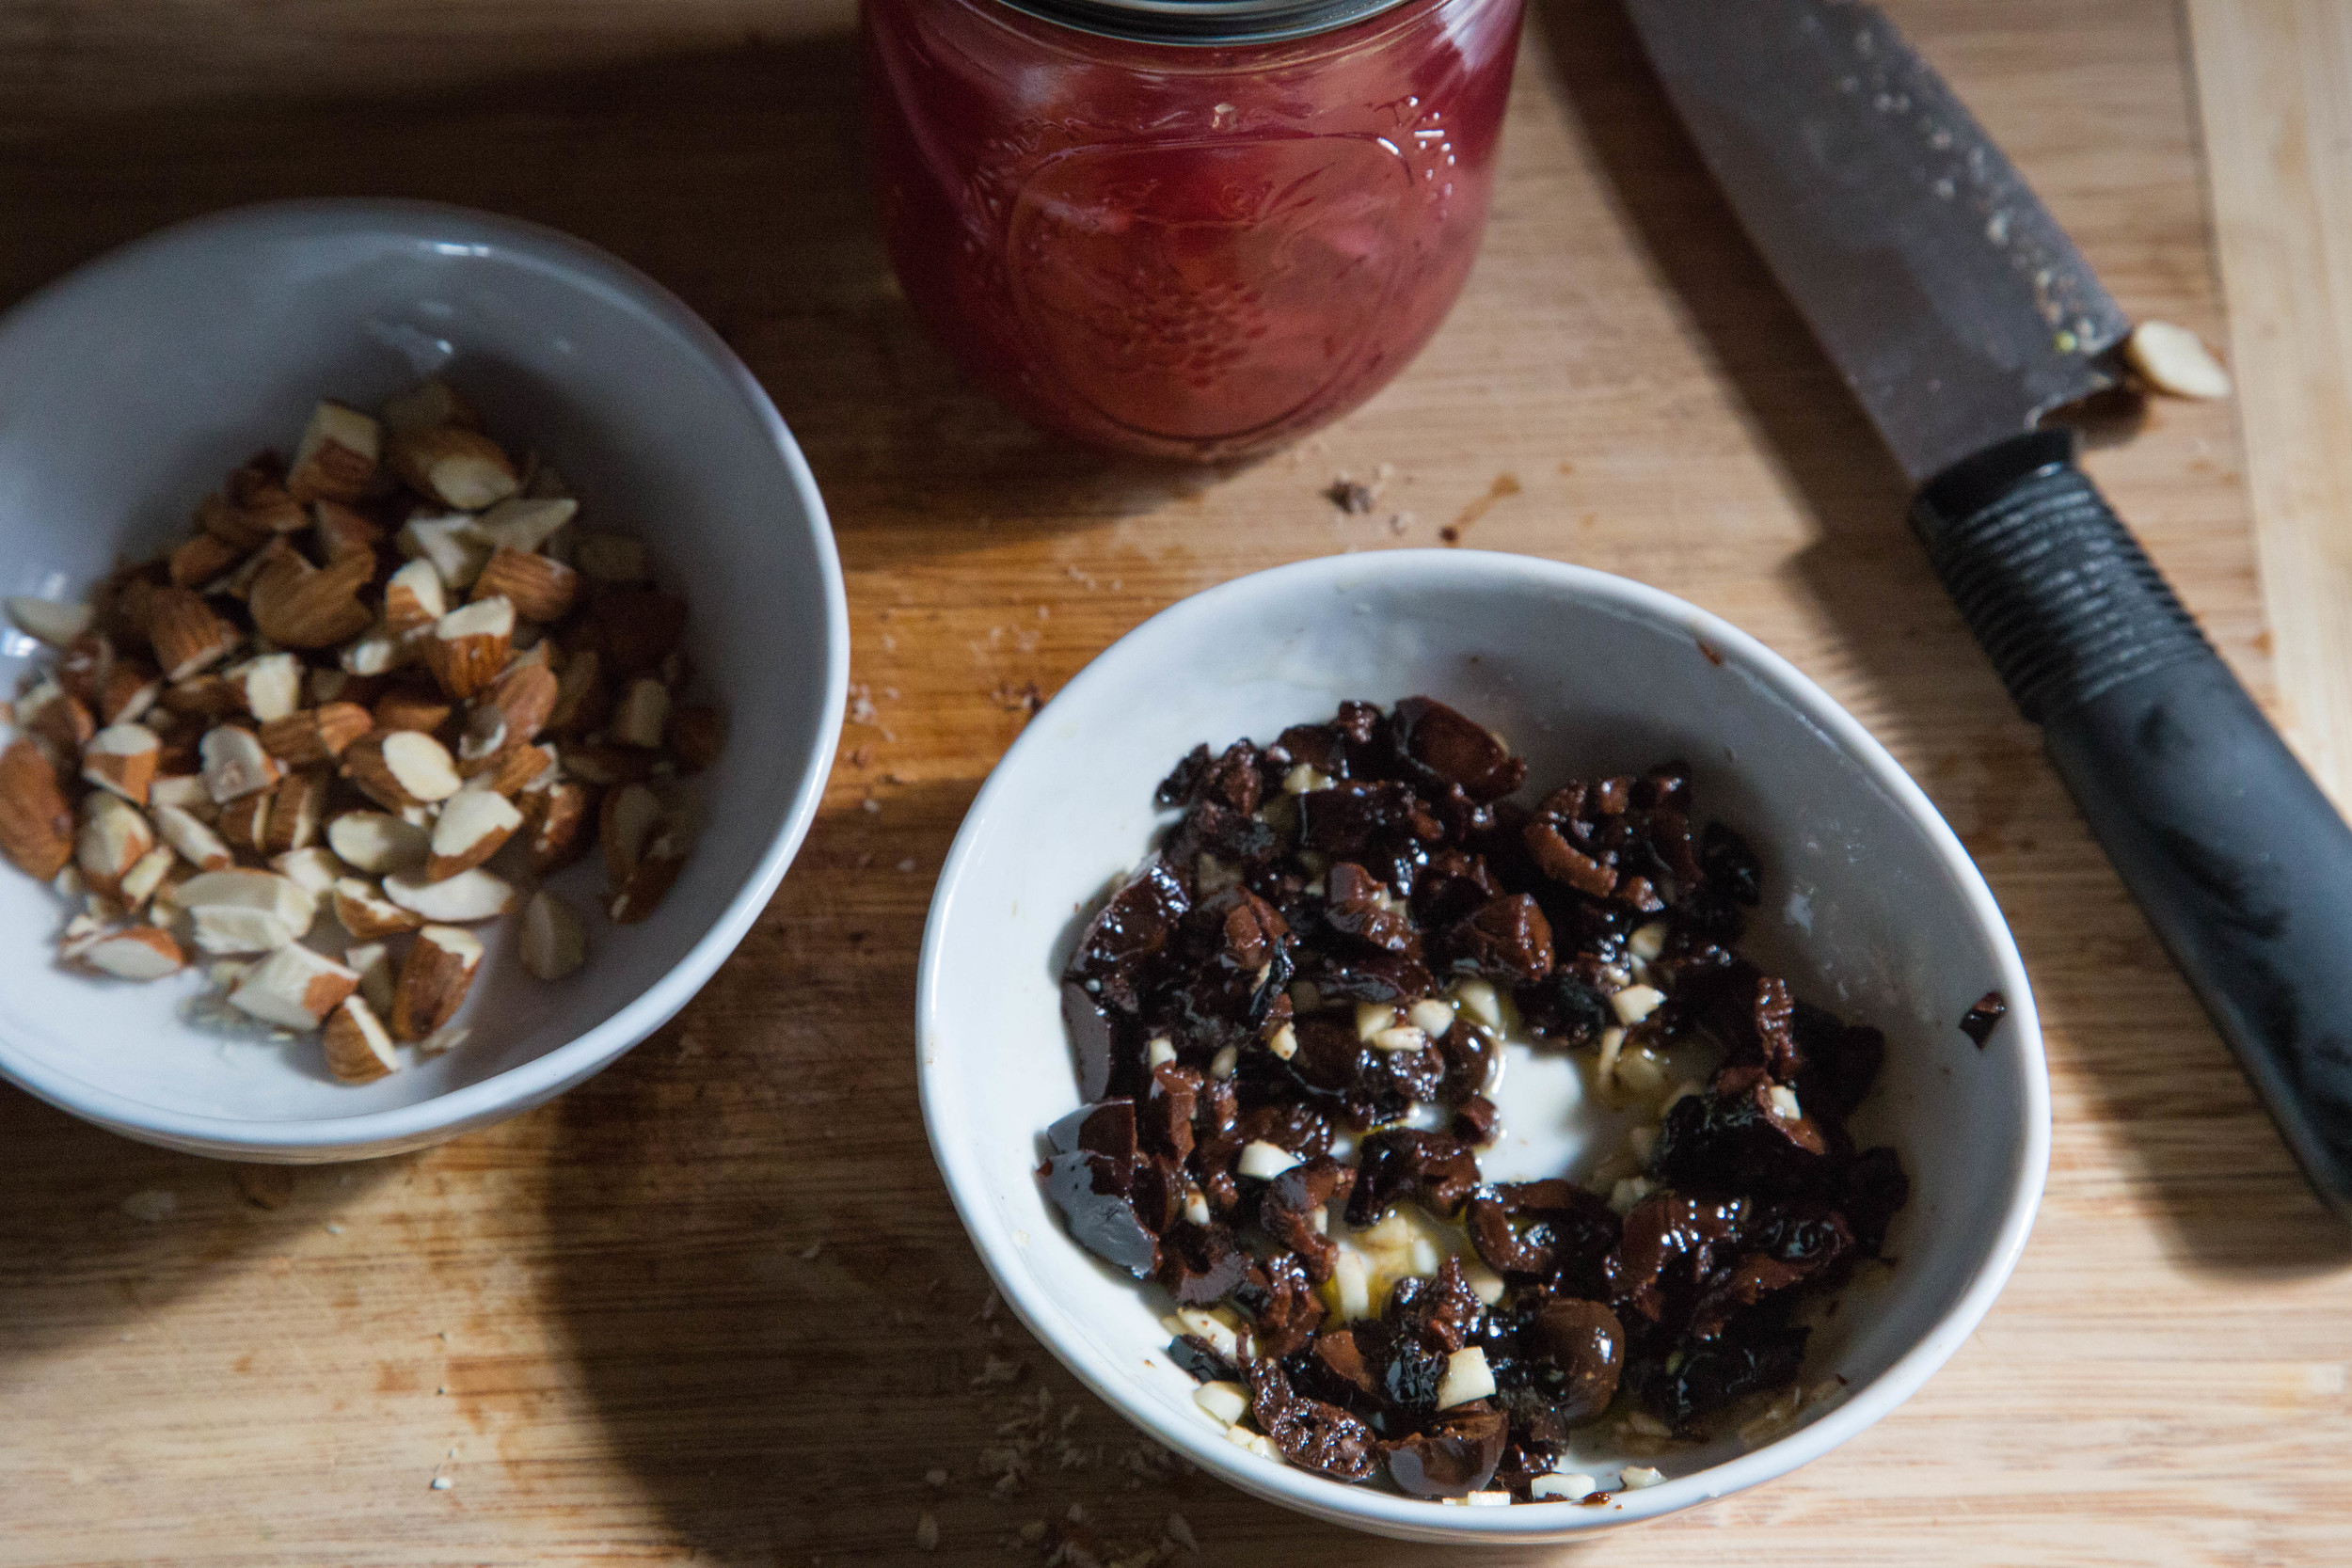
Put water on to boil and add a pinch of salt. Top and tail the green beans and put them on to boil. Roughly chop the olives and mince the garlic. Mix them together in a small bowl with a good splash of olive oil. Roughly chop the almonds.
Once the beans are cooked, remove from the heat and drain them. In a bowl mix the green beans with the olive/garlic/oil mixture.
To serve, place the beans in a bowl and scatter the almonds and red onions on top. If you don't care about presentation, just mix everything together and go at it.
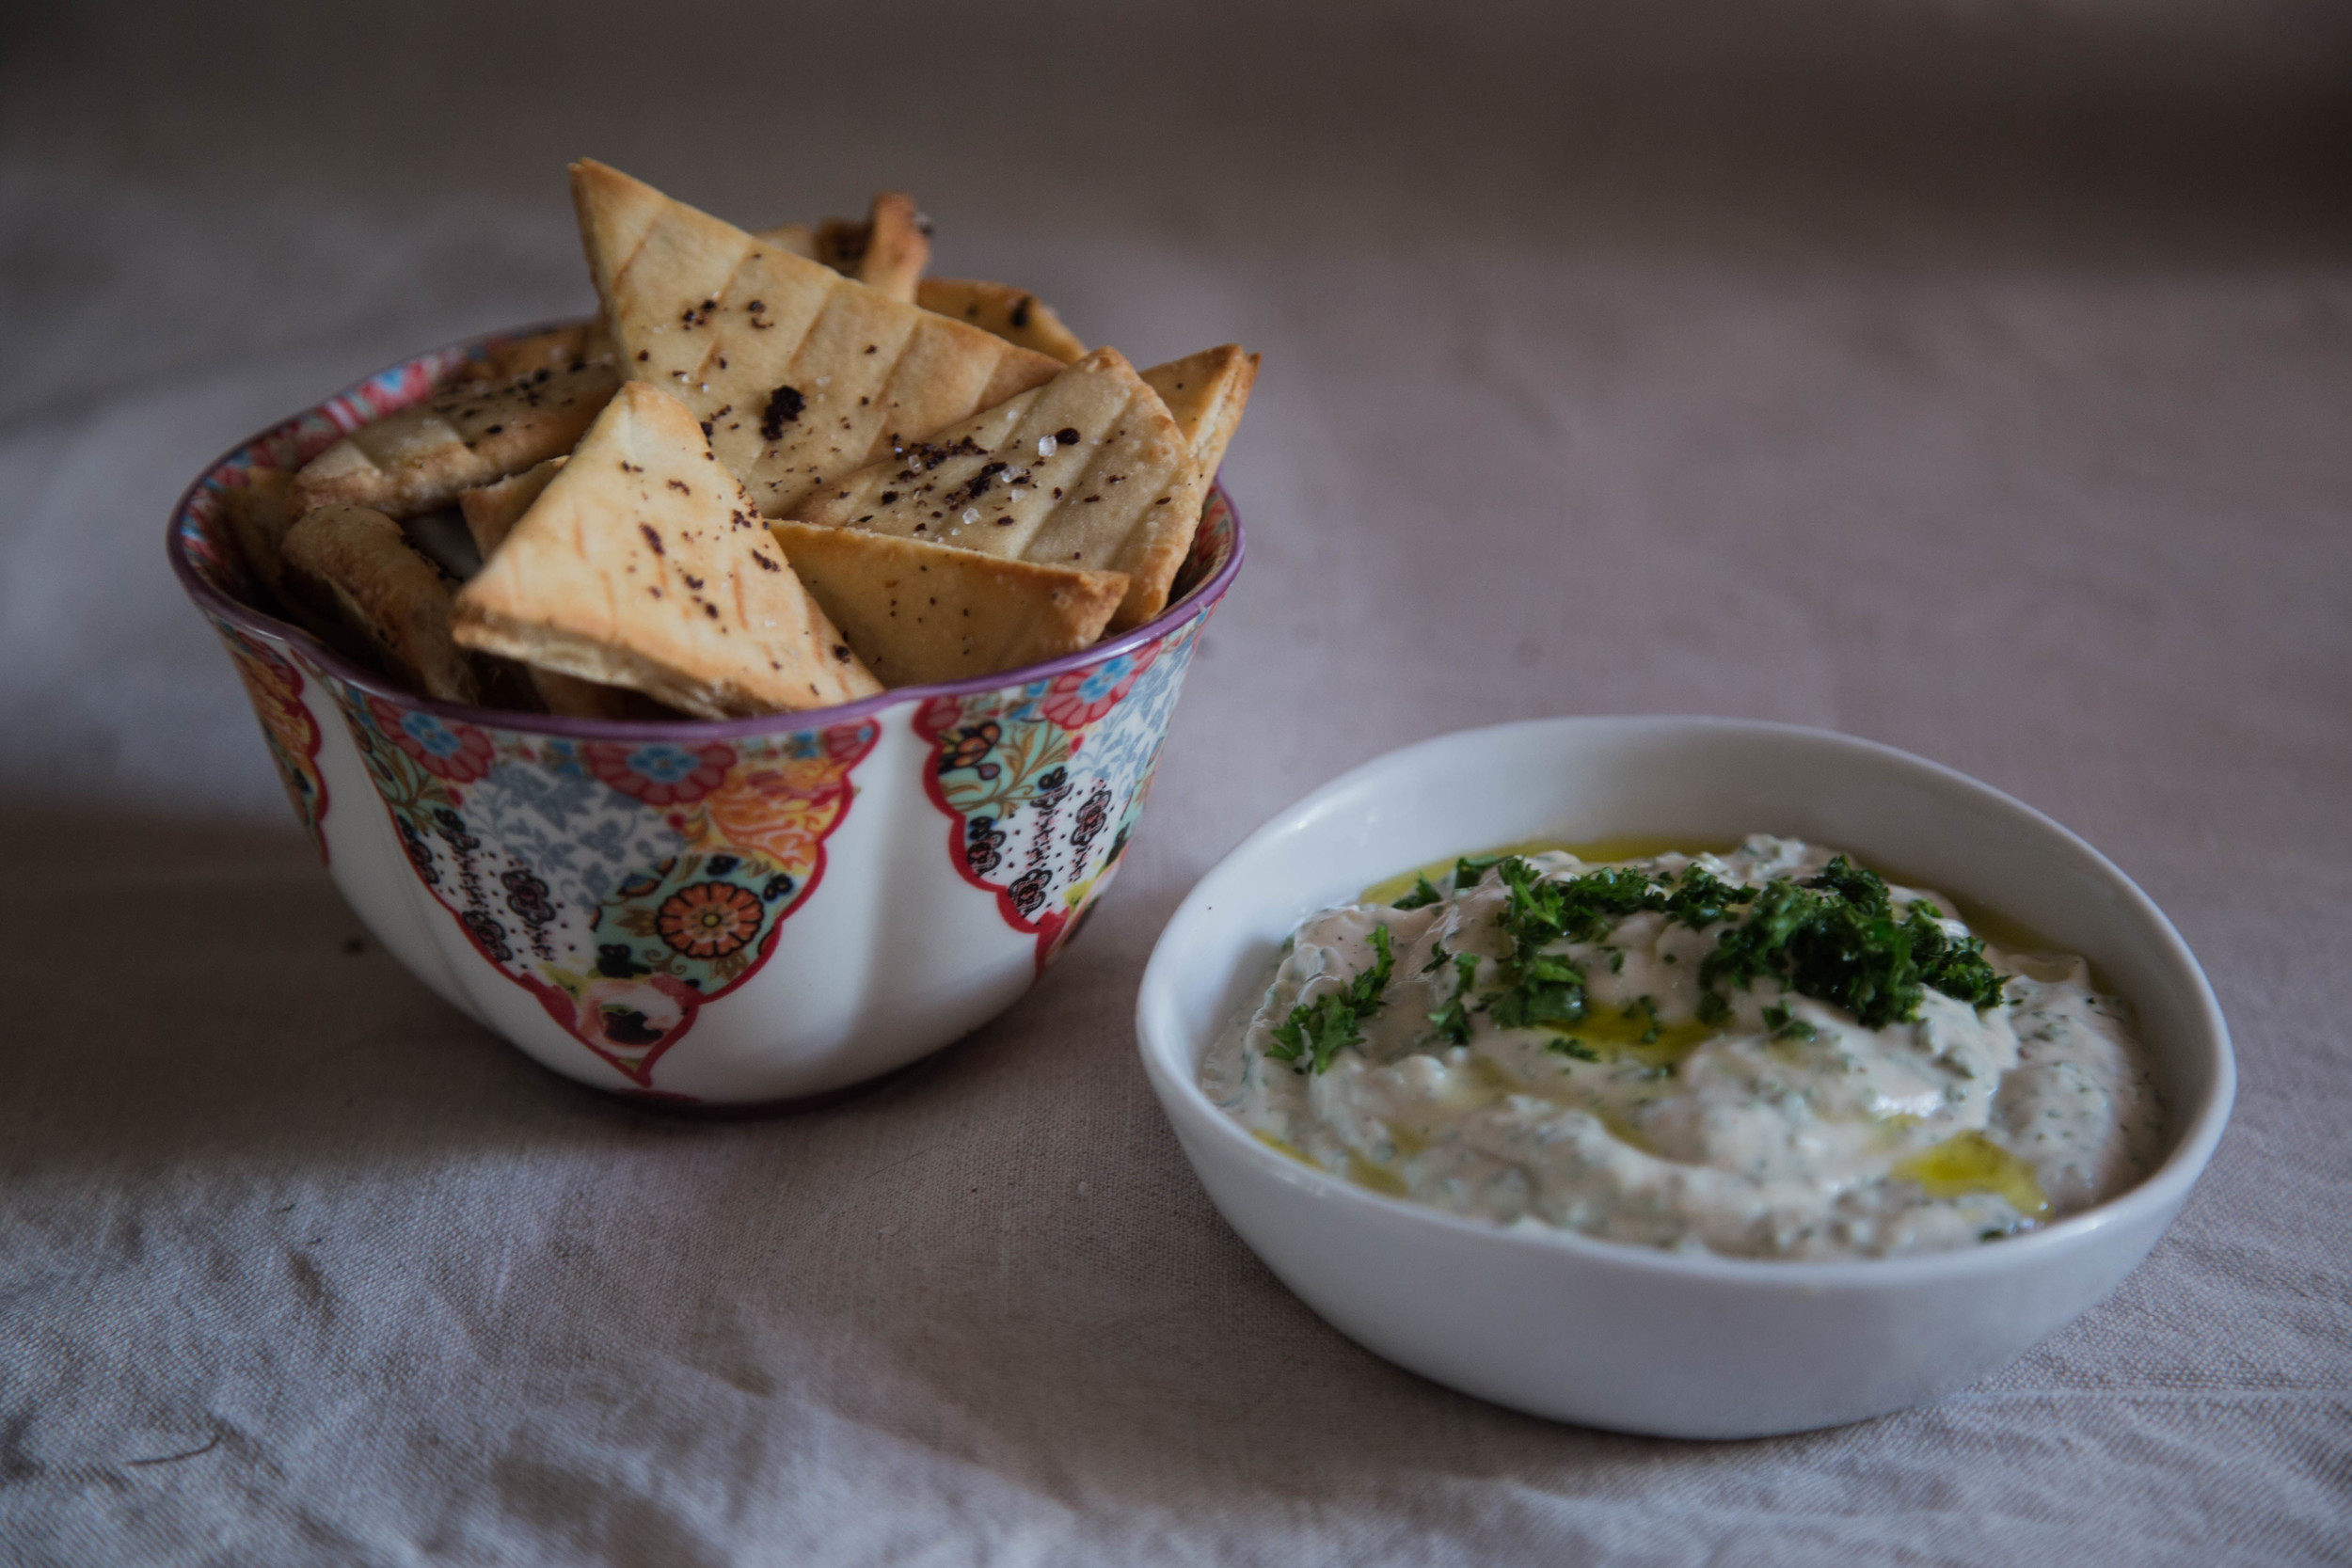
There are many subtle differences between the UK and the US (such as the definition of "biscuit" or the pronunciation of "h" in herbs) but perhaps a less commonly known discrepancy is the the taste of store bought hummus. For whatever reason, hummus from US stores tastes completely different to hummus from UK stores and I just can't stomach it. Sorry, but US hummus is disgusting and no one should be eating it. Really, stop eating it.
Anyway, since I can't live without hummus, I quickly learnt to make my own and now do so pretty much every weekend. However, sometimes I go out on Saturday and I forget to soak my chickpeas and I can't be bothered to wait two hours for them to cook and I just want to sit on the couch watching Gilmore Girls for 6 hours.... So I needed a way to satisfy my hummus craving even when I'm feeling supremely lazy.
So this is my lazy girl hummus for lazy weekends and week nights. It's super quick and super delicious. I use sheep yogurt because I find it has the right flavor (very tart) and consistency (lighter than greek yogurt, thicker than plain yogurt). If you have access to a Whole Foods or a ewe, you're all set for sheep yogurt. Otherwise, just use whatever you have on hand.
Stuff for "Hummus"
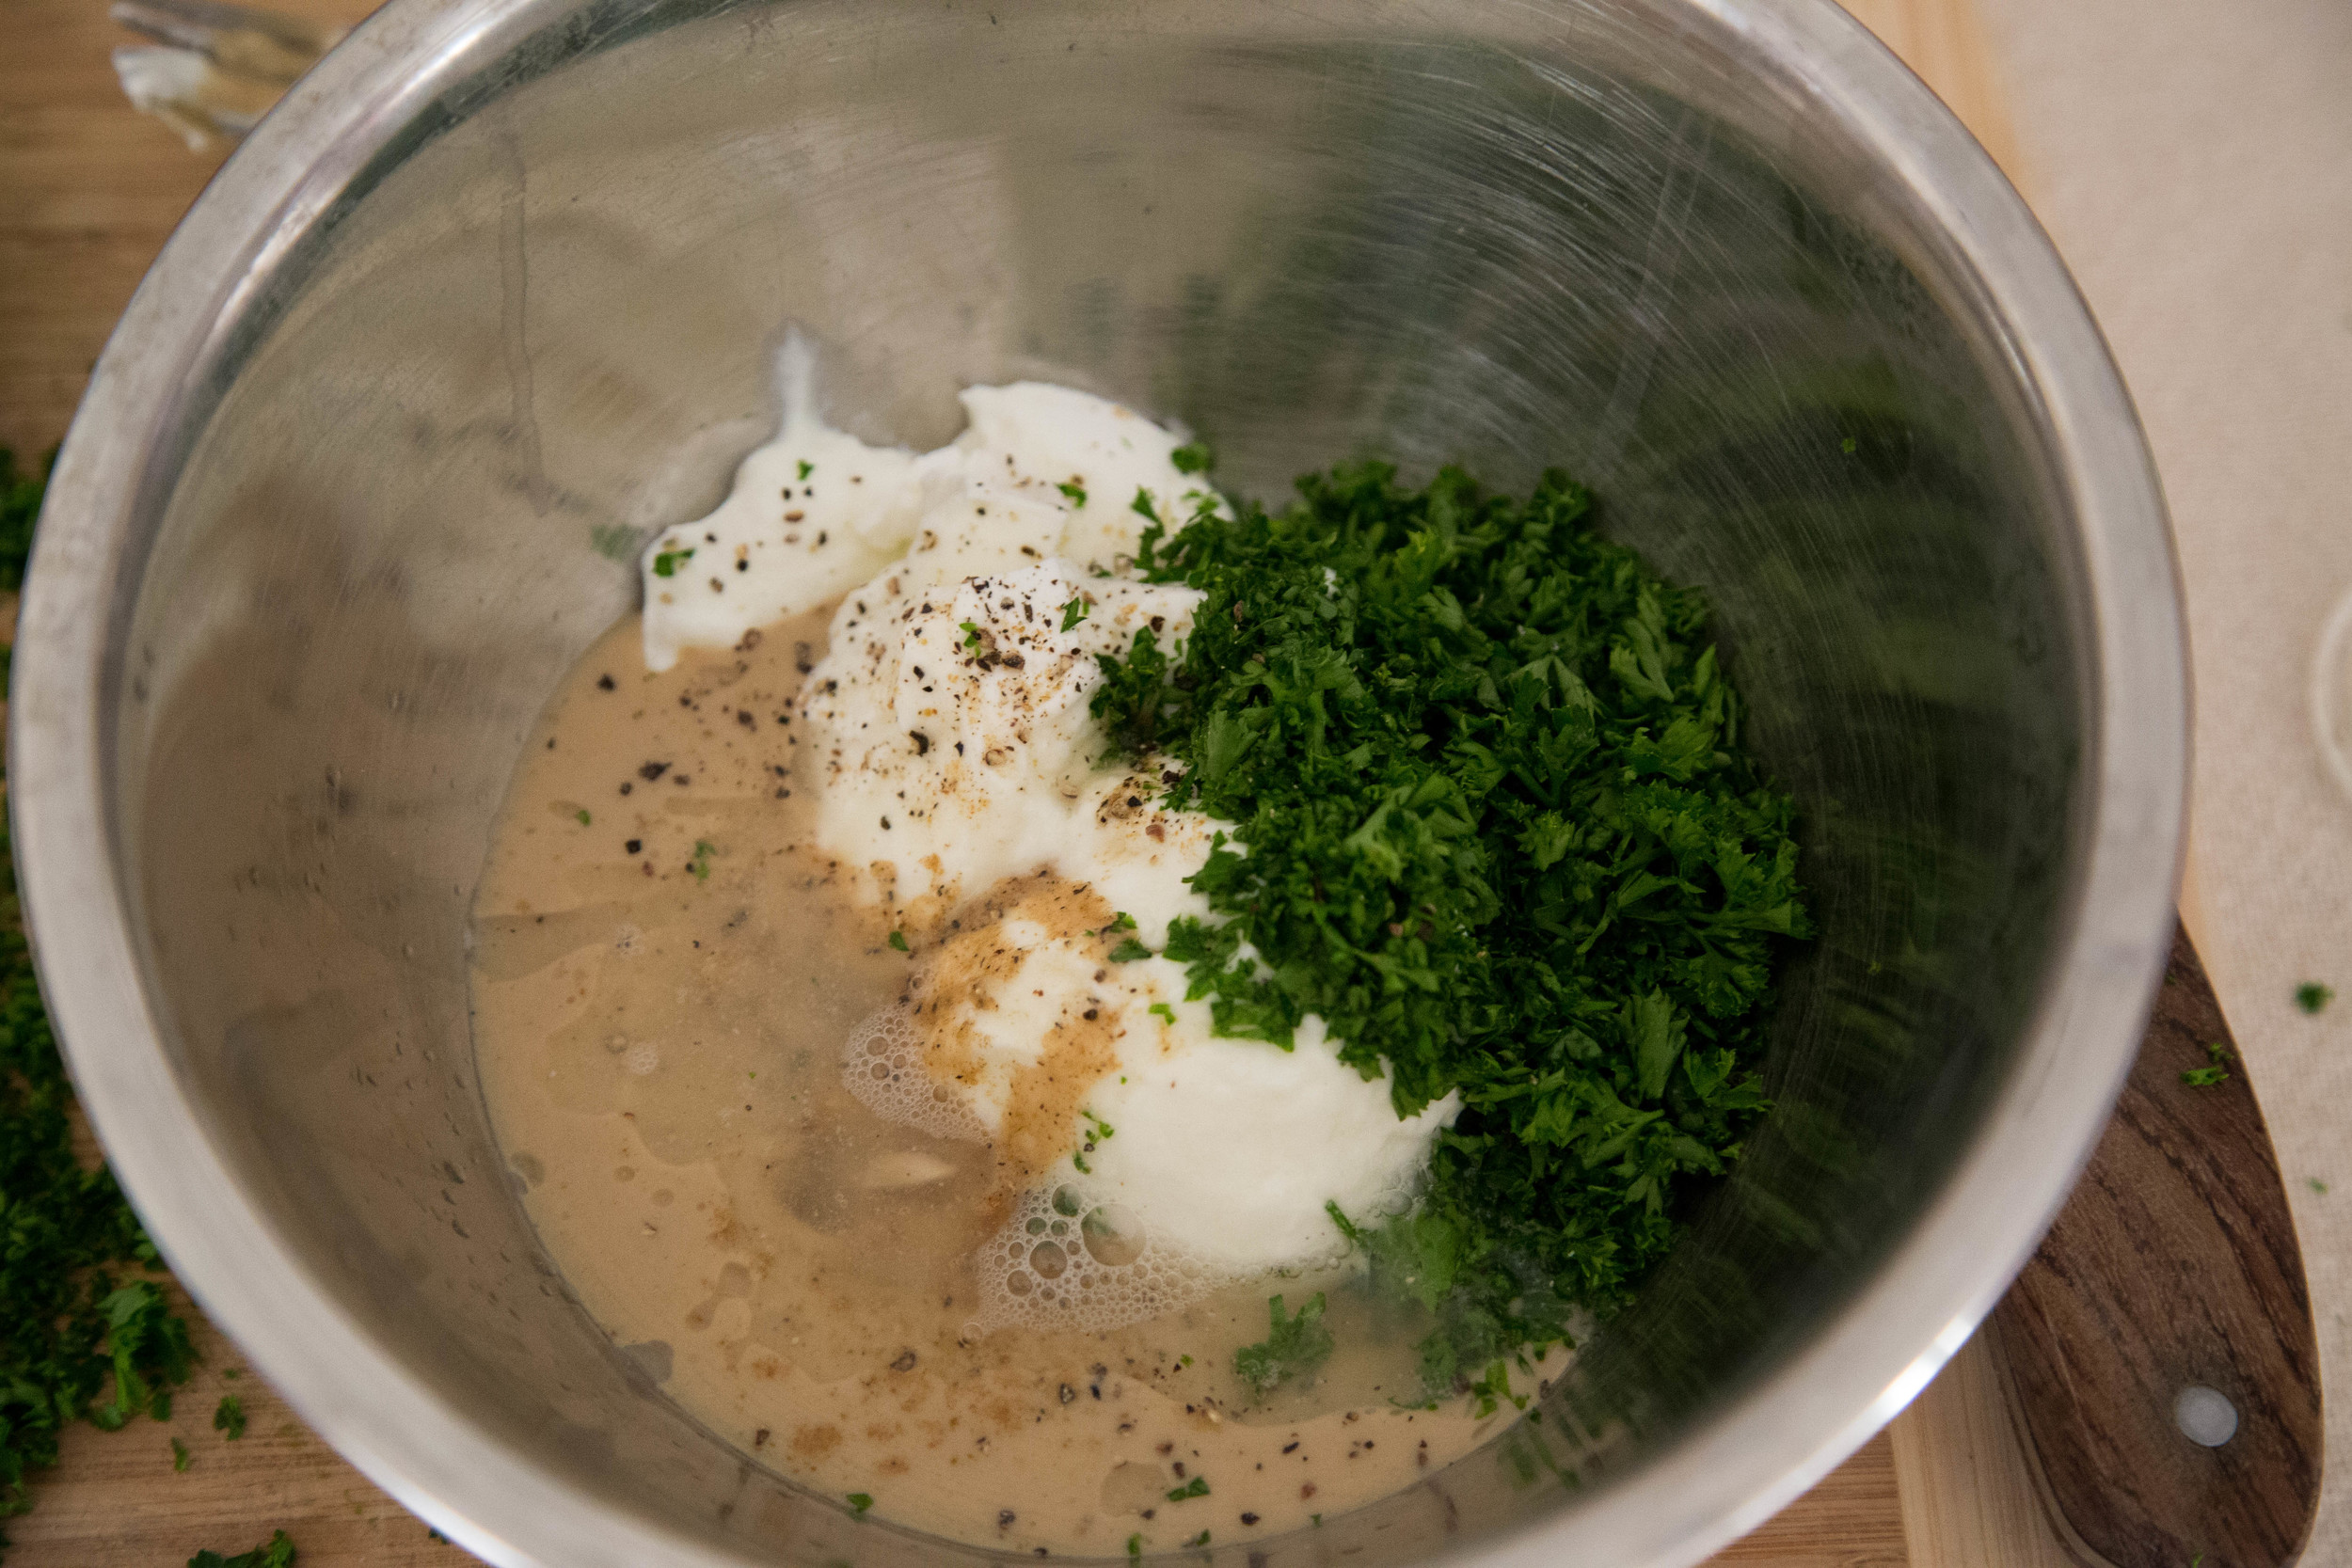
1/2 cup plain sheep yogurt
1/2 cup tahini
1/2 a lemon
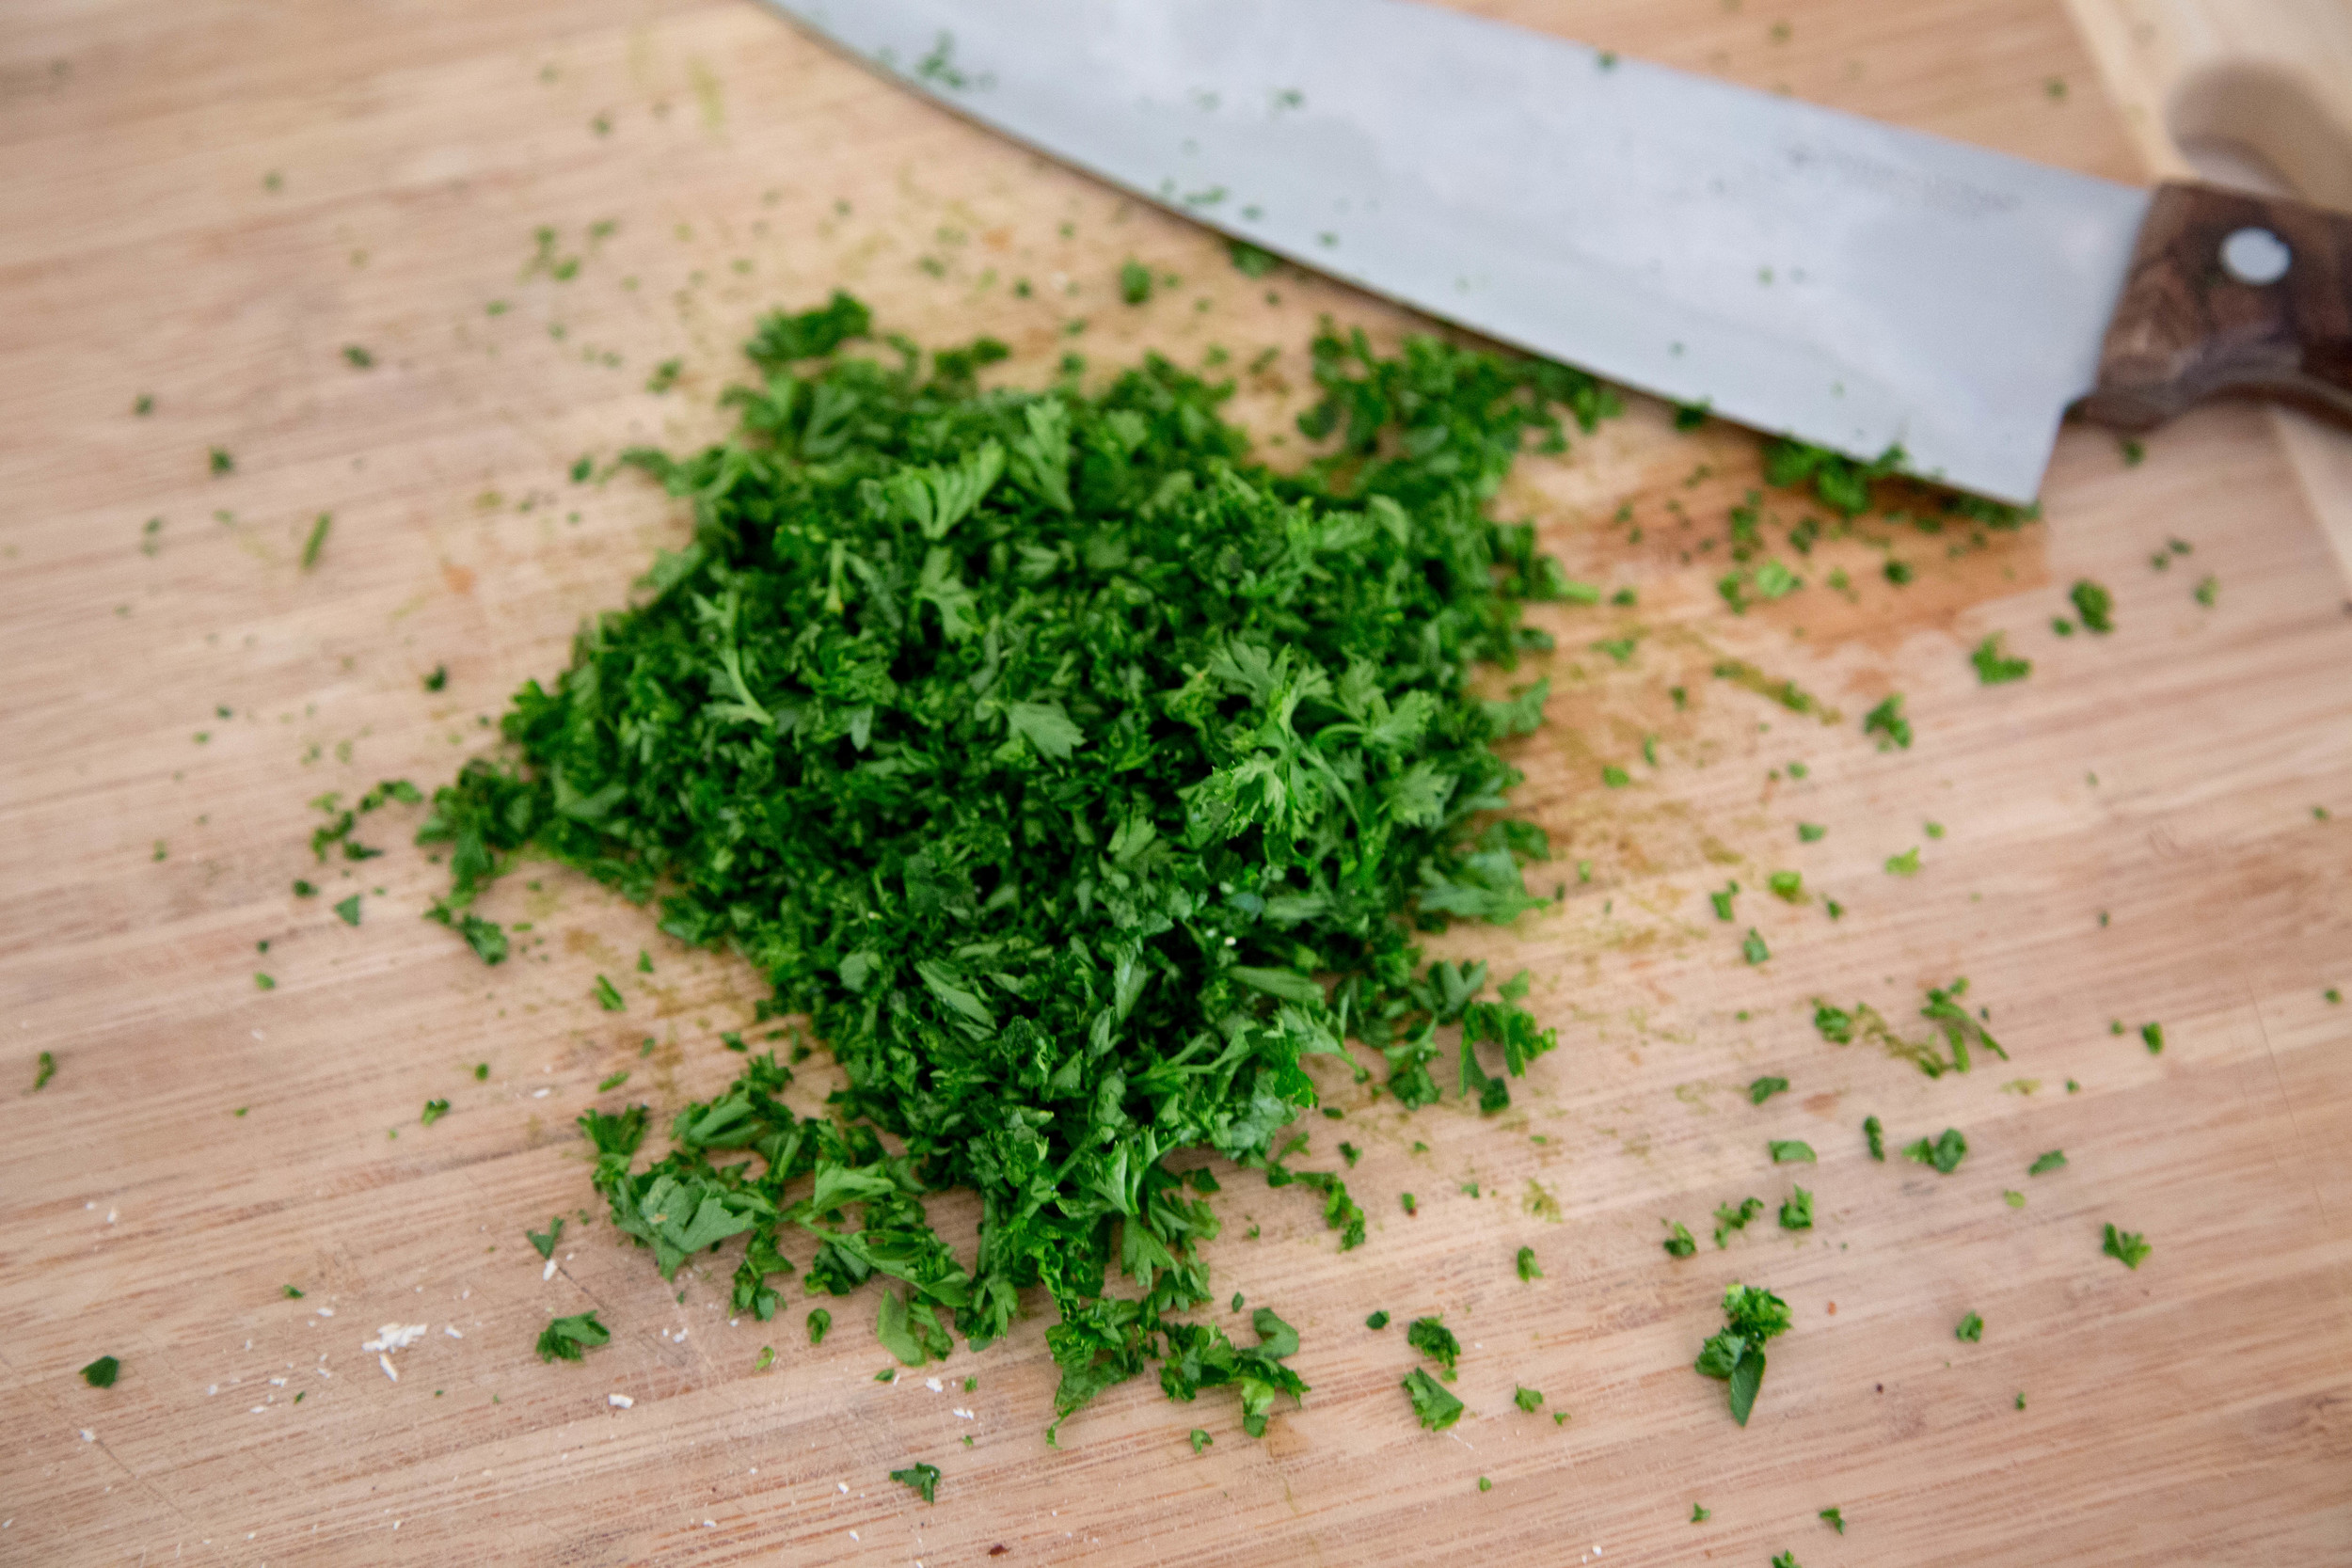
handful of parsley
pinch of cumin
pepper
olive oil
Steps for "Hummus"
Chop the parsley and juice the lemon. In a bowl mix together yogurt, tahini, lemon juice, parsley, cumin, and pepper. Taste and adjust flavors to your taste. Drizzle with olive oil to serve.
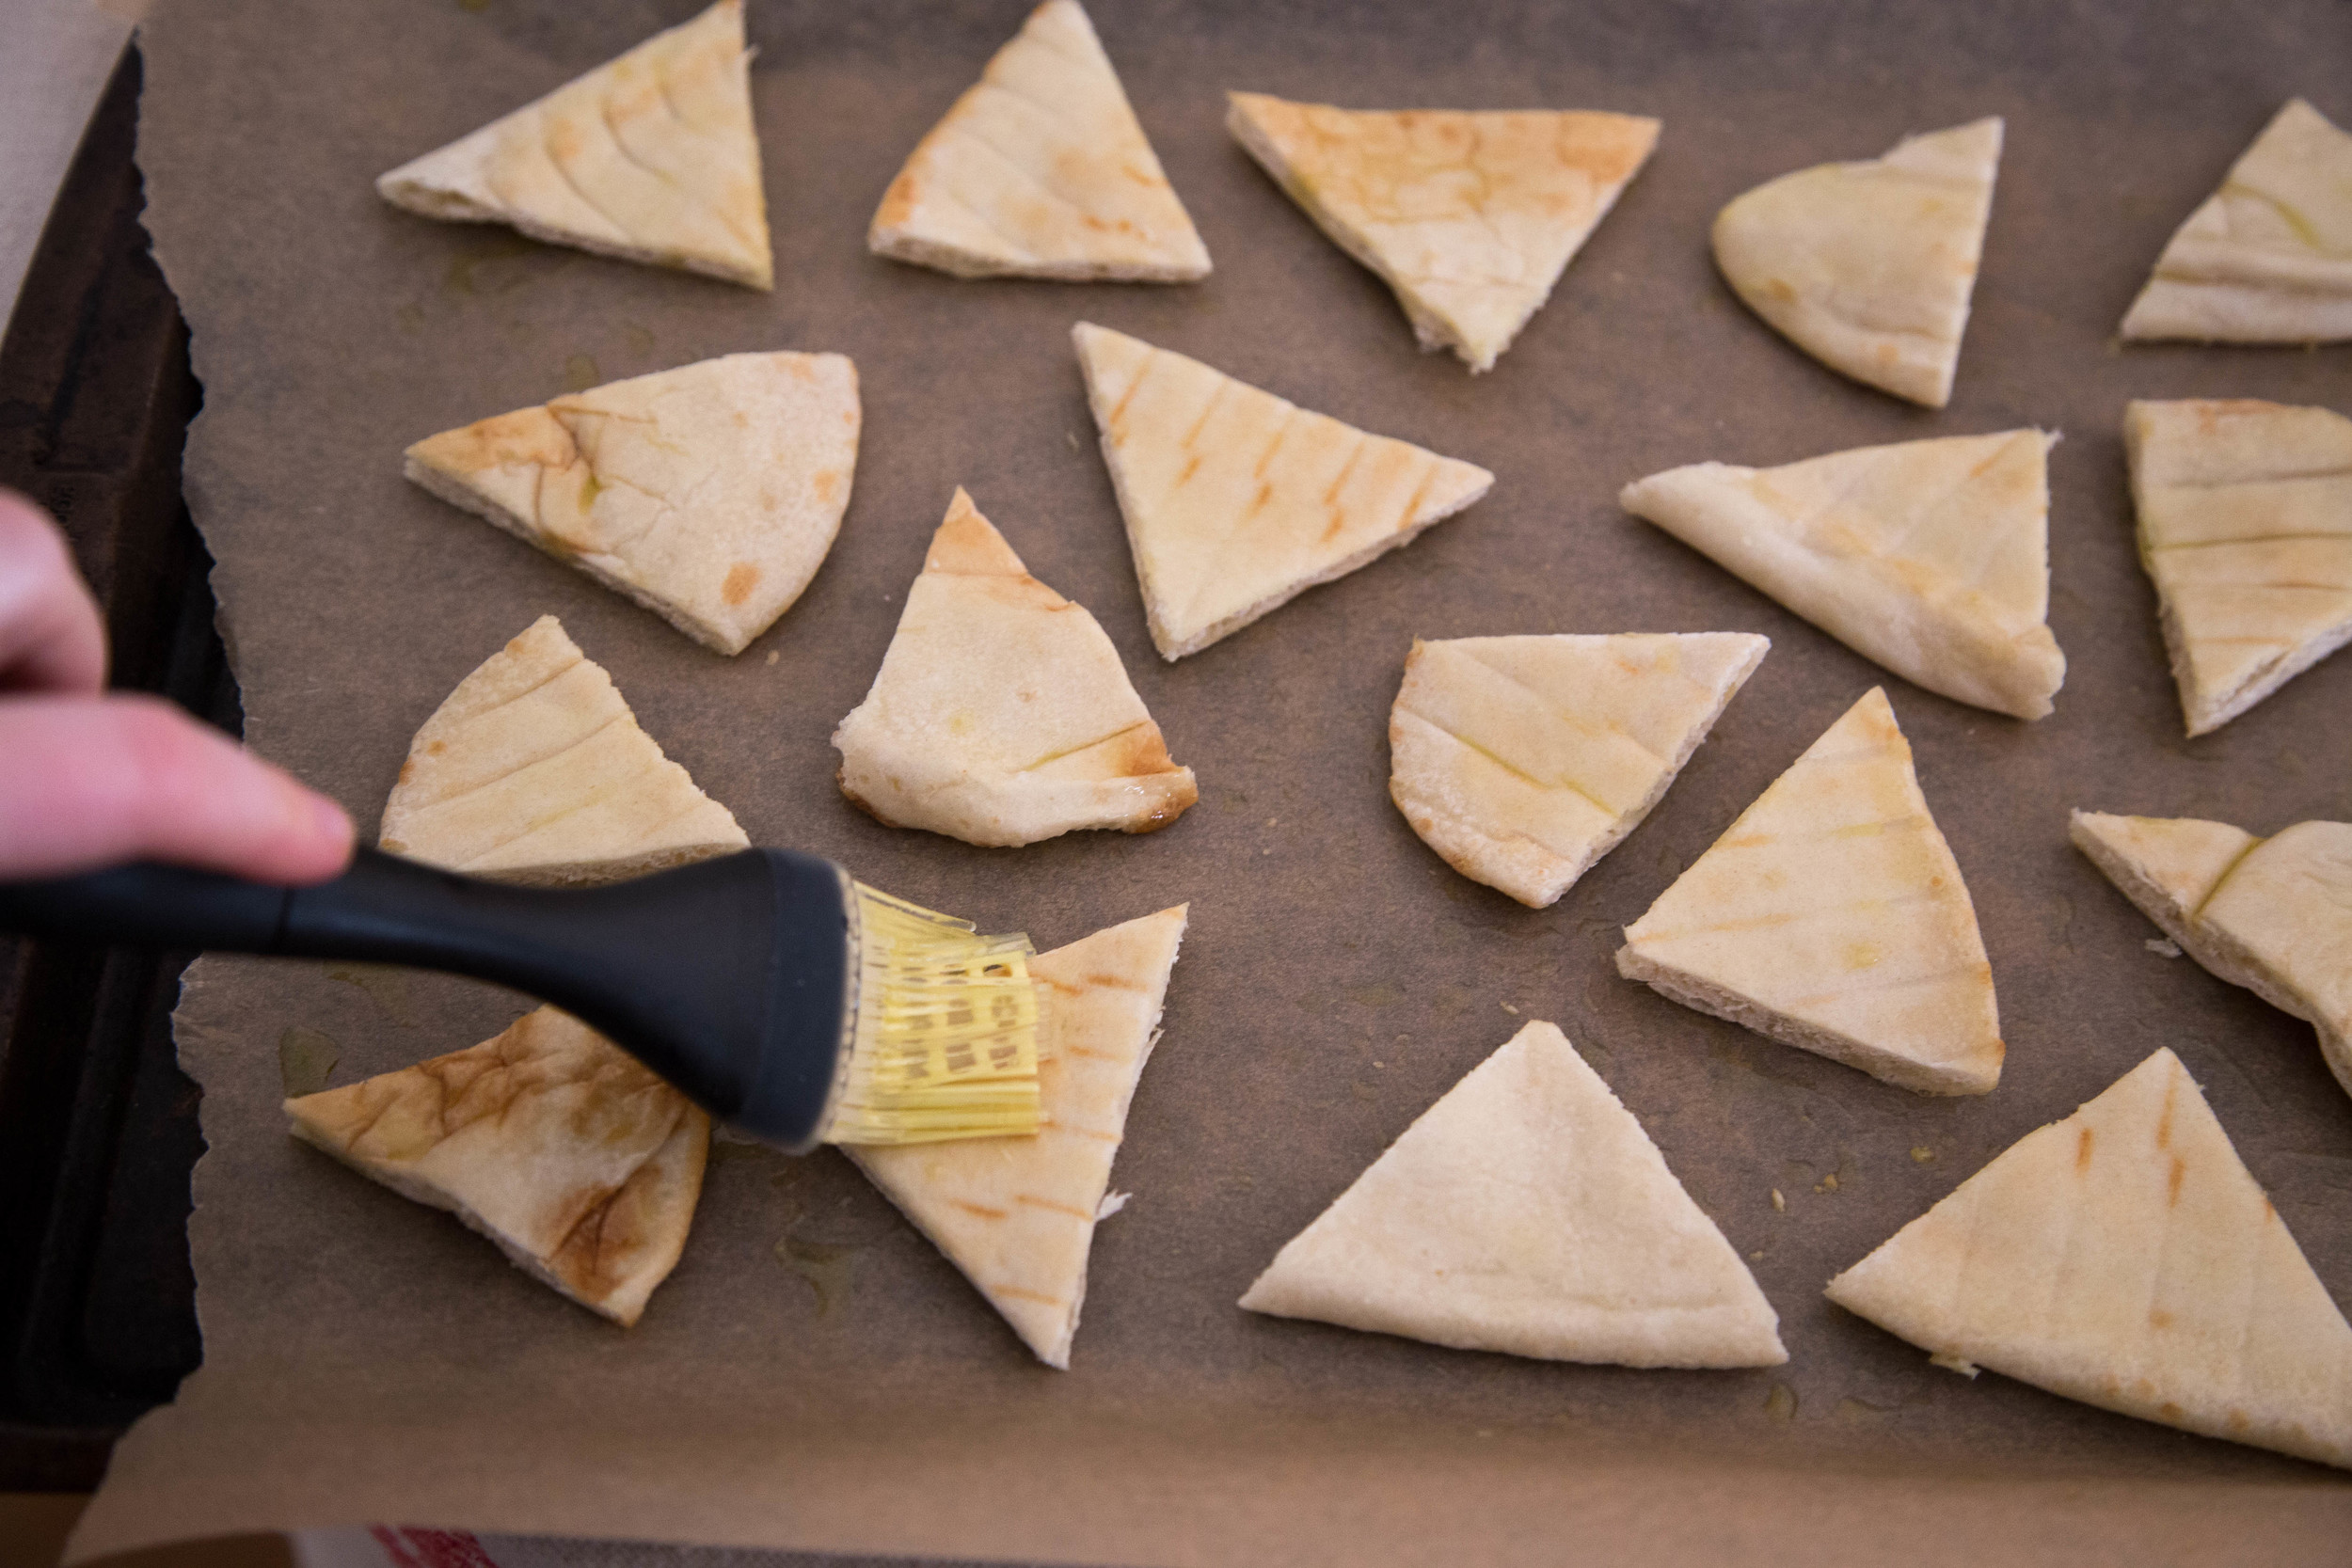
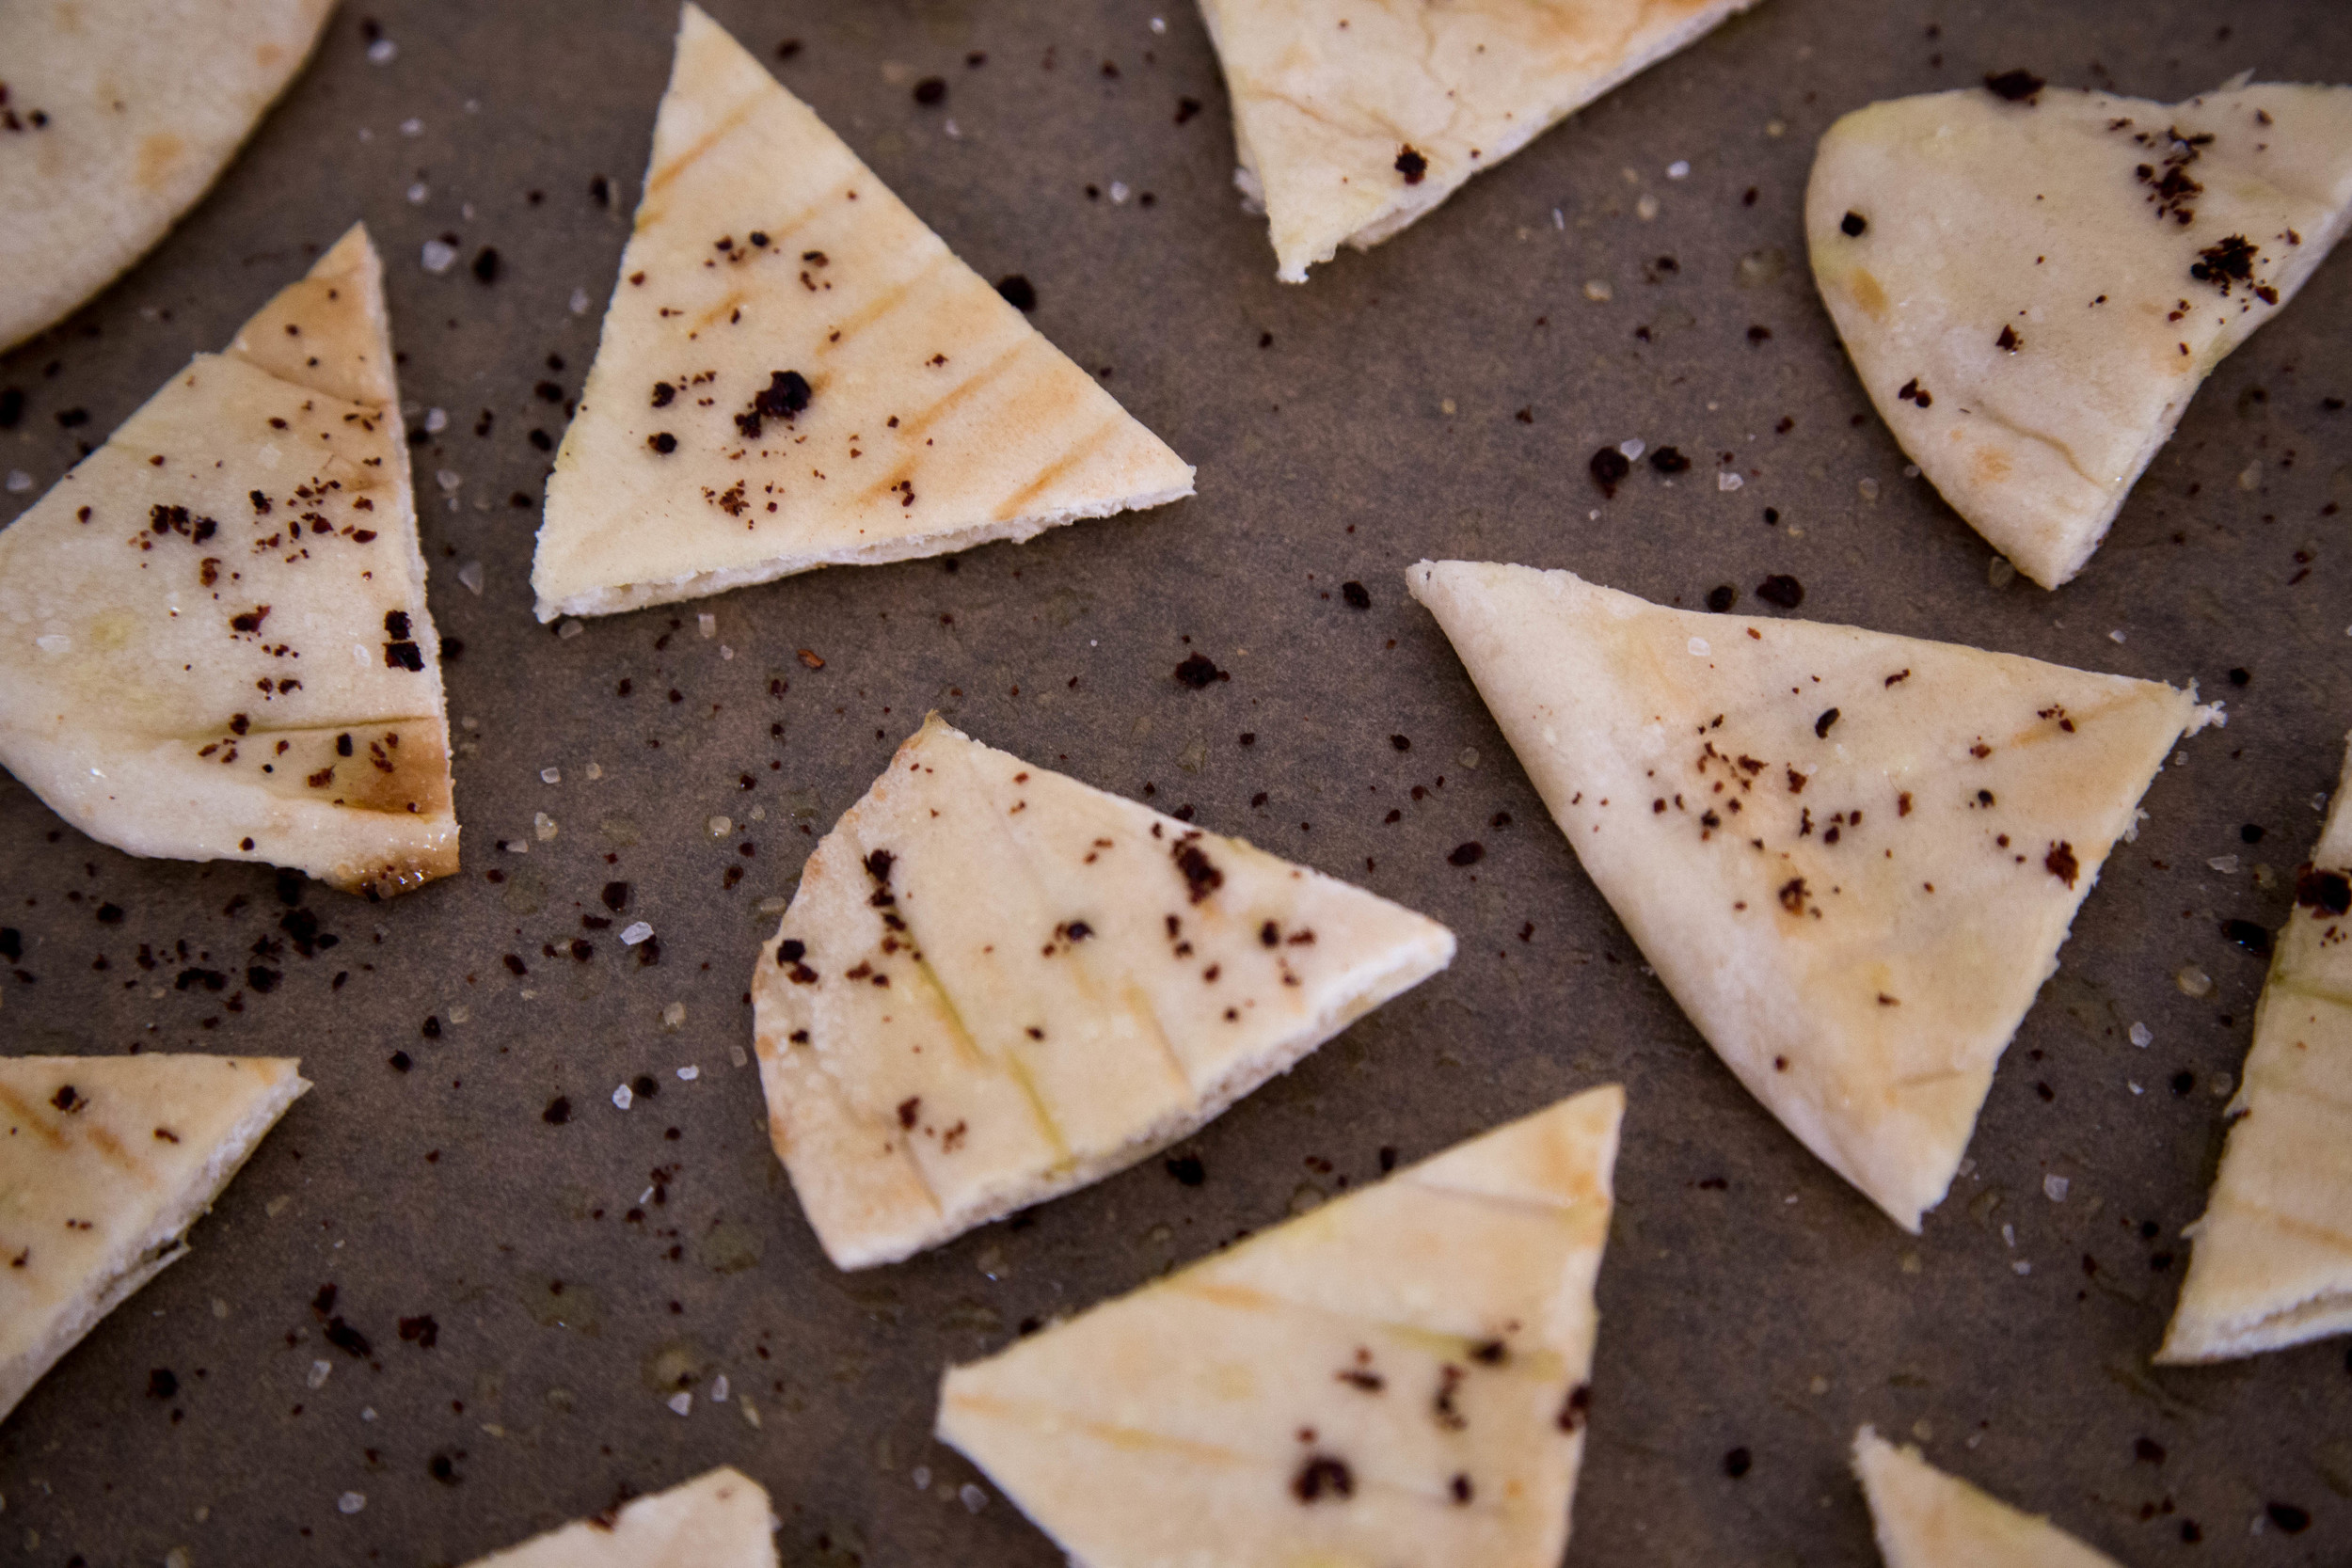
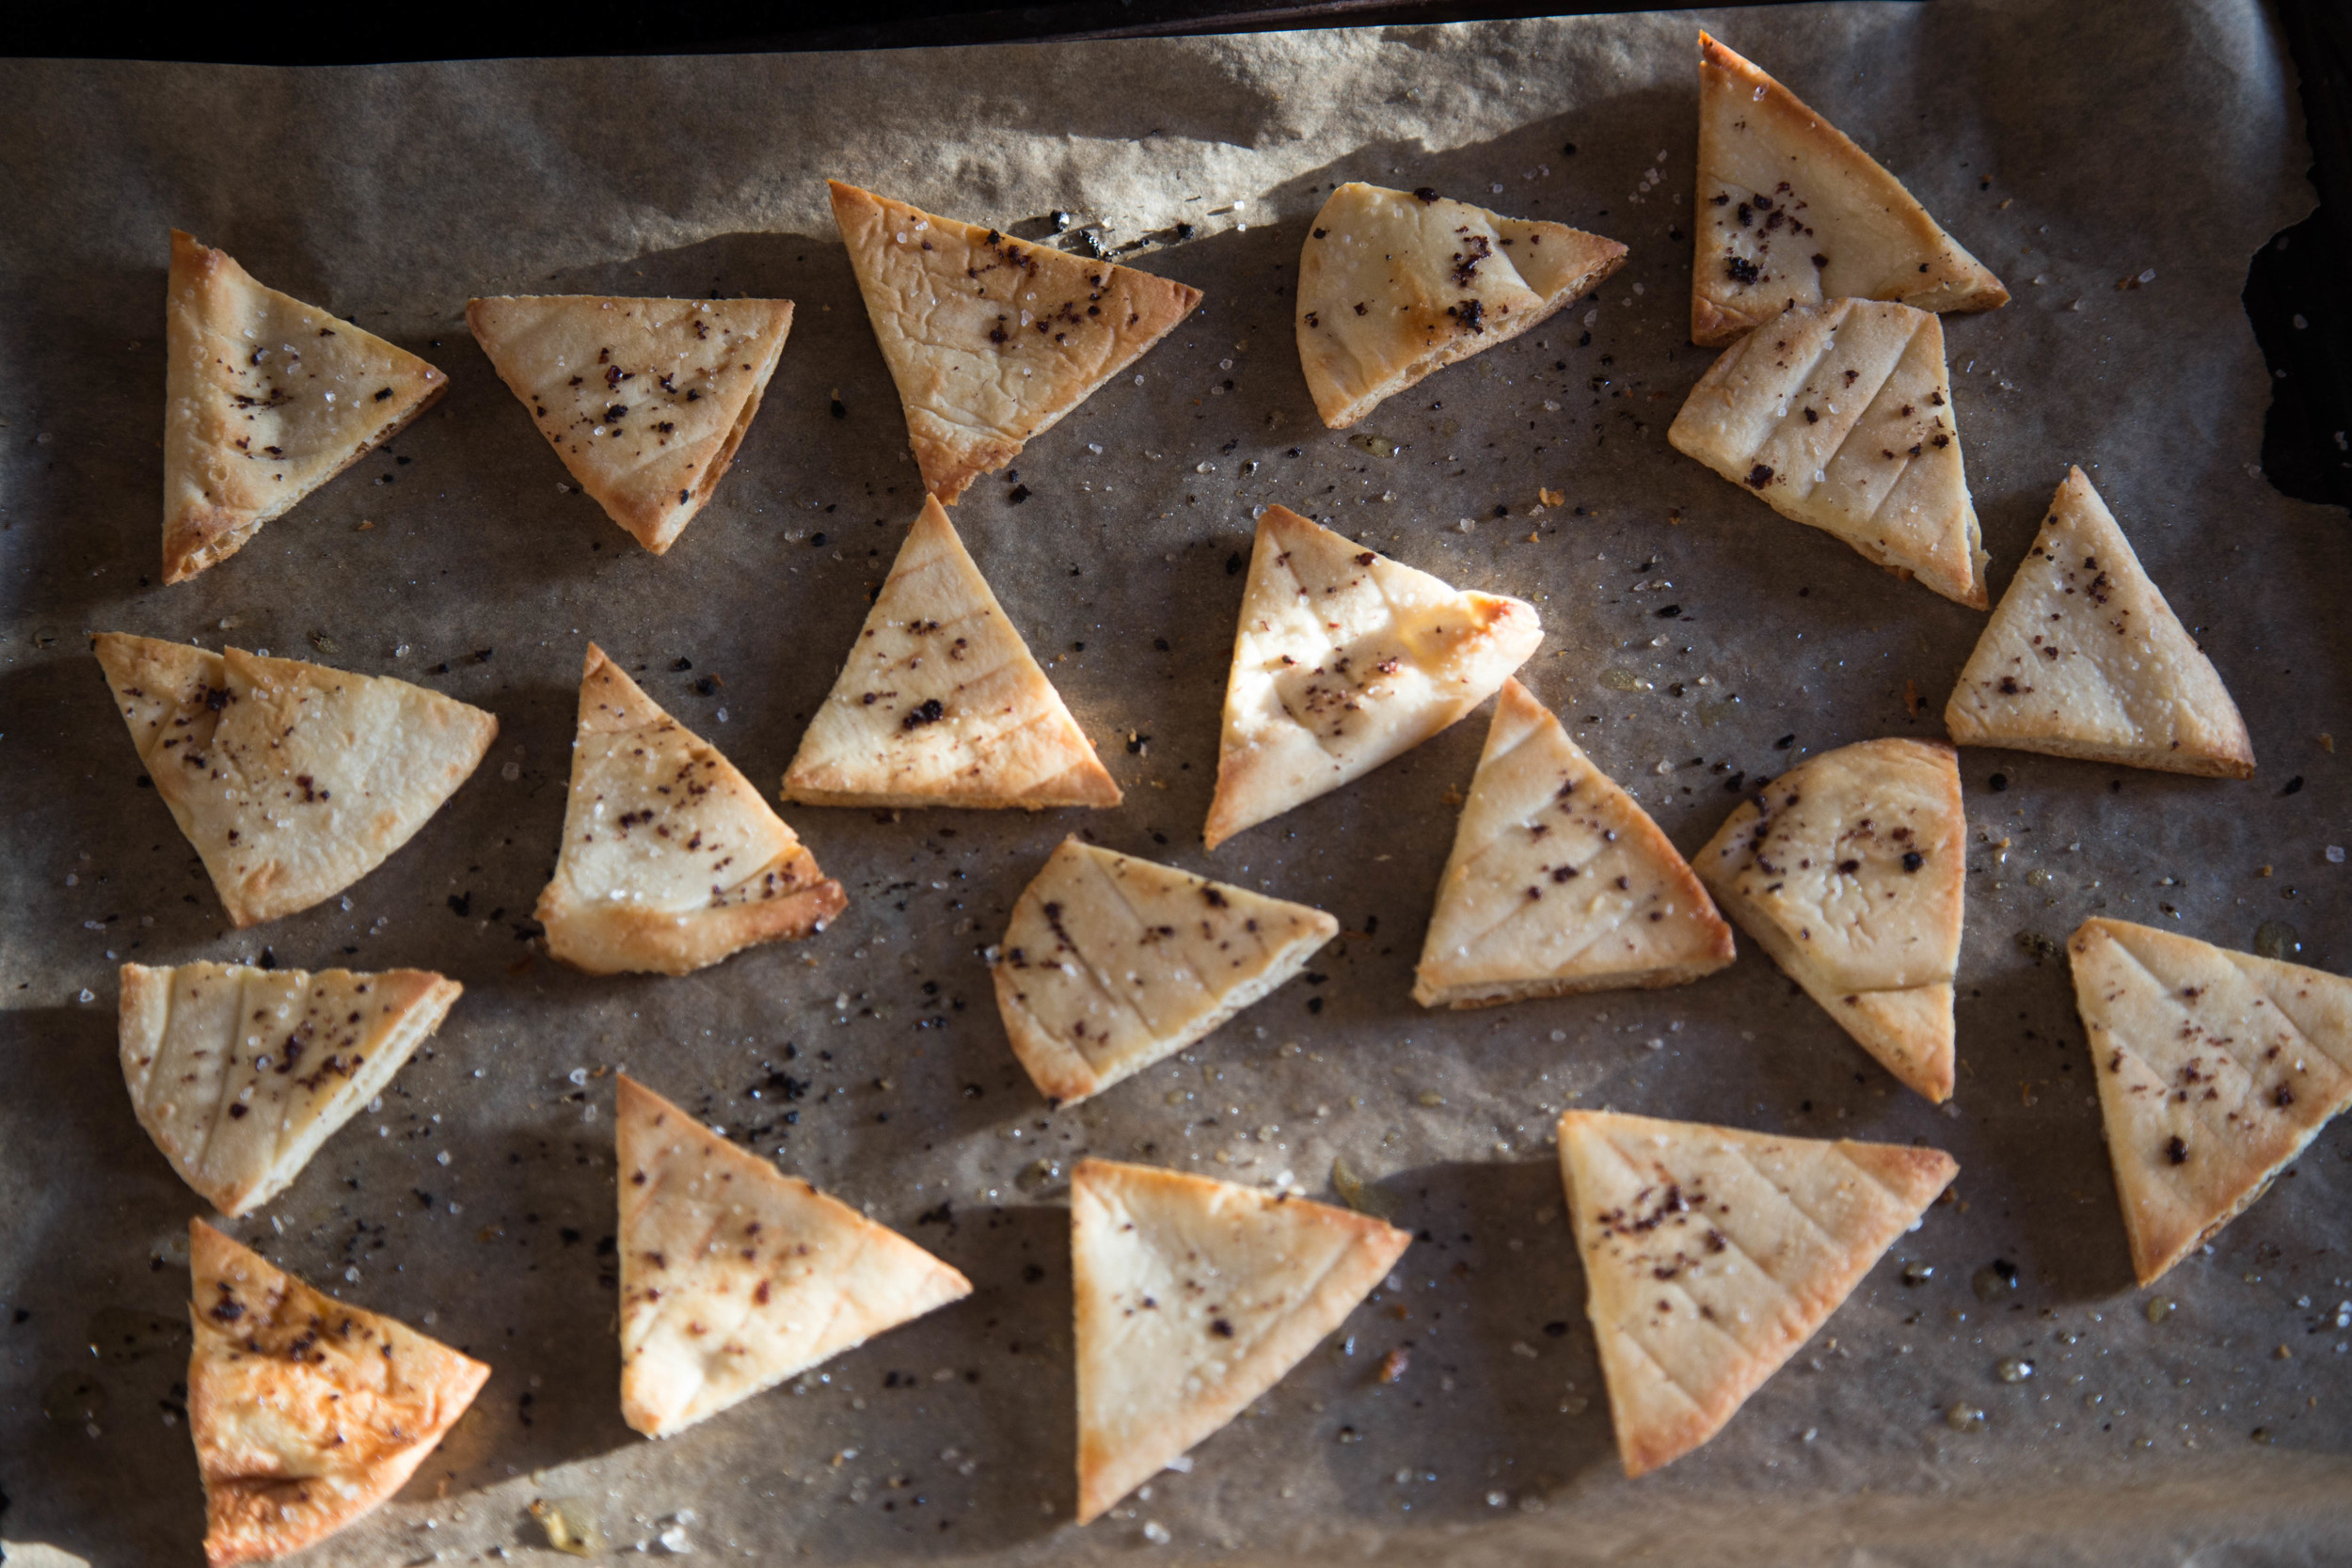
Stuff for Pita Chips
2 pitas
olive oil
sumac
salt and pepper
Steps for Pita Chips
Pre-heat oven to 400F. Cut pita into triangles. Brush with olive oil and sprinkle with sumac, salt, and pepper. Bake for 20 minutes or until golden brown and crispy.